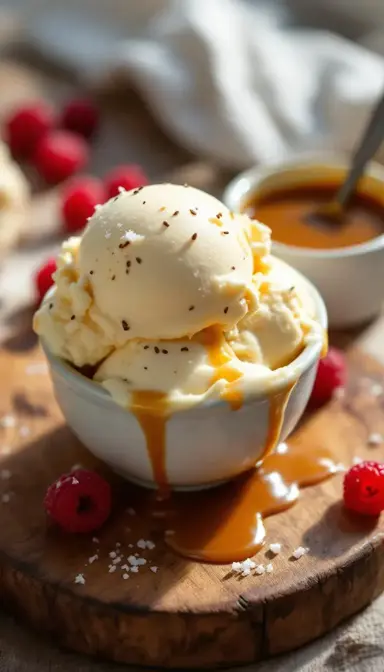
There’s something magical about the simplicity of vanilla bean ice cream. It’s the kind of dessert that feels like a warm hug—comforting, familiar, and utterly irresistible. While store-bought versions can be convenient, nothing compares to the veletly richness of homemade. When you make it yourself, you get to experience the full symphony of flavors from real vanilla beans, their tiny black specks promising an aromatic depth that artificial extracts just can’t match.
This recipe is my go-to for special occasions (or let’s be honest, any Tuesday night when I need a little indulgence). It’s a custard-based ice cream, meaning egg yolks are the secret to that luscious, melt-in-your-mouth texture. And yes, you’ll need an ice cream maker, but trust me—once you taste the results, you’ll wonder why you ever settled for anything less.
Why This Recipe Works
- Real vanilla beans—No shortcuts here. The tiny seeds infuse every bite with pure, floral sweetness.
- Custard base—Egg yolks create a silky, luxurious texture that’s miles ahead of simple cream-and-sugar mixes.
- Patience pays off—Chilling the base overnight isn’t just a suggestion; it’s the key to avoiding icy, grainy ice cream.
Essential Ingredients & Tools
Ingredients
- 2 cups heavy cream – This is the backbone of richness. Half-and-half can work, but it won’t be as decadent.
- 1 cup whole milk – Skim milk is a no-go here. We need that fat for creaminess.
- ¾ cup granulated sugar – Just enough to sweeten without overpowering the vanilla.
- 6 large egg yolks – The magic thickener. They give the ice cream that custardy depth.
- 1 vanilla bean – Split and scraped, releasing those intoxicating little seeds. (Substitute: 1 tbsp pure vanilla extract if necessary.)
- ¼ tsp fine sea salt – A pinch to balance the sweetness and elevate the vanilla.
Tools
- Medium saucepan – For gently heating the custard without scorching.
- Whisk & silicone spatula – To keep everything smooth and lump-free.
- Fine-mesh sieve – Because nobody wants scrambled eggs in their ice cream.
- Ice cream maker – Non-negotiable for that perfect, airy texture. (No ice cream maker? Try the “bag method” with ice and rock salt, though texture may vary.)
- Airtight container – To keep your masterpiece fresh and free of freezer burn.
Serves: 6 | Prep: 20 min | Cook: 10 min | Total Time (including chilling): 4+ hours
How to Make Homemade Vanilla Bean Ice Cream
- Prepare the Vanilla Bean – Split the 1 vanilla bean lengthwise with a sharp knife, then use the dull side to scrape out the sticky seeds. (Pro tip: Save the empty pod to infuse sugar or make vanilla extract later.)
- Heat the Base – In a saucepan, combine the 2 cups heavy cream, 1 cup whole milk, ½ of the ¾ cup granulated sugar, vanilla seeds, and the scraped pod. Heat over medium-low until steaming (about 175°F/80°C), stirring to dissolve the sugar. Never boil—this can scorch the dairy and create graininess.
- Temper the Eggs – Whisk 6 large egg yolks with the remaining ½ of the ¾ cup granulated sugar until pale. Slowly drizzle in 1 cup of the hot cream mixture while whisking vigorously. This gradual heating prevents curdling. Pour the tempered yolks back into the saucepan.
- Cook the Custard – Return to low heat and stir constantly with a spatula until the mixture reaches 180°F (82°C) or coats the back of a spoon (“nappé” stage). This ensures proper thickening.
- Strain & Chill – Strain through a fine-mesh sieve into a clean bowl. Discard the vanilla pod. Cover the surface with plastic wrap (to prevent a skin) and chill for at least 4 hours (overnight is ideal).
- Churn – Pour the chilled base into your ice cream maker and churn for 20–25 minutes, until it reaches soft-serve consistency. Over-churning makes it too firm.
- Freeze – Transfer to an airtight container, press parchment paper onto the surface, and freeze for 2+ hours. Let sit at room temperature for 5 minutes before scooping.
Pro Technique
Tempering Like a Pro
The key to silky custard is slow and steady. Adding hot liquid to eggs too quickly causes curdling. Whisk constantly, and if lumps form, strain immediately. A thermometer helps—heat the cream to 175°F (80°C) before tempering, and cook the custard to 180°F (82°C).
The Chill Factor
Chilling the base overnight hydrates proteins and stabilizers, yielding a denser, creamier texture. For faster chilling, place the bowl over an ice bath and stir occasionally.
Chef’s Wisdom
Choosing Your Vanilla
Madagascar Bourbon vanilla beans are the gold standard—floral, sweet, and slightly caramel-like. For deeper flavor, toast the scraped pod in a dry pan for 30 seconds before steeping. If using extract, add it after cooking to preserve aroma.
The Perfect Churn
Stop churning when the ice cream clings to the paddle but still droops slightly. Over-churning adds too much air. For a softer freeze, stir in 1 tbsp vodka—it lowers the freezing point without affecting taste.
Storage & Freshness Guide
Short-Term Storage
Store in an airtight container with parchment pressed directly on the surface. Keeps for 2 weeks, but flavors peak within 5 days. Freeze at 0°F (-18°C) or colder for best texture.
Long-Term Solutions
To prevent ice crystals, vacuum-seal the container or place it in a zip-top bag with all air pressed out. Add a layer of wax paper on top before sealing.
Reviving Hardened Ice Cream
If frozen solid, let it sit in the fridge for 15 minutes or microwave in 10-second bursts. Avoid refreezing more than once.
Nutrition Profile
A ½-cup serving is pure indulgence:
- Calories: 290
- Fat: 21g
- Protein: 4g
- Carbs: 22g
- Fiber: 0g
Ingredient Variations and Their Impact
Dairy-Free Dream
- full-fat coconut milk (1:1 ratio). Add 1 tsp guar gum for stability.
Honeyed Vanilla
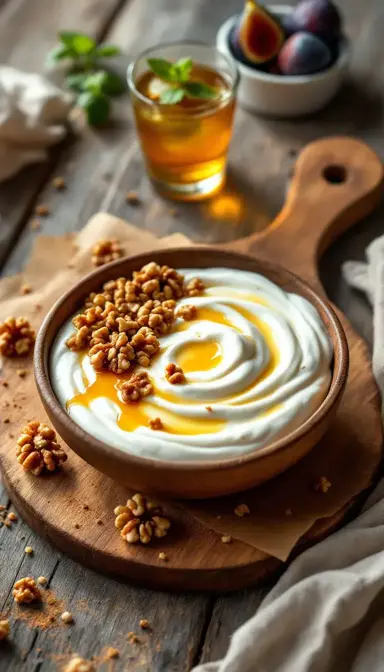
- Replace ½ cup sugar with honey for a softer texture and floral notes. Infuse the honey with lavender for complexity.
Egg-Free Version
- Omit yolks and use 2 tbsp cornstarch mixed with cold milk as a thickener. Light but still creamy.
Boozy Bourbon Vanilla
- Stir in 2 tbsp bourbon after chilling. Alcohol prevents over-hardening.
Malted Vanilla Crunch
- Swap ¼ cup sugar for malted milk powder, then fold in crushed malt balls after churning.
Perfect Pairings
Complementary Dishes
- Warm Apple Pie – The contrast of hot, spiced fruit against cold, creamy ice cream is timeless. Vanilla’s floral notes highlight the pie’s cinnamon.
- Flourless Chocolate Cake – Vanilla’s sweetness cuts through the cake’s intensity, while the creamy texture mirrors its density.
Drinks
- Sauternes – This honeyed dessert wine mirrors vanilla’s sweetness while adding apricot notes.
- Cold Brew Coffee – Pour it over for an instant Affogato—bitterness balances the richness.
Something Sweet
- Salted Caramel Sauce – The salt enhances vanilla’s depth, while caramel adds chewiness.
- Fresh Raspberries – Their tartness cleanses the palate between creamy bites.

Homemade Vanilla Bean Ice Cream: The Ultimate Comfort in Every Scoop
Make the creamiest homemade Vanilla Bean Ice Cream with real vanilla beans and a custard base. Perfect for desserts and special treats. Get the recipe now!
Ingredients
Main
-
2 cups heavy cream
-
1 cup whole milk
-
¾ cup granulated sugar
-
6 large egg yolks
-
1 vanilla bean (or 1 tbsp pure vanilla extract)
-
¼ tsp fine sea salt
Instructions
-
Split and scrape the 1 vanilla bean.01
-
Heat 2 cups heavy cream, 1 cup whole milk, ½ of the ¾ cup granulated sugar, vanilla seeds, and pod until steaming (175°F).02
-
Whisk 6 large egg yolks with remaining ½ of the ¾ cup granulated sugar, then temper with 1 cup of the hot cream mixture.03
-
Cook custard to 180°F, stirring constantly.04
-
Strain, chill for 4+ hours, then churn in an ice cream maker.05
-
Freeze for 2+ hours before serving.06


