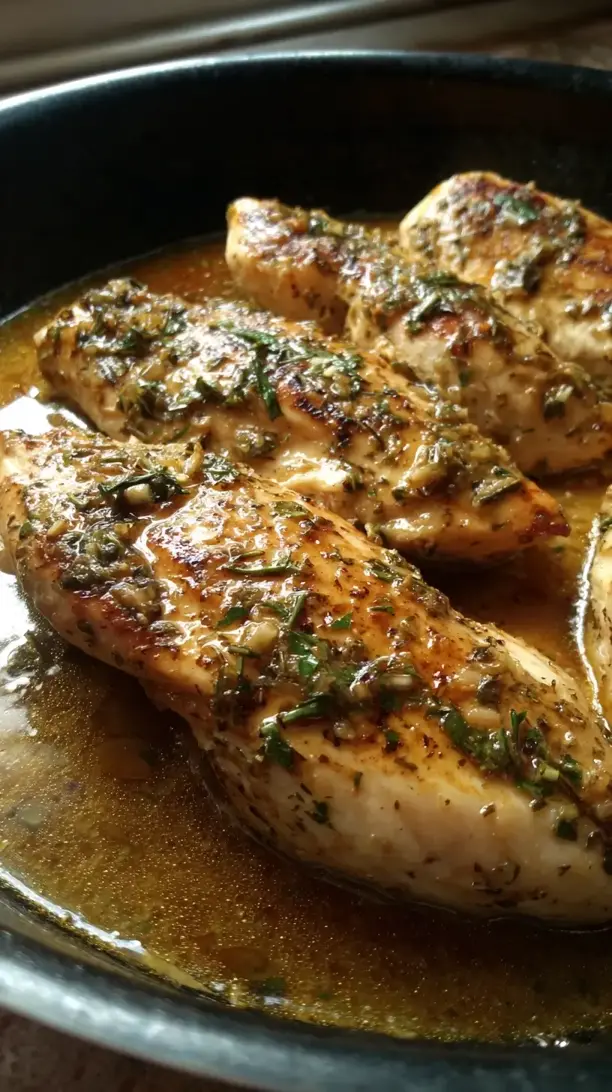
This Instant Pot Chicken is a game-changer for juicy, perfectly cooked chicken in minutes. It’s incredibly fast and versatile, making it a weeknight lifesaver. The pressure cooking method locks in moisture and flavor, delivering a reliable foundation for countless meals.
Nothing beats a great Instant Pot Chicken. Whether you're a fan of Chicken Recipes or want to try something from our Desserts selection, keep scrolling!


Why You’ll Love This Instant Pot Chicken
- Impossibly juicy: High-pressure steam cooks chicken evenly without drying it out.
- Incredibly fast: Ready in under 30 minutes from start to finish.
- Deeply infused flavor: Chicken soaks up savory broth and spices beautifully.
- Meal-prep superstar: Cook once and use all week in salads, wraps, and more.
Ingredients & Tools
- 1.5 lbs boneless, skinless chicken breasts
- 1 cup chicken broth (low-sodium is best)
- 2 tbsp olive oil
- 1 tsp garlic powder
- 1 tsp onion powder
- 1 tsp dried Italian seasoning
- 1/2 tsp paprika (smoked or sweet)
- 1 tsp kosher salt
- 1/2 tsp freshly ground black pepper
Tools: 6-quart or 8-quart Instant Pot or other electric pressure cooker, tongs, instant-read thermometer.
Notes: Using good-quality broth makes a difference. The dried herb and spice blend creates a versatile, aromatic foundation.
Nutrition (per serving)
| Calories: | 215 kcal |
| Protein: | 35 g |
| Fat: | 7 g |
| Carbs: | 1 g |
| Fiber: | 0 g |
Serves: 4 | Prep Time: 5 minutes | Cook Time: 10 minutes (plus pressure build/release) | Total Time: 25 minutes
Before You Start: Tips & Ingredient Notes
- Chicken breast size matters. Try to find breasts that are similar in size and thickness so they cook at the same rate. If one is a real monster, consider slicing it in half horizontally to create two thinner cutlets.
- Don’t skip the liquid. The Instant Pot needs at least 1 cup of liquid to safely come to pressure. The broth not only prevents a “burn” notice but also creates steam that cooks the chicken and adds flavor.
- Why use dried herbs instead of fresh? In the pressurized, steamy environment, dried herbs hold up better and infuse their flavor more consistently. Fresh herbs can wilt and lose their punch, so save those for garnishing at the end.
- To trivet or not to trivet? I highly recommend using the metal trivet that comes with your Instant Pot. Lifting the chicken out of the direct liquid prevents it from becoming waterlogged and gives you a more “roasted” texture.
How to Make Instant Pot Chicken
Step 1: First, we’ll get our chicken ready. Pat the chicken breasts completely dry with paper towels—this is a small step that makes a big difference, helping the spices stick and promoting better browning if you choose to sear. In a small bowl, mix together the garlic powder, onion powder, Italian seasoning, paprika, salt, and pepper. Rub this spice mixture evenly over all sides of each chicken breast. You’ll notice the chicken already looks more appetizing and smells fantastic.
Step 2: Now, let’s turn on the Instant Pot. Press the “Sauté” function and let it heat up for a minute. Once the display reads “Hot,” add the olive oil. Carefully place the seasoned chicken breasts in the pot. You’re not looking to cook them through here—just sear them for about 2 minutes per side to develop a beautiful golden-brown color and a deeper, richer flavor base. If you’re in a rush, you can skip this step, but I really think it adds another layer of taste.
Step 3: Once the chicken is seared (or if you skipped searing), turn off the “Sauté” function. Pour the chicken broth into the pot, using a wooden spoon to scrape up any little browned bits from the bottom. This is called deglazing, and it’s crucial for preventing a burn notice and for incorporating all that flavor back into the dish. Place the metal trivet inside the pot, then arrange the chicken breasts on top of the trivet in a single layer.
Step 4: Secure the lid on the Instant Pot, making sure the steam release valve is set to the “Sealing” position. Select the “Pressure Cook” or “Manual” setting and set the timer for 6 minutes for average-sized breasts (around 6-8 oz each). The pot will take about 8-10 minutes to come to pressure—you’ll see the float valve pop up. Once the cook time is complete, let the pressure release naturally for 5 minutes. This resting period is key for juiciness!
Step 5: After 5 minutes, carefully perform a quick release for any remaining pressure by moving the steam release valve to “Venting.” Wait until the float valve drops, indicating all pressure is released, then it’s safe to open the lid. The chicken should look plump and perfectly cooked. Use an instant-read thermometer to check that the internal temperature has reached 165°F in the thickest part.
Step 6: Finally, use tongs to transfer the chicken breasts to a cutting board. Let them rest for at least 5 minutes before slicing or shredding. This allows the muscle fibers to relax and reabsorb all the juices, ensuring every single bite is tender. You can pour the delicious, seasoned broth left in the pot over the sliced chicken for extra moisture and flavor, or save it for cooking rice or soup.
Storage & Freshness Guide
- Fridge: Store in an airtight container with some cooking liquid for 3–4 days.
- Freezer: Freeze shredded or whole in freezer bags for up to 3 months.
- Reviving: Reheat gently in microwave with broth or covered in oven to retain moisture.
Serving Suggestions
Complementary Dishes
- Garlic Mashed Potatoes — The creamy, buttery potatoes are a dream when paired with the juicy chicken and a spoonful of the cooking broth as a light gravy.
- A Simple Arugula Salad — The peppery bite of arugula with a lemony vinaigrette provides a bright, fresh contrast to the savory, rich chicken.
- Buttered Egg Noodles or Rice — These are the ultimate comfort food bases that soak up every last drop of flavor from the chicken and its juices.
Drinks
- A Crisp Sauvignon Blanc — The wine’s bright acidity and citrus notes cut through the richness of the dish beautifully, cleansing the palate.
- Sparkling Water with Lemon — For a non-alcoholic option, the bubbles and citrus are incredibly refreshing and light alongside this simple, clean-tasting protein.
Something Sweet
- Lemon Sorbet — A scoop of this icy, tart sorbet is the perfect palate-cleansing finish that feels light and sophisticated.
- Classic Rice Pudding — The warm, creamy, and cinnamon-spiced pudding is a comforting and homely way to end a meal centered around this chicken.
Top Mistakes to Avoid
- Mistake: Overcooking the chicken. It’s the number one error! A 6-minute cook time with a 5-minute natural release is the sweet spot for standard breasts. Remember, it will continue to cook during the natural release phase. I’ve messed this up before too, and you end up with dry, tough meat.
- Mistake: Not deglazing the pot. If you sear the chicken, those browned bits on the bottom are flavor gold. But if you don’t add the broth and scrape them up, they can burn once you pressurize the pot, leading to a “Burn” notice and a scorched taste.
- Mistake: Releasing all the pressure instantly. A full quick release right after cooking can cause the muscle fibers in the chicken to seize up violently, squeezing out precious moisture. Always allow for that 5-minute natural release first.
- Mistake: Skipping the rest time. Slicing into the chicken straight from the pot is a recipe for a puddle of juice on your cutting board and dry chicken on your plate. Let it rest!
Expert Tips
- Tip: For super-easy shredding, pop the hot chicken into the bowl of a stand mixer and use the paddle attachment on low speed for 15-20 seconds. It shreds it perfectly every single time, saving your hands from the heat and the work.
- Tip: If you’re using frozen chicken breasts, you don’t even need to thaw them! Just add 2-3 minutes to the pressure cooking time (so 8-9 minutes total) and keep the natural release the same. It’s a true kitchen miracle.
- Tip: Want a richer “sauce”? After removing the chicken, turn the Sauté function back on. Let the broth reduce for a few minutes, or stir in a tablespoon of cold butter at the end to make it glossy and luxurious.
- Tip: For a flavor twist, swap the chicken broth for a cup of salsa or a mix of broth and a splash of citrus juice like lemon or lime. It instantly gives the chicken a totally different profile for tacos or grain bowls.
FAQs
Can I use chicken thighs instead of breasts?
Absolutely! Bone-in, skin-on thighs are fantastic and actually harder to overcook. You’ll want to increase the pressure cook time to about 12-15 minutes, followed by the same 5-minute natural release. The result is fall-off-the-bone tender, incredibly flavorful dark meat that’s perfect for pulling.
Why did I get a “Burn” notice?
This usually happens if there isn’t enough liquid, or if something sticky (like tomato paste or a thick sauce) is sitting directly on the bottom of the pot. Always deglaze thoroughly after sautéing, ensure you have at least 1 cup of liquid, and use the trivet to keep the main ingredients out of the direct heat.
How long does the cooked chicken last in the fridge?
Once cooled, store the chicken in an airtight container with some of the cooking liquid to keep it moist. It will stay fresh and delicious for 3-4 days. It reheats beautifully in the microwave with a splash of broth or covered in the oven.
Can I double this recipe?
You sure can, as long as you don’t exceed the max fill line of your Instant Pot. The cook time remains the same! The pot just takes a few minutes longer to come to pressure because of the larger, colder mass of food inside.
Is the liquid at the bottom just for cooking, or can I use it?
Don’t you dare throw it away! That liquid is a lightly seasoned, delicate chicken stock. Use it to cook rice or quinoa for an extra flavor boost, as the base for a quick soup, or to sauté vegetables. It’s liquid gold!


Instant Pot Chicken
Make juicy, flavorful Instant Pot Chicken in under 30 minutes! Perfect for meal prep, salads, and more. Get the easy, foolproof recipe now.
Ingredients
For the Ingredients & Tools
-
1.5 lbs boneless, skinless chicken breasts
-
1 cup chicken broth (low-sodium is best)
-
2 tbsp olive oil
-
1 tsp garlic powder
-
1 tsp onion powder
-
1 tsp dried Italian seasoning
-
0.5 tsp paprika (smoked or sweet)
-
1 tsp kosher salt
-
0.5 tsp freshly ground black pepper
Instructions
-
First, we'll get our chicken ready. Pat the chicken breasts completely dry with paper towels—this is a small step that makes a big difference, helping the spices stick and promoting better browning if you choose to sear. In a small bowl, mix together the garlic powder, onion powder, Italian seasoning, paprika, salt, and pepper. Rub this spice mixture evenly over all sides of each chicken breast. You’ll notice the chicken already looks more appetizing and smells fantastic.01
-
Now, let's turn on the Instant Pot. Press the "Sauté" function and let it heat up for a minute. Once the display reads "Hot," add the olive oil. Carefully place the seasoned chicken breasts in the pot. You’re not looking to cook them through here—just sear them for about 2 minutes per side to develop a beautiful golden-brown color and a deeper, richer flavor base. If you're in a rush, you can skip this step, but I really think it adds another layer of taste.02
-
Once the chicken is seared (or if you skipped searing), turn off the "Sauté" function. Pour the chicken broth into the pot, using a wooden spoon to scrape up any little browned bits from the bottom. This is called deglazing, and it’s crucial for preventing a burn notice and for incorporating all that flavor back into the dish. Place the metal trivet inside the pot, then arrange the chicken breasts on top of the trivet in a single layer.03
-
Secure the lid on the Instant Pot, making sure the steam release valve is set to the "Sealing" position. Select the "Pressure Cook" or "Manual" setting and set the timer for 6 minutes for average-sized breasts (around 6–8 oz each). The pot will take about 8–10 minutes to come to pressure—you'll see the float valve pop up. Once the cook time is complete, let the pressure release naturally for 5 minutes. This resting period is key for juiciness!04
-
After 5 minutes, carefully perform a quick release for any remaining pressure by moving the steam release valve to "Venting." Wait until the float valve drops, indicating all pressure is released, then it's safe to open the lid. The chicken should look plump and perfectly cooked. Use an instant-read thermometer to check that the internal temperature has reached 165°F in the thickest part.05
-
Finally, use tongs to transfer the chicken breasts to a cutting board. Let them rest for at least 5 minutes before slicing or shredding. This allows the muscle fibers to relax and reabsorb all the juices, ensuring every single bite is tender. You can pour the delicious, seasoned broth left in the pot over the sliced chicken for extra moisture and flavor, or save it for cooking rice or soup.06
Not what you're looking for?


