There’s something about the scent of anise that instantly transports me back to my grandmother’s kitchen, especially during the holidays. Pulling a pan of these golden, soft Italian Anisette Cookies from the oven feels like a warm, nostalgic hug. They’re the kind of treat that makes holiday baking so magical, offering a beautiful departure from the usual lineup of Christmas cookies recipes.
If you’re looking for Christmas baking ideas that feel both special and doable, you’ve found them. These unique Christmas cookies, with their delicate cake-like texture and enchanting aroma, are some of my favorite Christmas sweets. They shine on any dessert table and are perfect for your holiday cookies Christmas celebrations. Best of all, they come together without fuss, making them ideal easy Christmas treats to share with loved ones.
Whether you’re carrying on a family tradition or starting your own, this recipe is a true comfort food recipe. Let me show you how to fill your home with the spirit of the season, one beautifully soft, anise-kissed cookie at a time.
Craving a delicious Italian Anisette Cookies? You've come to the right spot! From Christmas Cookie favorites to amazing Desserts recipes, there's something here for everyone.


Why You’ll Love This Italian Anisette Cookies
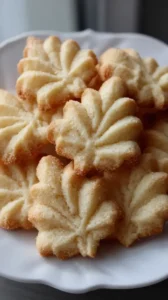
- Soft, cake-like texture: Wonderfully tender and light, melting in your mouth.
- Enchanting anise flavor: A warm, sweet, and floral licorice aroma.
- Simple to make: Easy dough and forgiving shaping—no cookie cutter needed.
- Classic, festive look: White glaze and vibrant sprinkles make everyone smile.
Ingredients & Tools
- 3 cups (360 g) all-purpose flour
- 2 tsp baking powder
- 1/4 tsp salt
- 1/2 cup (113 g) unsalted butter, softened
- 3/4 cup (150 g) granulated sugar
- 3 large eggs
- 2 tsp anise extract
- 1 tsp vanilla extract
- 1/4 cup (60 ml) whole milk
- For the Glaze: 1 1/2 cups (180 g) powdered sugar, 2-3 tbsp whole milk, 1/2 tsp anise or vanilla extract, and sprinkles for decorating.
Tools: Two baking sheets, parchment paper, a stand mixer or hand mixer (helpful but not essential), a medium bowl, a small bowl for the glaze, and a wire cooling rack.
Notes: The quality of your anise extract is key—it’s the star of the show. Don’t skip the milk in the dough; it gives these cookies their signature soft, cakey texture.
Nutrition (per serving)
| Calories: | 120 kcal |
| Protein: | 2 g |
| Fat: | 4 g |
| Carbs: | 20 g |
| Fiber: | 0 g |
Serves: 36 cookies | Prep Time: 20 minutes | Cook Time: 10-12 minutes | Total Time: 1 hour (includes cooling)
Before You Start: Tips & Ingredient Notes
- Your butter temperature matters. Make sure your butter is properly softened—it should yield to a gentle press but not be greasy or melted. This is crucial for creaming it with the sugar to create a light, airy base for your cookies.
- Don’t be shy with the anise. Anise extract can vary in potency, but a full two teaspoons gives you that beautiful, pronounced flavor that defines these cookies. If you’re a real anise lover, you can even add an extra half teaspoon.
- Weigh your flour for best results. If you have a kitchen scale, use it! If not, fluff your flour with a spoon, spoon it into your measuring cup, and level it off. Too much flour is the most common reason for dry, dense cookies.
- Parchment paper is your best friend. It prevents sticking and ensures even browning on the bottom of your cookies without any fuss. It makes cleanup an absolute breeze, too.
How to Make Italian Anisette Cookies
Step 1: First, preheat your oven to 350°F (175°C) and line your baking sheets with parchment paper. In a medium bowl, whisk together the flour, baking powder, and salt. This ensures your leavening is evenly distributed, which is key for a uniform rise. Set this dry mixture aside for now.
Step 2: In the bowl of a stand mixer fitted with the paddle attachment (or a large bowl if using a hand mixer), cream together the softened butter and granulated sugar. You’ll want to beat it on medium-high speed for about 2-3 minutes, until it becomes pale, light, and fluffy. This step incorporates air, which is part of what gives the cookies their lovely texture.
Step 3: Now, add the eggs one at a time, beating well after each addition. Make sure each egg is fully incorporated before adding the next—this helps create an emulsion and prevents the batter from curdling. Then, beat in the anise and vanilla extracts. Your kitchen will start to smell amazing already!
Step 4: With the mixer on low speed, gradually add about half of the flour mixture. Once it’s mostly incorporated, pour in all of the milk. Let that mix for a few seconds, then add the remaining flour mixture. Mix just until the flour disappears and a soft, slightly sticky dough forms. Be careful not to overmix at this stage.
Step 5: It’s time to shape the cookies! You can scoop the dough with a small cookie scoop (about 1 tablespoon portions) or use two spoons. Roll each portion of dough into a smooth ball, about 1-inch in diameter, and place them on your prepared baking sheets, leaving about 1 1/2 inches between each one as they will spread a little.
Step 6: Bake for 10-12 minutes. The cookies are done when the bottoms are just lightly golden and the tops are set and spring back lightly when touched. They should not brown on top. Let them cool on the baking sheet for 5 minutes before transferring them to a wire rack to cool completely. This is important—if you glaze them while they’re warm, the glaze will just slide right off.
Step 7: While the cookies cool, make the glaze. In a small bowl, whisk together the powdered sugar, 2 tablespoons of milk, and your chosen extract. You’re aiming for a thick but pourable consistency. If it’s too thick, add more milk a teaspoon at a time. If it’s too thin, add a bit more powdered sugar.
Step 8: Once the cookies are completely cool, dip the top of each one into the glaze, letting the excess drip back into the bowl. Place them back on the wire rack and immediately shower them with your favorite sprinkles. The glaze will set completely in about 30 minutes.
Storage & Freshness Guide
- Fridge: Not recommended, as refrigeration can dry out the cookies.
- Freezer: Freeze unglazed baked cookies in an airtight container for up to 3 months. Thaw and glaze before serving.
- Reviving: If cookies become slightly dry, a brief warm-up in the microwave (5-10 seconds) can help soften them.
Serving Suggestions
Complementary Dishes
- A platter of assorted Italian cookies — Serve these alongside pizzelles and almond biscotti for a classic cookie table experience that offers a variety of textures and flavors.
- Fresh fruit, like oranges or berries — The bright, acidic freshness of the fruit provides a lovely counterpoint to the sweet, aromatic cookies and cleanses the palate beautifully.
- A sharp, aged cheese — A small piece of a strong cheese like Pecorino Romano creates a surprising and delicious savory-sweet contrast that really highlights the anise flavor.
Drinks
- Espresso or strong black coffee — The bitterness of the coffee is the perfect partner for the sweet, fragrant cookie, making for an iconic Italian pairing.
- A glass of cold milk — It’s a timeless, comforting combination that never fails, especially with these soft, cake-like treats.
- Vin Santo or a sweet dessert wine — Dip the cookie right in for a truly decadent and traditional Italian way to end a meal.
Something Sweet
- A simple scoop of vanilla gelato — Place a warm cookie on top of the cold gelato for a fantastic mix of temperatures and textures that feels incredibly indulgent.
- Lemon sorbet — The zingy, tart lemon flavor cuts through the sweetness of the glaze and complements the anise in a really refreshing way.
- Dark chocolate-dipped strawberries — These offer a different kind of chocolatey richness that pairs wonderfully without competing with the anise flavor of the cookies.
Top Mistakes to Avoid
- Using melted butter. If your butter is liquid, it won’t trap air during the creaming process, resulting in a denser, flatter cookie that spreads too much. Softened, cool butter is the goal.
- Overbaking the cookies. These cookies should remain pale on top. If they get golden brown, they’ve baked too long and will be dry instead of soft and cakey. Pull them out as soon as the tops spring back.
- Glazing the cookies while they’re warm. I’ve messed this up before too—the warmth will cause the glaze to thin out, become transparent, and slide right off the cookie. Patience is key; let them cool completely.
- Overmixing the dough after adding the flour. Once the flour is incorporated, stop mixing. Overworking the dough develops gluten, which can make your cookies tough instead of tender.
Expert Tips
- Tip: For a more intense anise flavor, try adding 1-2 tablespoons of toasted anise seeds to the dry ingredients. The seeds provide little bursts of flavor and a subtle textural crunch that anise lovers will adore.
- Tip: If your dough is too sticky to handle easily, pop it in the refrigerator for 15-20 minutes. This will firm up the butter, making the dough much easier to roll into neat balls.
- Tip: Double the glaze recipe if you’re a fan of a thick, generous coating. Some people prefer just a hint of sweetness, while others love a substantial layer—it’s completely up to you!
- Tip: For a perfectly smooth, professional-looking glaze, sift your powdered sugar first. This prevents any little lumps from spoiling the silky finish on your beautiful cookies.
FAQs
Can I make the dough ahead of time?
Absolutely, you can! The dough can be made, covered tightly in plastic wrap, and refrigerated for up to 2 days. Let it sit at room temperature for about 15-20 minutes before scooping and baking, as it will be quite firm straight from the fridge. You can also freeze the shaped, un-baked dough balls on a tray before transferring them to a freezer bag. Bake from frozen, adding 1-2 minutes to the baking time.
My cookies came out dense. What happened?
This is usually due to one of two things: too much flour or overmixing. Remember to measure your flour correctly by weight or using the spoon-and-level method. And once you add the flour, mix only until it’s just combined. Overmixing develops the gluten in the flour, which leads to a tougher, denser crumb rather than a light and cakey one.
Can I use anise oil instead of anise extract?
You can, but you must be extremely careful. Anise oil is highly concentrated and potent. If you choose to use it, start with just 1/4 teaspoon and taste the dough. You can always add more, but you can’t take it out. Using the full 2 teaspoons of oil as a direct substitute would result in an overwhelmingly strong, almost medicinal flavor.
How should I store these cookies, and how long do they last?
Store the completely glazed and set cookies in a single layer in an airtight container at room temperature. You can place parchment paper between layers if you need to stack them. They will stay soft and delicious for about 4-5 days. The glaze helps keep them moist. I do not recommend refrigerating them, as it can dry them out.
Can I omit the anise extract?
Of course! If you’re not a fan of anise, you can replace it with an equal amount of another extract. Almond extract is a very popular and delicious alternative, creating a classic Italian almond cookie. Vanilla, lemon, or orange extract would also work beautifully and give you a completely different, but equally wonderful, cookie.


Italian Anisette Cookies: A Soft, Easy Christmas Cookie Recipe
Italian Anisette Cookies are a soft, cake-like holiday treat. This easy anise cookie recipe is perfect for your Christmas baking ideas, offering a nostalgic and aromatic delight.
Ingredients
For the Cookies:
-
3 cups all-purpose flour (360 g)
-
2 tsp baking powder
-
1/4 tsp salt
-
1/2 cup unsalted butter (softened, 113 g)
-
3/4 cup granulated sugar (150 g)
-
3 large eggs
-
2 tsp anise extract
-
1 tsp vanilla extract
-
1/4 cup whole milk (60 ml)
For the Glaze:
-
1 1/2 cups powdered sugar (180 g)
-
2-3 tbsp whole milk
-
1/2 tsp anise or vanilla extract
-
sprinkles (for decorating)
Instructions
-
First, preheat your oven to 350°F (175°C) and line your baking sheets with parchment paper. In a medium bowl, whisk together the flour, baking powder, and salt. This ensures your leavening is evenly distributed, which is key for a uniform rise. Set this dry mixture aside for now.01
-
In the bowl of a stand mixer fitted with the paddle attachment (or a large bowl if using a hand mixer), cream together the softened butter and granulated sugar. You’ll want to beat it on medium-high speed for about 2-3 minutes, until it becomes pale, light, and fluffy. This step incorporates air, which is part of what gives the cookies their lovely texture.02
-
Now, add the eggs one at a time, beating well after each addition. Make sure each egg is fully incorporated before adding the next—this helps create an emulsion and prevents the batter from curdling. Then, beat in the anise and vanilla extracts. Your kitchen will start to smell amazing already!03
-
With the mixer on low speed, gradually add about half of the flour mixture. Once it’s mostly incorporated, pour in all of the milk. Let that mix for a few seconds, then add the remaining flour mixture. Mix just until the flour disappears and a soft, slightly sticky dough forms. Be careful not to overmix at this stage.04
-
It’s time to shape the cookies! You can scoop the dough with a small cookie scoop (about 1 tablespoon portions) or use two spoons. Roll each portion of dough into a smooth ball, about 1-inch in diameter, and place them on your prepared baking sheets, leaving about 1 1/2 inches between each one as they will spread a little.05
-
Bake for 10-12 minutes. The cookies are done when the bottoms are just lightly golden and the tops are set and spring back lightly when touched. They should not brown on top. Let them cool on the baking sheet for 5 minutes before transferring them to a wire rack to cool completely. This is important—if you glaze them while they're warm, the glaze will just slide right off.06
-
While the cookies cool, make the glaze. In a small bowl, whisk together the powdered sugar, 2 tablespoons of milk, and your chosen extract. You’re aiming for a thick but pourable consistency. If it’s too thick, add more milk a teaspoon at a time. If it’s too thin, add a bit more powdered sugar.07
-
Once the cookies are completely cool, dip the top of each one into the glaze, letting the excess drip back into the bowl. Place them back on the wire rack and immediately shower them with your favorite sprinkles. The glaze will set completely in about 30 minutes.08
Not what you're looking for?


