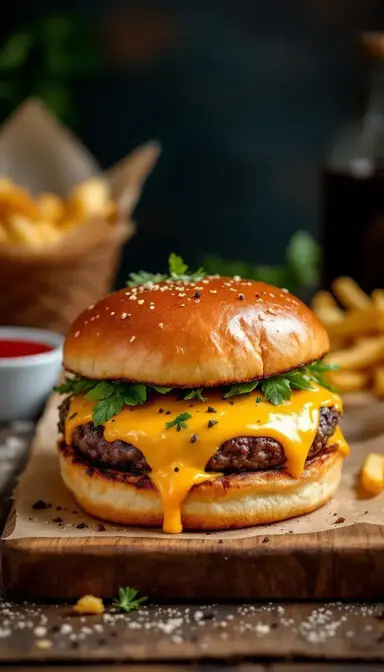
There’s something almost magical about that first bite into a Jucy Lucy. The crisp, caramelized exterior gives way to a river of molten cheese that floods your senses—pure, unadulterated burger euphoria. This isn’t just a sandwich; it’s a culinary event. Born in the heart of Minneapolis, the Jucy Lucy (or Juicy Lucy, depending on which bar you swear by) is a burger that keeps its cheesy secrets hidden until that glorious moment of discovery.
Love Jucy Lucy (Cheese-Stuffed Burger)? So do we! If you're into Burgers or curious about Chicken Thigh Recipes, you'll find plenty of inspiration below.


Why This Recipe Works
- The Cheese Surprise: Every bite is a treasure hunt for that molten core.
- Simple, Bold Ingredients: Just beef, cheese, and a little know-how create something extraordinary.
- Endless Creativity: Swap cheeses, experiment with blends, or pile on your favorite toppings—this burger is your canvas.
The Story Behind the Sauce
The Jucy Lucy’s origins are as hotly debated as its spelling. Two Minneapolis bars—Matt’s Bar (firmly team “Jucy”) and the 5-8 Club (team “Juicy”)—both claim to have invented this masterpiece in the 1950s. The genius? Stuffing the cheese inside the patty, turning an ordinary burger into a molten revelation.
Essential Ingredients & Tools
For the Patties
- 1.5 lbs ground beef (80/20 chuck is your best friend here—fat equals flavor)
- 1 tsp kosher salt (don’t skimp; this is your flavor foundation)
- 1 tsp black pepper
- 1 tsp garlic powder (optional, but highly recommended)
- 1 tsp onion powder (ditto)
- 6–8 oz American cheese (cubed or thick slices—this is the melt king; substitute with cheddar if needed)
For Assembly
- 4 hamburger buns (go for brioche or sesame for that perfect soft-crunch contrast)
- 2 tbsp butter (because toasted buns are non-negotiable)
- Toppings: Keep it classic with lettuce, tomato, onion, pickles, ketchup, and mustard—or go wild.
Tools You’ll Need
- A heavy skillet (cast iron is ideal, but any thick-bottomed pan works)
- Instant-read thermometer (or use the finger test: medium-rare feels like the base of your thumb when touching your pinky to thumb)
- Sturdy spatula (a fish spatula works great for flipping)
- Mixing bowl (any large bowl will do)
Serves: 4 | Prep: 20 mins | Cook: 10 mins | Total: 30 mins
How to Make The Jucy Lucy Burger
- Season & Divide
Gently mix the 1.5 lbs ground beef with 1 tsp kosher salt, 1 tsp black pepper, and those optional-but-really-not-optional spices (1 tsp garlic powder and 1 tsp onion powder). Handle it like you’re folding delicate dough—overmixing leads to tough, sad patties. Divide the mixture into 8 equal portions. Think of this as your burger blueprint.
- Form Thin Patties
Flatten 4 portions into ¼-inch-thick patties, about 5 inches across. Smooth the edges with your fingertips—this isn’t just for looks; it’s your first line of defense against cheese leaks. Pro tip: A little cold water on your hands keeps the beef from sticking like glue.
- Cheese Time
Place ½-inch cubes of 6–8 oz American cheese (or folded slices) in the center of each patty, leaving a ½-inch border. This isn’t just a suggestion—it’s the difference between cheesy bliss and a skillet full of regret.
- Seal the Deal
Top each cheese-loaded patty with another flattened portion. Pinch the edges together like you’re sealing a love letter—firmly and with purpose. Roll the edges inward slightly for extra security. Any gaps here, and your cheese will stage a great escape.
- Chill Out
Pop the patties in the fridge for 10 minutes if you can spare the time. This firms up the fat, making your burgers less likely to fall apart when they hit the heat.
- Sear to Perfection
Heat your cast iron skillet over medium heat. Add the patties and let them cook for 4–5 minutes per side. Resist the urge to press down—you’re not making paninis. That deep brown crust? That’s the Maillard reaction working its flavor magic.
- Check the Temp
Slide an instant-read thermometer into the side of a patty (avoid the cheese center). Aim for 155–160°F—safe for the beef, molten for the cheese.
- Let It Rest
Give the burgers 5 minutes off the heat. This lets the cheese thicken slightly (so it oozes instead of erupts) and lets the juices settle. Patience is a virtue, especially when cheese is involved.
- Toast the Buns
While the burgers rest, butter the 4 hamburger buns with 2 tbsp butter and toast them in the same skillet until golden. Because nobody likes a soggy bun.
- Assemble & Devour
Place each patty on a bun, add your toppings, and serve immediately. The cheese waits for no one.
Pro Technique
The Seal is Everything
Cold beef is easier to handle, so don’t let it sit out too long. Thin, even patties (¼-inch thick) ensure the cheese melts before the beef overcooks. When sealing, press the edges together like you’re closing a vault, then roll them inward for extra insurance. A little water on your fingers keeps things smooth and stick-free.
Mastering the Melt
American cheese is the undisputed melt champion, but if you’re using cheddar or another variety, freeze the cubes for 15 minutes first. This slows the melt, reducing leaks. Cook over medium heat—too high, and your patty might split like a overstuffed suitcase. If cheese starts to escape, gently nudge it back in with a spatula. No panic required.
Chef’s Wisdom
Overhandling the Beef
This is the cardinal sin of burger-making. Packing the beef too tightly or mixing it aggressively turns your patties into dense, rubbery pucks. Handle it like you’re folding a delicate omelet—gentle and minimal.
Skipping the Rest
That 5-minute rest isn’t just a suggestion. It lets the cheese thicken slightly and the juices redistribute. Cutting in too soon is like opening a shaken soda—expect a molten cheese explosion.
Storage & Freshness Guide
Raw Patties
Store uncooked patties in an airtight container in the fridge for up to 24 hours. Freezing isn’t ideal (the texture suffers), but if you must, wrap each patty in parchment paper and thaw overnight in the fridge before cooking.
Leftovers
Cooked burgers keep for 3–4 days in the fridge. Reheat gently in a 300°F oven for 10–15 minutes. Microwaving is a last resort—it turns the beef rubbery and the cheese into a sad, separated mess.
Safety First
Ground beef should always hit 160°F to be safe. Use a thermometer, especially near the cheese pocket where heat can be uneven. And never leave cooked burgers out for more than 2 hours.
Nutrition Profile
Indulgent? Absolutely. Worth it? Without a doubt. Here’s the breakdown per serving:
- Calories: 720
- Protein: 42g
- Carbohydrates: 35g
- Fat: 45g
- Fiber: 2g
Ingredient Variations and Their Impact
- Smoky Cheddar Blend: Swap American cheese for sharp cheddar and add 1 tsp smoked paprika to the beef. Freeze the cheddar cubes first—they melt slower but pack a flavor punch.
- Pepper Jack Kick: Use pepper jack cheese for heat, and mix in 1 tbsp chopped jalapeños for an extra kick. The cheese’s oils amplify the spice.
- Brisket Boost: Substitute half the chuck with ground brisket for deeper flavor. A splash of Worcestershire sauce takes the umami up a notch.
- Caramelized Onion Delight: Fold 2 tbsp caramelized onions into the beef and stuff with Gruyère cheese. Sweet, nutty, and utterly irresistible.
- Bacon Lover’s Dream: Mix ¼ cup cooked, minced bacon into the patties and stuff with blue cheese. Salty, tangy, and downright decadent.
Perfect Pairings
Complementary Dishes
- Crispy French Fries: The salty crunch contrasts the burger’s richness. Double-fry them for extra crispness.
- Vinegar-Based Slaw: Its acidity cuts through the fat, refreshing the palate between bites.
Drinks
- American Lager: Light and effervescent, it cleanses the palate without overpowering the beef.
- Cherry Cola: The sweetness balances the savory cheese, while bubbles aid digestion.
Something Sweet
- Vanilla Milkshake: A classic pairing—the cold, creamy shake tempers the burger’s heat.
- Grilled Peach Halves: Their caramelized sweetness offers a fresh, summery finish.
FAQs
- Q: Why did my cheese leak?
A: Likely a weak seal, overfilling, or too-high heat. Seal tightly and cook over medium. - Q: Can I use pre-shredded cheese?
A: Skip it—anti-caking agents mess with the melt. Block cheese, cubed or sliced, is the way. - Q: Grill or stovetop?
A: Both work! Skillet offers control; grill adds smoke. Just keep the heat medium.


The Jucy Lucy Burger: A Molten Cheese Revelation
Make the ultimate Jucy Lucy burger with my foolproof recipe—stuffed with melty cheese and packed with flavor. Get ready for the best burger of your life!
Ingredients
For the Patties
-
1.5 lbs ground beef
-
1 tsp kosher salt
-
1 tsp black pepper
-
1 tsp garlic powder
-
1 tsp onion powder
-
6–8 oz American cheese
For Assembly
-
4 hamburger buns
-
2 tbsp butter
-
Lettuce, tomato, onion, pickles, ketchup, mustard
Instructions
-
Gently mix beef with salt, pepper, garlic powder, and onion powder. Divide into 8 portions.01
-
Flatten 4 portions into ¼-inch patties.02
-
Place cheese cubes in the center of each patty, leaving a ½-inch border.03
-
Top with remaining patties and seal edges tightly.04
-
Chill patties for 10 minutes.05
-
Cook in a skillet over medium heat for 4–5 minutes per side.06
-
Check internal temperature reaches 155–160°F.07
-
Rest burgers for 5 minutes.08
-
Toast buns in the same skillet.09
-
Assemble and serve immediately.10
Not what you're looking for?