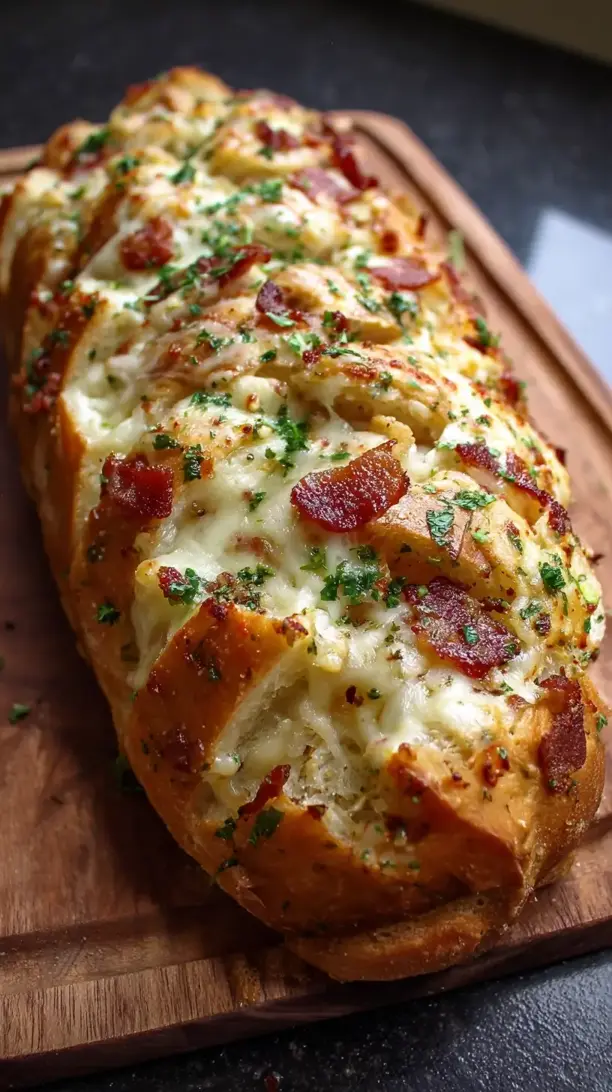
This Loaded Cheesy Bread is a warm, pull-apart loaf stuffed with melted cheeses, bacon, and garlic butter. It’s incredibly easy to make and perfect for sharing. Your next gathering needs this Loaded Cheesy Bread.
Looking for Loaded Cheesy Bread inspiration? You'll love what we have! Explore more Savory Snacks recipes or discover our Chicken Breast Recipes favorites.


Why You’ll Love This Loaded Cheesy Bread
- Shareable & Fun: Perfect for tearing and sharing with friends and family.
- Perfect Texture: Crispy crust with a soft, cheesy interior in every bite.
- Simple to Make: Easy prep with no fancy techniques required.
- Endlessly Customizable: Swap cheeses or add your favorite mix-ins.
Ingredients & Tools
- 1 large loaf of Italian or French bread (about 12-14 inches long)
- 8 oz (225 g) block of mozzarella cheese, shredded
- 4 oz (115 g) sharp cheddar cheese, shredded
- 6 slices thick-cut bacon, cooked until crispy and crumbled
- 3 green onions, thinly sliced
- 1/2 cup (115 g) unsalted butter, melted
- 2 large cloves garlic, minced
- 1 tsp Italian seasoning
- 1/4 tsp crushed red pepper flakes (optional, for a little kick)
- 1/4 cup freshly grated Parmesan cheese
- 2 tbsp fresh parsley, finely chopped
Tools: A sharp serrated knife, a baking sheet, parchment paper, a couple of mixing bowls, and a pastry brush (helpful but not essential).
Notes: Shredding your own cheese from a block ensures smoother melting. Fresh garlic delivers the best flavor.
Nutrition (per serving)
| Calories: | 320 kcal |
| Protein: | 12 g |
| Fat: | 22 g |
| Carbs: | 18 g |
| Fiber: | 1 g |
Serves: 6-8 | Prep Time: 15 minutes | Cook Time: 15-20 minutes | Total Time: 30-35 minutes
Before You Start: Tips & Ingredient Notes
- Choose the right bread. You want a sturdy, crusty loaf like Italian or French bread that can hold all the cheesy goodness without getting soggy. A softer sandwich bread will just turn to mush, so crusty is key here.
- Shred your own cheese, seriously. I know it’s tempting to grab a bag of pre-shredded cheese, but it’s coated to prevent clumping, which also prevents it from melting into those beautiful, stretchy strings. Taking two minutes to shred a block is a game-changer for texture.
- Don’t skip the garlic-infused butter. This is the secret sauce—literally. Melting the butter and stirring in the fresh minced garlic and herbs allows that flavor to seep into every nook and cranny of the bread, creating an incredible base flavor.
- Cook your bacon until truly crispy. If the bacon is even slightly soft when you crumble it, it can release grease into the bread and make it soggy during baking. Crispy bacon will stay crispy and add that wonderful salty, smoky crunch.
How to Make Loaded Cheesy Bread
Step 1: First, preheat your oven to 375°F (190°C). This is a hot-and-fast bake, so you want the oven fully ready to go. Line your baking sheet with parchment paper—this isn’t just for easy cleanup; it also prevents the bottom of the bread from getting too dark. Now, take your loaf of bread and, using a sharp serrated knife, make deep cuts about 1 inch apart across the top, but be careful not to cut all the way through the bottom crust. You’re creating little pockets for all that cheesy filling to nestle into.
Step 2: In a medium bowl, combine your melted butter, minced garlic, Italian seasoning, and those optional red pepper flakes if you’re using them. Give it a good whisk until it’s all combined and wonderfully fragrant. Using a pastry brush—or just a spoon if that’s what you have—generously brush this garlic butter mixture in between every single slit you cut into the bread. Really get it in there; this is what’s going to make the interior of the bread incredibly flavorful and moist.
Step 3: Now for the fun part—the loading! In another large bowl, toss together your shredded mozzarella, cheddar, most of the crumbled bacon (save a little for topping!), and most of the sliced green onions (again, save some for garnish). Take handfuls of this cheesy mixture and stuff it into all the crevices of the bread. Don’t be shy—pack it in there. You’ll notice some will fall out onto the baking sheet; that’s totally fine and will create delicious, crispy cheese chips.
Step 4: Once the bread is fully loaded, drizzle any remaining garlic butter over the top. Then, sprinkle the entire thing with the grated Parmesan cheese. This is going to create a fantastic, savory, slightly crispy crust on top. Wrap the entire loaf fairly loosely in aluminum foil, place it on your prepared baking sheet, and pop it into the preheated oven.
Step 5: Bake for about 12-15 minutes wrapped in the foil. This initial stage steams the bread slightly, ensuring the inside gets hot and the cheese melts perfectly without the top burning. Then, carefully remove the foil and continue baking for another 5-7 minutes, or until the cheese on top is completely melted, bubbly, and starting to get those gorgeous golden-brown spots.
Step 6: Take the baking sheet out of the oven—be careful, it’s hot! Immediately sprinkle the reserved bacon, green onions, and the fresh chopped parsley over the top. The residual heat will wilt the herbs and onions just slightly, releasing their aroma. Let it sit for about 2-3 minutes before serving—this allows the cheese to set just enough so it’s gloriously stringy but not a complete molten lava situation when you try to pull it apart. Then, dig in!
Storage & Freshness Guide
- Fridge: Store leftovers wrapped in foil or in an airtight container for up to 3 days.
- Freezer: Wrap tightly in foil and freeze for up to 1 month. Thaw in fridge before reheating.
- Reviving: Reheat in a 350°F oven for 5-10 minutes to restore crispiness and melt cheese.
Serving Suggestions
Complementary Dishes
- A robust, tomato-based soup — The acidity and freshness of a classic tomato soup or a hearty minestrone cut through the rich, cheesy fat of the bread perfectly, making for a truly comforting meal.
- A big, crisp garden salad — Something with a sharp vinaigrette dressing, lots of crunchy romaine, cucumbers, and radishes provides a refreshing, clean contrast to the indulgent, savory bread.
- Marinara or ranch dipping sauce — For the ultimate snack experience, serve small bowls of warm marinara for an Italian twist or cool, creamy ranch dressing for a classic crowd-pleaser right alongside the bread.
Drinks
- A cold, hoppy IPA — The bitterness of the hops stands up beautifully to the saltiness of the cheese and bacon, cleansing the palate with each sip.
- A crisp, dry white wine — A Sauvignon Blanc or Pinot Grigio with its bright citrus notes acts as a fantastic counterpoint to all the rich, savory flavors happening in the bread.
- Sparkling water with lemon — For a non-alcoholic option, the bubbles and citrus are incredibly effective at resetting your taste buds between each delicious, cheesy bite.
Something Sweet
- Simple lemon sorbet — After all that savory richness, a scoop of bright, tart, and refreshing lemon sorbet is the perfect palate cleanser and a light way to end the meal.
- Dark chocolate brownies — If you’re leaning into full indulgence, a fudgy, rich brownie continues the theme of comfort food but satisfies that completely different chocolate craving.
- Fresh berry salad — A mix of strawberries, blueberries, and raspberries with a tiny drizzle of honey offers a fresh, juicy, and naturally sweet finish that feels light and balanced.
Top Mistakes to Avoid
- Mistake: Cutting all the way through the bread. If you slice completely through the bottom crust, all your cheesy filling will just fall out onto the pan during baking, and you’ll lose that wonderful “pull-apart” effect. The base needs to stay intact to hold everything together.
- Mistake: Using soggy or undercooked bacon. Any excess moisture from the bacon will steam into the bread and cheese, potentially making the final result greasy and soft instead of crispy and delightful. I’ve messed this up before too… always go for extra-crispy.
- Mistake: Skipping the foil tent. Baking without the foil cover first can cause the top cheese to brown too quickly and even burn before the inside bread is warm and the other cheeses have fully melted. The foil creates a mini-oven effect for perfect, even cooking.
- Mistake: Not letting it rest after baking. I know it’s hard to wait, but if you tear into it straight from the oven, the cheese will be too liquid and just run everywhere. A brief 2-3 minute rest lets it set up for the perfect stringy pull.
Expert Tips
- Tip: Add a creamy element for extra luxury. For an even more decadent version, try spreading a thin layer of cream cheese mixed with a little garlic powder inside the bread slits before adding the shredded cheese. It creates an incredibly rich, almost dip-like center.
- Tip: Make it ahead for easy entertaining. You can fully assemble the bread, wrap it tightly in plastic wrap and then foil, and keep it in the fridge for up to 24 hours before you need to bake it. Just add a few extra minutes to the baking time since it’s going in cold.
- Tip: Create a cheesy “crust” on the bottom. Before you place the stuffed loaf on the parchment paper, sprinkle a thin layer of shredded cheese directly onto the paper. As it bakes, it will fuse to the bottom of the bread, creating an amazing, crispy cheese skirt that everyone fights over.
- Tip: Broil for a final color boost. If your bread is baked through but the top isn’t as golden as you’d like, switch the oven to broil for the last 60-90 seconds. Watch it like a hawk—it can go from perfect to burnt in a flash, but it gives a beautiful professional finish.
FAQs
Can I make this Loaded Cheesy Bread ahead of time?
Absolutely, and it’s a great trick for parties. You can assemble the entire loaf—cut, buttered, and stuffed with cheese—wrap it tightly in both plastic wrap and foil, and refrigerate it for up to a day. When you’re ready, bake it straight from the fridge, adding about 5-7 extra minutes to the initial foil-covered baking time to account for it being cold. It works like a charm and tastes just as fantastic.
What’s the best way to reheat leftovers?
Leftovers? A rare occurrence, but it happens! The microwave will make it soft and a bit soggy. For best results, reheat slices in a toaster oven or a conventional oven at 350°F (175°C) for 5-10 minutes. This will re-crisp the exterior and re-melt the cheese beautifully, making it almost as good as new. A quick tip: if the top is browning too fast, you can tent it with a small piece of foil.
Can I use different types of cheese?
Of course! This recipe is a wonderful canvas. Monterey Jack or Pepper Jack add a lovely mild flavor or a little kick. Gruyère would be fantastic for a more sophisticated, nutty taste. Even a little gouda or provolone would work well. I’d recommend keeping at least half of the cheese as a good melter like mozzarella, and then experimenting with the other half for flavor. Just avoid very hard, oily, or non-melting cheeses like halloumi or traditional queso fresco.
My bread got soggy. What happened?
Oh no, the dreaded sogginess! This usually stems from one of two things. First, the butter mixture might have been too heavy, or there was excess grease from the bacon. Make sure your bacon is very crispy and patted dry, and you’re just brushing the butter mixture, not drowning the bread. Second, it could be that the bread itself was too soft. Always start with a sturdy, crusty loaf that can stand up to the moisture.
Is it possible to make a vegetarian version?
Definitely! It’s super easy. Simply omit the bacon. To make up for that smoky, savory flavor, you could add a pinch of smoked paprika to the butter mixture, or mix in other veggies like finely chopped sautéed mushrooms, sun-dried tomatoes, or even some black olives. It will be a different, but still utterly delicious, cheesy bread experience.


Loaded Cheesy Bread
Make this easy Loaded Cheesy Bread recipe for your next party! It's stuffed with melty cheese, bacon, and garlic butter. Get the simple recipe and bake it today!
Ingredients
For the Loaded Cheesy Bread
-
1 large loaf Italian or French bread (about 12-14 inches long)
-
8 oz block of mozzarella cheese (shredded, 225 g)
-
4 oz sharp cheddar cheese (shredded, 115 g)
-
6 slices thick-cut bacon (cooked until crispy and crumbled)
-
3 green onions (thinly sliced)
-
1/2 cup unsalted butter (melted, 115 g)
-
2 large cloves garlic (minced)
-
1 tsp Italian seasoning
-
1/4 tsp crushed red pepper flakes (optional, for a little kick)
-
1/4 cup freshly grated Parmesan cheese
-
2 tbsp fresh parsley (finely chopped)
Instructions
-
First, preheat your oven to 375°F (190°C). This is a hot-and-fast bake, so you want the oven fully ready to go. Line your baking sheet with parchment paper—this isn’t just for easy cleanup; it also prevents the bottom of the bread from getting too dark. Now, take your loaf of bread and, using a sharp serrated knife, make deep cuts about 1 inch apart across the top, but be careful not to cut all the way through the bottom crust. You’re creating little pockets for all that cheesy filling to nestle into.01
-
In a medium bowl, combine your melted butter, minced garlic, Italian seasoning, and those optional red pepper flakes if you’re using them. Give it a good whisk until it’s all combined and wonderfully fragrant. Using a pastry brush—or just a spoon if that’s what you have—generously brush this garlic butter mixture in between every single slit you cut into the bread. Really get it in there; this is what’s going to make the interior of the bread incredibly flavorful and moist.02
-
Now for the fun part—the loading! In another large bowl, toss together your shredded mozzarella, cheddar, most of the crumbled bacon (save a little for topping!), and most of the sliced green onions (again, save some for garnish). Take handfuls of this cheesy mixture and stuff it into all the crevices of the bread. Don’t be shy—pack it in there. You’ll notice some will fall out onto the baking sheet; that’s totally fine and will create delicious, crispy cheese chips.03
-
Once the bread is fully loaded, drizzle any remaining garlic butter over the top. Then, sprinkle the entire thing with the grated Parmesan cheese. This is going to create a fantastic, savory, slightly crispy crust on top. Wrap the entire loaf fairly loosely in aluminum foil, place it on your prepared baking sheet, and pop it into the preheated oven.04
-
Bake for about 12-15 minutes wrapped in the foil. This initial stage steams the bread slightly, ensuring the inside gets hot and the cheese melts perfectly without the top burning. Then, carefully remove the foil and continue baking for another 5-7 minutes, or until the cheese on top is completely melted, bubbly, and starting to get those gorgeous golden-brown spots.05
-
Take the baking sheet out of the oven—be careful, it’s hot! Immediately sprinkle the reserved bacon, green onions, and the fresh chopped parsley over the top. The residual heat will wilt the herbs and onions just slightly, releasing their aroma. Let it sit for about 2-3 minutes before serving—this allows the cheese to set just enough so it’s gloriously stringy but not a complete molten lava situation when you try to pull it apart. Then, dig in!06
Not what you're looking for?


