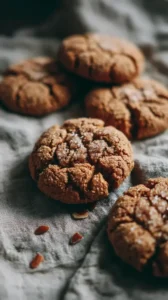
There’s something truly special about the scent of cookies baking during the holidays, isn’t there? I used to think that keeping things a bit lighter meant missing out, but then I discovered these low sugar Christmas cutouts. They’ve completely changed my approach to holiday baking, offering all the festive joy with a gentle sweetness. For me, this has become one of the most cherished Christmas dessert ideas—a tender, buttery canvas that proves you can absolutely enjoy easy Christmas treats without the sugar rush.
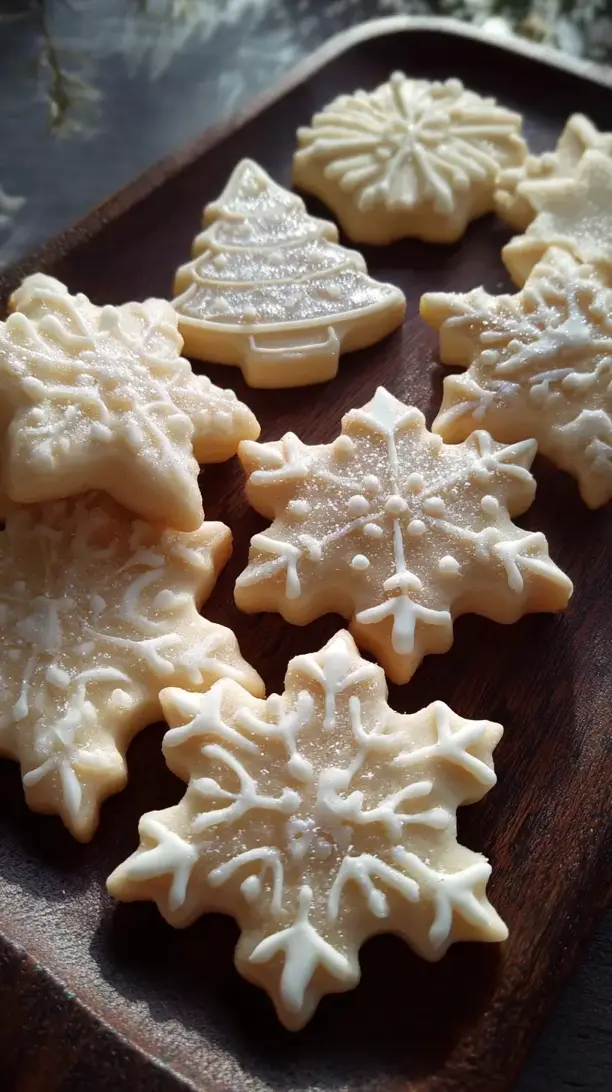
What I love most is how this recipe opens up a whole world of Christmas baking ideas. The dough rolls out like a dream and holds even the most intricate shapes, making it perfect for creating unique Christmas cookies that are as beautiful to look at as they are to eat. Whether you’re gathering the family for a decorating afternoon or simply want to add a heartfelt homemade touch to your tray, these cutouts shine brightly among all holiday cookies Christmas traditions. So, if you’re browsing through Christmas cookies recipes looking for that perfect blend of comfort and care, let this be your guide. It’s a comfort food recipe that lets you savor every magical bite of the season, fully and joyfully.
If you're looking for the perfect Low-Sugar Christmas Cutouts, you're in the right place. Whether you love Christmas Cookie or want to explore our Burgers collection, we've got you covered.


Why You’ll Love This Low-Sugar Christmas Cutouts
Balanced sweetness: Satisfies your cookie craving without a sugar rush.
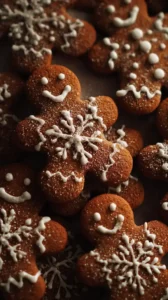
Fun to decorate: Holds sharp edges for stars, trees, and snowmen.
Lighter holiday treat: Great for those watching sugar intake.
Pure Christmas aroma: Fills your kitchen with vanilla, butter, and spice.
Ingredients & Tools
- 240 g all-purpose flour
- 115 g unsalted butter, softened
- 60 g erythritol or your preferred granulated sugar alternative
- 1 large egg, at room temperature
- 2 tsp pure vanilla extract
- 1/2 tsp baking powder
- 1/4 tsp salt
- 1/4 tsp ground nutmeg (optional, but lovely)
- For the Icing: 120 g powdered erythritol or powdered sugar alternative, 2-3 tbsp milk or cream, 1/2 tsp vanilla extract, and natural food colorings.
Tools: A stand mixer or hand mixer, rolling pin, assorted Christmas cookie cutters, parchment paper, baking sheets, and a cooling rack.
Notes: Using room temperature ingredients is key for a smooth dough. Don’t skip the nutmeg for extra warmth.
Nutrition (per serving)
| Calories: | 95 kcal |
| Protein: | 1.5 g |
| Fat: | 5 g |
| Carbs: | 11 g |
| Fiber: | 0.5 g |
Serves: 24 cookies | Prep Time: 25 minutes | Cook Time: 10 minutes | Total Time: 35 minutes (plus chilling)
Before You Start: Tips & Ingredient Notes
- Why room temperature butter and egg? This isn’t just a fussy baker’s rule. Soft butter creams perfectly with the sweetener, creating a light and fluffy base, and a room-temp egg incorporates smoothly without seizing up the butter.
- Can I use a different sugar alternative? Absolutely. Monk fruit or allulose blends work wonderfully. Just make sure you’re using a granulated version that measures 1:1 like sugar for the best texture.
- Don’t skip the chilling time. I know, the wait is the hardest part! But chilling the dough firms up the butter, which is the secret to cookies that hold their sharp shape and don’t spread into blobs in the oven.
- What about the icing? The beauty of a simple powdered sugar alternative icing is that you control the sweetness. Start with less liquid and add gradually until you get your perfect drizzling consistency.
How to Make Low-Sugar Christmas Cutouts
Step 1: In the bowl of your stand mixer fitted with the paddle attachment, cream together the softened butter and granulated sugar alternative. You’ll want to mix on medium speed for about 2-3 minutes, until the mixture is pale, fluffy, and well combined. Scrape down the sides of the bowl with a spatula to make sure everything is incorporated. This first step is where you’re building the structure and airiness of your cookie, so don’t rush it.
Step 2: Add the room temperature egg and vanilla extract to the creamed butter mixture. Mix on medium speed until fully combined. The mixture might look a little curdled at first, but just keep mixing—it will come together into a smooth, cohesive blend. This is also the time to add that optional nutmeg for a little extra festive flair.
Step 3: In a separate, medium-sized bowl, whisk together the all-purpose flour, baking powder, and salt. This ensures the leavening and salt are evenly distributed throughout the flour, which prevents any bitter pockets in your finished cookies.
Step 4: With your mixer on low speed, gradually add the dry ingredients to the wet ingredients. Mix just until the flour streaks disappear and a soft dough forms. Be careful not to overmix! Overworking the dough can develop the gluten and make your cookies tough instead of tender.
Step 5: Turn the dough out onto a piece of plastic wrap. Shape it into a flat disc—this makes it chill faster and is easier to roll out later. Wrap it tightly and refrigerate for at least 1 hour, or up to 2 days. This chilling step is non-negotiable for perfect cutouts.
Step 6: Preheat your oven to 350°F (175°C) and line your baking sheets with parchment paper. Take the chilled dough out of the fridge and let it sit for 5-10 minutes to become just pliable enough to roll. On a lightly floured surface, roll the dough to about a 1/4-inch thickness.
Step 7: Dip your cookie cutters in a little flour to prevent sticking, then press them firmly into the dough. Cut your shapes as close together as possible to minimize scraps. Use a small offset spatula or a knife to carefully transfer the shapes to your prepared baking sheets, leaving about an inch between them.
Step 8: Bake for 8-10 minutes, or until the edges are just barely starting to turn a light golden brown. The centers should still look soft and set. You’ll notice they don’t spread much, which is exactly what we want. Rotate the baking sheet halfway through for even baking.
Step 9: Let the cookies cool on the baking sheet for 5 minutes before transferring them to a wire cooling rack to cool completely. They will be very soft when they first come out but will firm up perfectly as they cool. Do not try to decorate warm cookies!
Step 10: While the cookies cool, make the icing. Whisk together the powdered sugar alternative, 2 tablespoons of milk, and vanilla extract. You’re aiming for a thick but pipeable consistency. Add more milk, a teaspoon at a time, if it’s too thick. Divide and color as desired, then decorate your completely cooled cookies to your heart’s content.
Storage & Freshness Guide
- Fridge: Store undecorated cookies in an airtight container for up to 1 week.
- Freezer: Freeze baked cookies (un-iced) in a single layer, then transfer to a bag for up to 3 months.
- Reviving: Refresh cookies in a 300°F oven for 3–5 minutes to crisp them up.
Serving Suggestions
Complementary Dishes
- A Charcuterie Board — The slight saltiness of cheeses and cured meats provides a wonderful contrast to the subtle sweetness of the cookies, creating a balanced snack platter.
- Spiced Nuts — A bowl of warm, cinnamon-toasted pecans or almonds offers a different texture and a complementary spiced flavor profile that feels very holiday-appropriate.
Drinks
- Hot Cocoa (sugar-free!) — A rich, warm mug of cocoa made with a sugar-free sweetener is the ultimate cozy pairing, especially after coming in from the cold.
- Peppermint Tea — The cool, refreshing notes of peppermint cleanse the palate and make each bite of cookie taste fresh and new again.
Something Sweet
- Vanilla Bean Panna Cotta — A silky, smooth, and not-too-sweet panna cotta provides a creamy counterpoint to the crisp texture of the cookies for a truly elegant dessert duo.
Top Mistakes to Avoid
- Mistake: Using melted butter. This is the number one reason cookies spread. You need softened, creamed butter to trap air and provide structure. Melted butter will make your beautiful shapes melt into puddles.
- Mistake: Skipping the chill time. I’ve messed this up before too, thinking I could save time. Warm dough is sticky and soft, leading to misshapen cookies that bake unevenly. Patience is a virtue here.
- Mistake: Rolling the dough too thin or too thick. A 1/4-inch thickness is the sweet spot. Too thin, and the cookies can burn; too thick, and they’ll be doughy in the middle and won’t have that classic crisp bite.
- Mistake> Decorating before completely cool. Any icing or glaze will immediately melt and slide right off a warm cookie, creating a messy, sticky situation. Let them cool on the rack until they are no longer warm to the touch.
Expert Tips
- Tip: Re-roll scraps only once. When you gather your dough scraps to re-roll, do it just one more time. After that, the dough can become overworked and tough, resulting in less tender cookies.
- Tip: Use a ruler for even thickness. For perfectly uniform cookies that bake at the same rate, place two wooden dowels or chopsticks of the same thickness on either side of your dough as guides for your rolling pin.
- Tip: Make the icing ahead. You can whip up the icing a day in advance and store it in an airtight container in the fridge. Just let it come to room temperature and give it a good stir before using.
- Tip: Freeze the shaped dough. For a fantastic make-ahead hack, place your unbaked cutouts on a parchment-lined sheet and freeze them solid. Then transfer to a zip-top bag. You can bake them straight from the freezer, adding a minute or two to the baking time.
FAQs
Can I make these cookies dairy-free?
Yes, you absolutely can! Simply replace the butter with a high-quality, firm vegan butter stick (not the spreadable kind from a tub). For the icing, use a plant-based milk like almond or oat. The texture and flavor will be wonderfully similar.
Why did my cookies turn out hard?
The most common culprit is overmixing the dough after adding the flour, which develops gluten. Mix just until the flour is incorporated. Another reason could be over-baking. Remember, the cookies continue to set as they cool on the hot baking sheet, so take them out when the edges are just lightly golden.
How should I store decorated cookies?
Store them in a single layer in an airtight container at room temperature. If you stack them, place a piece of parchment paper between the layers to protect your beautiful icing work. They’ll stay fresh and delicious for up to 5 days.
Can I use regular powdered sugar for the icing?
You can, but it will obviously increase the sugar content significantly. If that’s your preference, go for it! The recipe works the same way. Just be aware that traditional powdered sugar often contains a bit of cornstarch, which can make the icing slightly thicker, so you may need a touch more liquid.
My dough is too crumbly. What happened?
This usually means there’s a bit too much flour. Did you scoop the flour directly from the bag with your measuring cup? That can pack in extra flour. Next time, try spooning the flour into your measuring cup and leveling it off. For now, you can try kneading in a teaspoon of milk at a time until the dough just comes together.


Low-Sugar Christmas Cutouts: A Healthy Holiday Cookie Recipe
Create beautiful, healthier holiday cookies with these Low Sugar Christmas Cutouts. This easy Christmas treat yields tender, buttery cookies perfect for festive decorating.
Ingredients
For the cookie dough:
-
240 g all-purpose flour
-
115 g unsalted butter (softened)
-
60 g erythritol or your preferred granulated sugar alternative
-
1 large egg (at room temperature)
-
2 tsp pure vanilla extract
-
1/2 tsp baking powder
-
1/4 tsp salt
-
1/4 tsp ground nutmeg (optional, but lovely)
For the Icing:
-
120 g powdered erythritol or powdered sugar alternative
-
2-3 tbsp milk or cream
-
1/2 tsp vanilla extract
-
natural food colorings
Instructions
-
In the bowl of your stand mixer fitted with the paddle attachment, cream together the softened butter and granulated sugar alternative. You’ll want to mix on medium speed for about 2-3 minutes, until the mixture is pale, fluffy, and well combined. Scrape down the sides of the bowl with a spatula to make sure everything is incorporated. This first step is where you’re building the structure and airiness of your cookie, so don’t rush it.01
-
Add the room temperature egg and vanilla extract to the creamed butter mixture. Mix on medium speed until fully combined. The mixture might look a little curdled at first, but just keep mixing—it will come together into a smooth, cohesive blend. This is also the time to add that optional nutmeg for a little extra festive flair.02
-
In a separate, medium-sized bowl, whisk together the all-purpose flour, baking powder, and salt. This ensures the leavening and salt are evenly distributed throughout the flour, which prevents any bitter pockets in your finished cookies.03
-
With your mixer on low speed, gradually add the dry ingredients to the wet ingredients. Mix just until the flour streaks disappear and a soft dough forms. Be careful not to overmix! Overworking the dough can develop the gluten and make your cookies tough instead of tender.04
-
Turn the dough out onto a piece of plastic wrap. Shape it into a flat disc—this makes it chill faster and is easier to roll out later. Wrap it tightly and refrigerate for at least 1 hour, or up to 2 days. This chilling step is non-negotiable for perfect cutouts.05
-
Preheat your oven to 350°F (175°C) and line your baking sheets with parchment paper. Take the chilled dough out of the fridge and let it sit for 5-10 minutes to become just pliable enough to roll. On a lightly floured surface, roll the dough to about a 1/4-inch thickness.06
-
Dip your cookie cutters in a little flour to prevent sticking, then press them firmly into the dough. Cut your shapes as close together as possible to minimize scraps. Use a small offset spatula or a knife to carefully transfer the shapes to your prepared baking sheets, leaving about an inch between them.07
-
Bake for 8-10 minutes, or until the edges are just barely starting to turn a light golden brown. The centers should still look soft and set. You’ll notice they don’t spread much, which is exactly what we want. Rotate the baking sheet halfway through for even baking.08
-
Let the cookies cool on the baking sheet for 5 minutes before transferring them to a wire cooling rack to cool completely. They will be very soft when they first come out but will firm up perfectly as they cool. Do not try to decorate warm cookies!09
-
While the cookies cool, make the icing. Whisk together the powdered sugar alternative, 2 tablespoons of milk, and vanilla extract. You’re aiming for a thick but pipeable consistency. Add more milk, a teaspoon at a time, if it’s too thick. Divide and color as desired, then decorate your completely cooled cookies to your heart's content.10
Not what you're looking for?


