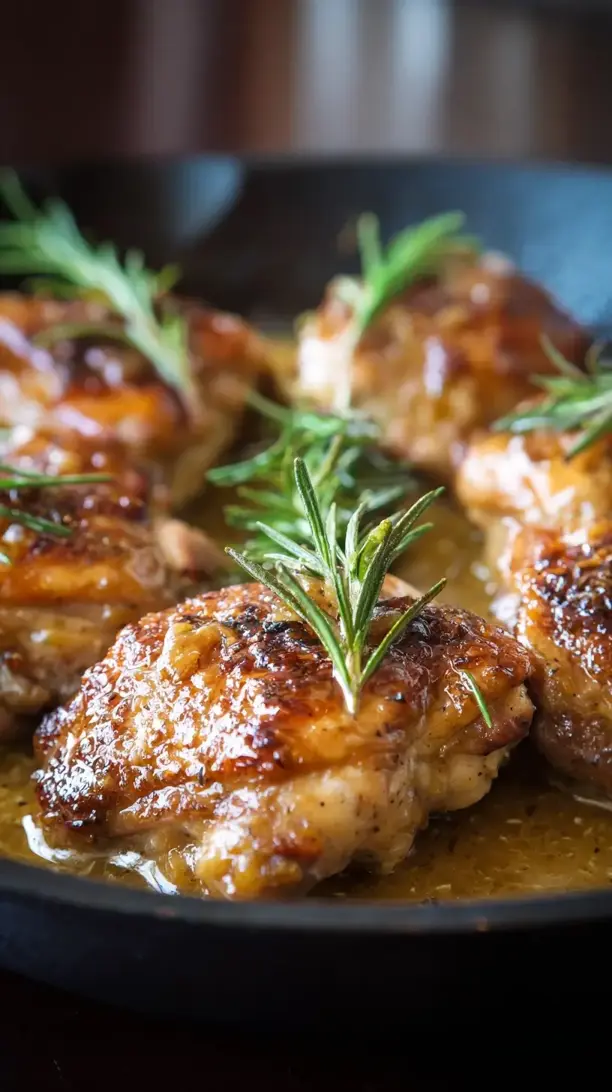
These Maple Dijon Chicken Thighs deliver juicy, crispy-skinned chicken with a sticky, savory-sweet glaze. The combination of real maple syrup and grainy Dijon is a classic for good reason—it’s balanced, flavorful, and incredibly easy. This dish feels both rustic and elegant, perfect for a weeknight or entertaining.
Nothing beats a great Maple Dijon Chicken Thighs. Whether you're a fan of Dinner Ideas or want to try something from our Chicken Recipes selection, keep scrolling!


Why You’ll Love This Maple Dijon Chicken Thighs
- Sweet & savory balance: Deep maple and tangy Dijon create complex flavor.
- Forgiving & easy: Chicken thighs stay juicy; glaze is simple to whisk.
- Crispy sticky skin: High heat renders fat and caramelizes the glaze.
- Fancy without effort: Impressive bistro-quality look with minimal prep.
Ingredients & Tools
- 6 bone-in, skin-on chicken thighs
- 3 tbsp pure maple syrup
- 2 tbsp grainy Dijon mustard
- 2 cloves garlic, minced
- 1 tbsp apple cider vinegar
- 1 tbsp olive oil
- 1 tsp fresh thyme leaves (or ½ tsp dried)
- ½ tsp smoked paprika
- ½ tsp onion powder
- To taste, kosher salt and freshly ground black pepper
Tools: A medium bowl for the marinade, a baking sheet, and a wire rack (highly recommended for crispier skin).
Notes: Use real maple syrup, not pancake syrup. Grainy Dijon adds texture and tang. Apple cider vinegar balances sweetness.
Nutrition (per serving)
| Calories: | 385 kcal |
| Protein: | 28 g |
| Fat: | 24 g |
| Carbs: | 10 g |
| Fiber: | 1 g |
Serves: 3 | Prep Time: 10 minutes | Cook Time: 35 minutes | Total Time: 45 minutes
Before You Start: Tips & Ingredient Notes
- Pat your chicken thighs DRY. This is the single most important step for achieving crispy skin. Any moisture on the surface will steam the skin instead of letting it crisp up. Use paper towels and really press down to get them as dry as possible.
- Why bone-in, skin-on? The bone helps the chicken cook more evenly and adds a ton of flavor, while the skin protects the meat from drying out and, of course, becomes a delicious, crispy treat. It’s worth seeking out for this recipe.
- Let the chicken come to room temperature. Taking the chicken out of the fridge 20-30 minutes before cooking helps it cook more evenly. A cold chicken thigh going into a hot oven can seize up and cook unevenly.
- Season generously under the skin. Don’t just sprinkle salt and pepper on top. Gently lift the skin and season the meat directly. This seasons the chicken itself, not just the outer layer, making every single bite perfectly seasoned.
- Use a wire rack if you have one. Placing the chicken on a wire rack set over a baking sheet allows hot air to circulate all around the thighs, resulting in skin that’s crispy all over, not just on top.
How to Make Maple Dijon Chicken Thighs
Step 1: Prep the Chicken and Oven. Start by preheating your oven to 400°F (200°C). This high heat is key for rendering the fat and crisping the skin. While the oven heats up, take your chicken thighs and pat them relentlessly dry with paper towels. Remember, dry skin is crispy skin. Then, using your fingers, gently loosen the skin from the meat—just slide your fingers underneath to create a little pocket. This isn’t just for seasoning; it also helps the fat render more effectively.
Step 2: Season the Chicken. Now, season both sides of the chicken thighs generously with kosher salt and black pepper. Be sure to lift that loosened skin and sprinkle salt and pepper directly onto the meat. Don’t be shy here—this is your chance to season the chicken from the inside out. A good pinch under the skin makes a world of difference. Let the seasoned thighs sit while you make the glaze.
Step 3: Whisk Together the Glaze. In a medium bowl, combine the maple syrup, grainy Dijon mustard, minced garlic, apple cider vinegar, olive oil, thyme, smoked paprika, and onion powder. Whisk it all together until it’s smooth and emulsified. You’ll notice the mixture will thicken slightly and take on a beautiful, glossy appearance. Give it a quick taste—you should get a hit of sweet, then tangy, with the herbs and spices lingering in the background.
Step 4: Coat the Chicken. Now for the fun part. Place your seasoned chicken thighs on the wire rack set over your baking sheet. Using a brush or a spoon, coat the top and sides of each thigh with about half of the maple Dijon glaze. Be generous, making sure to get the glaze into all the nooks and crannies. Reserve the other half of the glaze—you’ll use it later for a second coating that builds incredible flavor.
Step 5: Initial Roast. Place the baking sheet in the preheated oven and roast for 20 minutes. During this time, the chicken will start to cook through, and the skin will begin to render and crisp. The glaze will start to caramelize and bubble around the edges. Your kitchen will start to smell absolutely amazing.
Step 6: Second Glaze and Final Roast. Carefully remove the baking sheet from the oven. Brush the remaining glaze over the chicken thighs. This second layer is what creates that deeply flavored, sticky, restaurant-quality finish. Return the pan to the oven and roast for another 12-15 minutes, or until the chicken is cooked through. You’ll know it’s done when the internal temperature reaches 165°F (74°C) and the juices run clear. The skin should be a deep, golden brown and look irresistibly crispy.
Step 7: Rest and Serve. Once out of the oven, let the chicken thighs rest on the pan for about 5-10 minutes. This is a non-negotiable step! Resting allows the juices to redistribute throughout the meat, ensuring every bite is moist and tender. If you cut into it right away, all those precious juices will just run out onto the plate. After resting, transfer to a platter, spoon over any extra glaze from the pan, and serve immediately.
Storage & Freshness Guide
- Fridge: Store in an airtight container for up to 3 days.
- Freezer: Freeze in a single layer, then transfer to a bag for up to 2 months.
- Reviving: Reheat in a 350°F oven for 10–15 minutes to re-crisp skin.
Serving Suggestions
Complementary Dishes
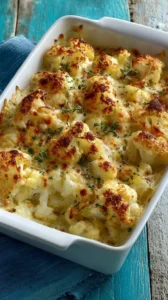
- Cauliflower Mash — The creamy, mild flavor is the perfect canvas for the rich, sticky sauce from the chicken. It soaks up all that goodness beautifully.
- Sautéed Garlic Green Beans — Their crisp-tender texture and sharp garlicky bite provide a fresh, vibrant contrast to the sweet and savory chicken.
- A Simple Arugula Salad — Tossed with a light lemon vinaigrette, the peppery arugula cuts through the richness of the dish and cleanses the palate.
Drinks
- A Crisp Chardonnay — Look for an unoaked version; its bright acidity and citrus notes will complement the mustard’s tang without overpowering the maple.
- An Amber Ale — The caramel and toasty malt flavors in the beer mirror the sweetness of the glaze, creating a really harmonious pairing.
- Sparkling Water with Lemon — The effervescence and citrus are a fantastic non-alcoholic option that refreshes your palate between each flavorful bite.
Something Sweet
- Dark Chocolate Avocado Mousse — It’s rich, creamy, and deeply chocolatey without being too heavy, providing a decadent yet low-carb finish to the meal.
- Berry Crumble — A warm bake of mixed berries with a nutty, buttery almond flour topping continues the cozy, rustic theme of the dinner.
- Vanilla Chia Pudding — Its cool, creamy texture and subtle sweetness are a light and refreshing way to end the evening on a satisfying note.
Top Mistakes to Avoid
- Using imitation maple syrup. The flavor is flat, overly sweet, and often contains corn syrup, which can burn easily and won’t provide the complex, woody sweetness that real maple syrup does. It makes a world of difference.
- Not patting the chicken dry. I’ve messed this up before too, thinking it wasn’t a big deal. It is. Wet skin steams and becomes rubbery, not crispy. Take the extra minute to dry it thoroughly.
- Skipping the second glaze. That first coat gives you a base layer, but the second one, applied halfway through cooking, is what builds depth and creates that signature sticky, lacquered finish. Don’t use all the glaze at once.
- Overcrowding the pan. If the thighs are too close together, they’ll steam each other. Give them some space on the wire rack so the hot air can circulate properly and crisp the skin from all angles.
Expert Tips
- Tip: Add a splash of soy sauce. For an extra layer of umami depth, whisk a teaspoon of tamari or coconut aminos into your glaze. It enhances the savory notes and makes the sweet and tangy flavors pop even more.
- Tip: Broil for the last minute. If your skin isn’t quite as crispy as you’d like by the end of the cooking time, switch the oven to broil for just 60-90 seconds. Watch it like a hawk—it can burn in a flash, but it gives you that perfect, crackly finish.
- Tip: Make a pan sauce. After resting the chicken, there will be delicious browned bits and glaze in the pan. Add a quarter cup of chicken broth to the hot pan, scrape up all those bits, and let it reduce slightly for a simple, incredible sauce to pour over everything.
- Tip: Marinate for deeper flavor. If you have time, combine the chicken and half the glaze in a zip-top bag and let it marinate in the fridge for up to 4 hours. The flavor will penetrate the meat more deeply, resulting in an even more flavorful dish.
FAQs
Can I use chicken breasts instead of thighs?
You can, but you’ll need to adjust the cooking time significantly. Boneless, skinless chicken breasts cook much faster and are far less forgiving. They can dry out easily. If you do use them, reduce the oven temperature to 375°F (190°C) and check for doneness after 15-20 minutes. I’d really recommend sticking with thighs for their juiciness and flavor, though.
How should I store and reheat leftovers?
Store any leftover chicken in an airtight container in the fridge for up to 3 days. To reheat, avoid the microwave if you want to keep the skin crispy. Instead, place it on a baking sheet and warm it in a 350°F (175°C) oven for about 10-15 minutes, until heated through. This will help re-crisp the skin better than any other method.
My glaze is burning in the pan. What did I do wrong?
This usually happens if you use a baking sheet without a rim or if there’s not enough fat to prevent direct contact. The sugar in the maple syrup can burn. Using a rimmed baking sheet and a wire rack elevates the chicken, allowing drips to fall away. If it’s still happening, you can add a little water or broth to the bottom of the pan to create steam and prevent burning.
Can I make this recipe ahead of time?
Absolutely! You can whisk the glaze and season the chicken up to a day in advance. Keep them separate in the fridge until you’re ready to cook. You can even apply the first coat of glaze and let the chicken sit on the racked baking sheet in the fridge for an hour before baking, which can help the skin dry out even more for extra crispiness.
Is grainy Dijon mustard essential, or can I use smooth?
Grainy Dijon (or whole-grain mustard) is highly recommended for its texture and more complex, less sharp flavor. The little mustard seeds pop with tangy flavor. If you only have smooth Dijon, you can use it, but the final result will be different—smoother and potentially a bit sharper. I’d suggest using 1.5 tablespoons of smooth Dijon instead of 2 to balance the tang.


Maple Dijon Chicken Thighs
Make juicy, crispy-skinned Maple Dijon Chicken Thighs with a sweet & savory glaze. An easy, impressive dinner recipe. Get the simple steps and cook it tonight!
Ingredients
For the Ingredients
-
6 bone-in, skin-on chicken thighs
-
3 tbsp pure maple syrup
-
2 tbsp grainy Dijon mustard
-
2 cloves garlic (minced)
-
1 tbsp apple cider vinegar
-
1 tbsp olive oil
-
1 tsp fresh thyme leaves (or ½ tsp dried)
-
½ tsp smoked paprika
-
½ tsp onion powder
-
kosher salt and freshly ground black pepper (to taste)
Instructions
-
Start by preheating your oven to 400°F (200°C). This high heat is key for rendering the fat and crisping the skin. While the oven heats up, take your chicken thighs and pat them relentlessly dry with paper towels. Remember, dry skin is crispy skin. Then, using your fingers, gently loosen the skin from the meat—just slide your fingers underneath to create a little pocket. This isn't just for seasoning; it also helps the fat render more effectively.01
-
Now, season both sides of the chicken thighs generously with kosher salt and black pepper. Be sure to lift that loosened skin and sprinkle salt and pepper directly onto the meat. Don't be shy here—this is your chance to season the chicken from the inside out. A good pinch under the skin makes a world of difference. Let the seasoned thighs sit while you make the glaze.02
-
In a medium bowl, combine the maple syrup, grainy Dijon mustard, minced garlic, apple cider vinegar, olive oil, thyme, smoked paprika, and onion powder. Whisk it all together until it’s smooth and emulsified. You’ll notice the mixture will thicken slightly and take on a beautiful, glossy appearance. Give it a quick taste—you should get a hit of sweet, then tangy, with the herbs and spices lingering in the background.03
-
Now for the fun part. Place your seasoned chicken thighs on the wire rack set over your baking sheet. Using a brush or a spoon, coat the top and sides of each thigh with about half of the maple Dijon glaze. Be generous, making sure to get the glaze into all the nooks and crannies. Reserve the other half of the glaze—you’ll use it later for a second coating that builds incredible flavor.04
-
Place the baking sheet in the preheated oven and roast for 20 minutes. During this time, the chicken will start to cook through, and the skin will begin to render and crisp. The glaze will start to caramelize and bubble around the edges. Your kitchen will start to smell absolutely amazing.05
-
Carefully remove the baking sheet from the oven. Brush the remaining glaze over the chicken thighs. This second layer is what creates that deeply flavored, sticky, restaurant-quality finish. Return the pan to the oven and roast for another 12-15 minutes, or until the chicken is cooked through. You’ll know it’s done when the internal temperature reaches 165°F (74°C) and the juices run clear. The skin should be a deep, golden brown and look irresistibly crispy.06
-
Once out of the oven, let the chicken thighs rest on the pan for about 5-10 minutes. This is a non-negotiable step! Resting allows the juices to redistribute throughout the meat, ensuring every bite is moist and tender. If you cut into it right away, all those precious juices will just run out onto the plate. After resting, transfer to a platter, spoon over any extra glaze from the pan, and serve immediately.07
Not what you're looking for?


