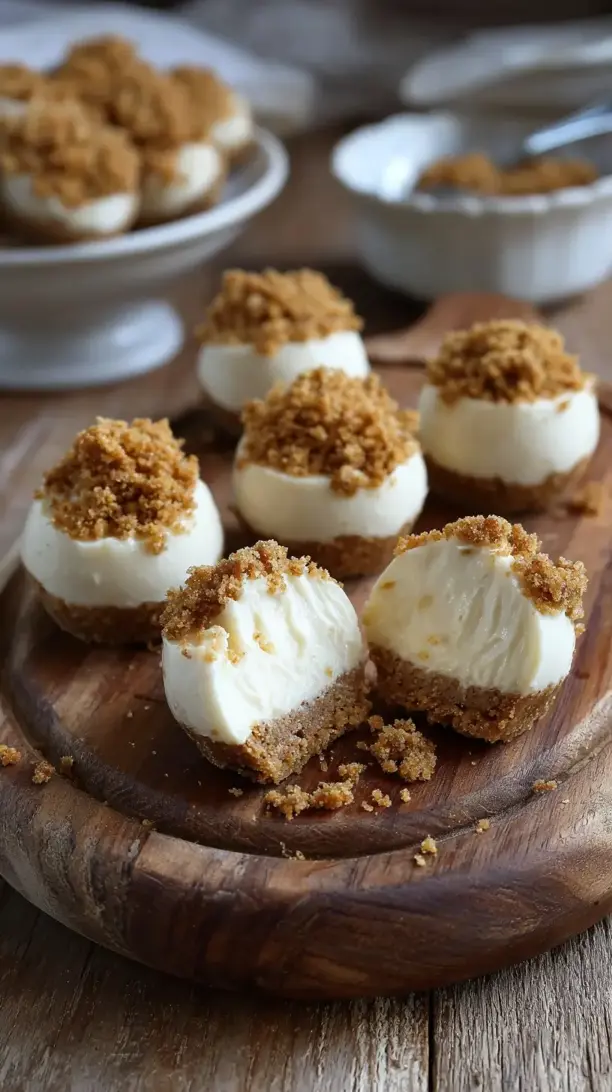
These No Bake Cheesecake Bites deliver creamy, tangy sweetness with a buttery biscuit base—all without turning on your oven. They’re perfect for parties or late-night cravings and come together in just 20 minutes of active work. This no bake cheesecake bites recipe is foolproof, portable, and fantastically delicious.
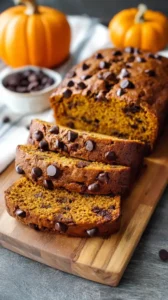
Looking for No Bake Cheesecake Bites inspiration? You'll love what we have! Explore more Snacks recipes or discover our Crockpot Recipes favorites.


Why You’ll Love This No Bake Cheesecake Bites
- Effortless elegance: No baking required—just mix, chill, and enjoy.
- Incredibly customizable: A blank canvas for fruit, cookies, or caramel swirls.
- Perfect portion control: Satisfying little bites without overwhelming sweetness.
- Make-ahead magic: They improve overnight, ideal for stress-free entertaining.
Ingredients & Tools
- 200 g digestive biscuits or graham crackers
- 75 g unsalted butter, melted
- 450 g full-fat cream cheese, at room temperature
- 100 g icing sugar
- 1 tsp vanilla extract
- 250 ml double cream (heavy cream), cold
- Pinch of fine sea salt
Tools: Food processor or zip-top bag and rolling pin, electric hand mixer or stand mixer, spatula, 24-cup mini muffin tin (or a silicone mold), piping bag (optional but helpful)
Notes: Using full-fat cream cheese and cold double cream is non-negotiable for structure and lush texture. The pinch of salt makes the vanilla and sweetness pop.
Nutrition (per serving)
| Calories: | 145 kcal |
| Protein: | 2 g |
| Fat: | 11 g |
| Carbs: | 10 g |
| Fiber: | 0.2 g |
Serves: 24 bites | Prep Time: 25 minutes | Chill Time: 4 hours (or overnight) | Total Time: 4 hours 25 minutes
Before You Start: Tips & Ingredient Notes
- Why room temperature cream cheese? If your cream cheese is cold, you’ll end up with lumpy batter no matter how long you mix. Taking it out an hour ahead makes for an impossibly smooth, creamy filling.
- Can I use a different biscuit? Absolutely! Digestives and graham crackers are classics, but ginger nuts, Oreos (without the filling), or even speculoos work wonderfully. Just aim for a similar weight for the base.
- What if I don’t have a mini muffin tin? No problem at all. You can use a silicone mold, or simply spoon the mixture into small glasses or jars for deconstructed cheesecake pots. It’s all about the layers.
- Is there a substitute for double cream? For the right consistency, you need a high-fat cream (at least 35% milk fat). Whipping cream works, but single cream or half-and-half won’t whip up properly and your bites won’t set.
How to Make No Bake Cheesecake Bites
Step 1: First, let’s tackle the base. Add your biscuits to a food processor and pulse until you have fine, even crumbs. If you’re going the low-tech route, pop them into a sturdy zip-top bag and roll with a rolling pin until crushed. You’re aiming for the texture of damp sand—no big chunks. Transfer the crumbs to a bowl and pour over the melted butter. Mix really well until every crumb is coated and the mixture holds together when you pinch it. This buttery layer is the foundation of every great bite.
Step 2: Now, prepare your mold. If you’re using a mini muffin tin, I highly recommend lining it with mini paper cases for easy removal. Spoon about a teaspoon of the crumb mixture into each cavity. Use the back of a small spoon or a tamper to press the crumbs down firmly and evenly. You want a compact base that won’t fall apart. Pop the whole tin into the fridge while you work on the filling—this helps the base set a little.
Step 3: Time for the star of the show: the filling. In a large bowl, beat the room-temperature cream cheese with an electric mixer on medium speed until it’s completely smooth and pliable. This should take about 2 minutes. Scrape down the sides of the bowl with a spatula. Now, sift in the icing sugar—this prevents lumps—and add the vanilla extract and that all-important pinch of salt. Beat again until everything is perfectly combined and the mixture looks silky.
Step 4: In a separate, clean bowl, pour the cold double cream. Using the whisk attachment on your mixer, whip the cream until it reaches stiff peaks. You’ll know it’s ready when you lift the whisk and the peak stands straight up without flopping over. Be careful not to over-whip, or you’ll risk it turning grainy. This whipped cream is what gives the filling its airy, mousse-like texture.
Step 5: Now for the gentle part. Add about a third of the whipped cream to the cream cheese mixture and fold it in with your spatula. This first addition lightens the dense cheese. Once incorporated, gently fold in the remaining whipped cream. Use a figure-eight motion, cutting through the center and folding over, until no white streaks remain. The mixture should be thick, smooth, and beautifully pale.
Step 6: Retrieve your chilled bases from the fridge. You can spoon the filling into the molds, but for neatest results, transfer the filling to a piping bag (no nozzle needed, just snip the end). Pipe the filling into each cavity, swirling it slightly at the top. Smooth the tops with a small offset spatula or the back of a spoon. You should use up all the filling.
Step 7: The final, most crucial step: chilling. Cover the tin loosely with cling film and refrigerate for at least 4 hours, but ideally overnight. This patience-testing wait is when the magic happens—the bites firm up, the flavors meld, and they become the perfect, sliceable texture. Don’t rush it!
Storage & Freshness Guide
- Fridge: Store in an airtight container for up to 4 days; bases may soften slightly over time.
- Freezer: Freeze solid on a tray, then transfer to a container; enjoy as a firm, ice-cream-like treat for up to 1 month.
- Reviving: If bites soften, refrigerate 30 minutes to re-firm; frozen bites can be eaten straight from freezer or thawed briefly in fridge.
Serving Suggestions
Complementary Dishes
- A fresh fruit platter — The bright, acidic notes of berries, mango, or pineapple cut through the richness of the cheesecake beautifully, creating a lovely balance on the palate.
- A sharp citrus salad — Thinly sliced oranges or grapefruit with a hint of mint provides a refreshing, zesty counterpoint that makes each cheesecake bite taste new again.
- Salty snacks like pretzels or mixed nuts — Offering something salty on the side enhances the sweet creaminess and makes for a more dynamic snacking experience.
Drinks
- A glass of cold milk or a latte — It’s a classic pairing for a reason. The creamy beverage mirrors the dessert’s texture and helps cleanse the palate between bites.
- Sweet Moscato d’Asti — The gentle fizz and light sweetness of this wine complement the cheesecake without overpowering its delicate vanilla flavor.
- Earl Grey tea, iced or hot — The bergamot in the tea has a lovely floral-citrus quality that dances wonderfully with the creamy, tangy notes of the filling.
Something Sweet
- Dark chocolate-dipped strawberries — This adds another layer of indulgence and a different texture. The bitter dark chocolate is a fantastic partner for the sweet cheesecake.
- A drizzle of salted caramel sauce — Just a little over the top takes these bites to a whole new level of decadence, playing on that classic sweet-and-salty combination.
- A small scoop of raspberry sorbet — The tartness and icy texture provide a stunning contrast, making for a truly sophisticated dessert duo.
Top Mistakes to Avoid
- Mistake: Using cold cream cheese. This is the number one reason for a lumpy filling. Cold cheese won’t incorporate smoothly with the other ingredients, leaving you with an uneven texture. Patience is key—let it warm up.
- Mistake: Not whipping the cream enough. If your cream is still soft, the filling won’t have enough structure to hold its shape, and your bites will slump. Whip it to stiff peaks for the best results.
- Mistake> Rushing the chill time. I know it’s tempting, but if you don’t give them a full 4 hours, the bites will be too soft to hold their form and the base won’t have set properly. Trust the process.
- Mistake: Overmixing the filling. Once you add the whipped cream, you need to fold gently. Aggressive beating will knock the air out, resulting in a dense, heavy filling instead of a light and airy one.
Expert Tips
- Tip: Use a hot knife for clean cuts. If you’re making a larger version or just want pristine edges, dip your knife in hot water and wipe it dry before slicing. It glides through the creamy filling without dragging.
- Tip> Toast your biscuit crumbs. For a deeper, nuttier base, spread your biscuit crumbs on a baking tray and toast them in a 180°C (350°F) oven for 5-7 minutes before mixing with the butter. Let them cool completely first.
- Tip: Create a flavor swirl. Before chilling, dollop a teaspoon of fruit curd or chocolate sauce on top of each bite and use a toothpick to gently swirl it in for a marbled, professional look.
- Tip: Freeze for a firmer, ice-cream-like treat. These bites freeze beautifully. Pop them on a tray until solid, then transfer to a container. They’re a fantastic frozen dessert straight from the freezer.
FAQs
How long will these cheesecake bites keep in the fridge?
They will stay perfectly delicious for up to 4 days when stored in an airtight container in the refrigerator. The base may soften slightly by day 4, but they’ll still be wonderfully tasty. I don’t recommend keeping them much longer than that, as the texture can begin to change.
Can I make these bites without a mixer?
You can, but it will require some elbow grease! For the biscuit base, the bag-and-rolling-pin method works fine. For the filling, ensure your cream cheese is very soft. You can whisk the cream by hand with a balloon whisk—it will take several minutes of vigorous whisking until you get stiff peaks. Then, fold everything together gently.
My filling is too runny. What happened?
This usually points to one of two issues: either your cream wasn’t whipped to stiff peaks, or your cream cheese was too warm. If it’s already mixed, all is not lost! Just pop the entire mixture into the fridge for 20-30 minutes to firm up a bit before trying to pipe or spoon it again.
Can I use low-fat cream cheese and cream to make this lighter?
I really don’t recommend it. Low-fat dairy products have more water and less fat, which means the filling won’t set properly. The result will be a soft, potentially watery mixture that doesn’t hold its shape. For the best texture and flavor, full-fat is the way to go.
How do I get the bites out of the tin without breaking them?
The paper liners are your best friend here! If you didn’t use liners, gently run a small offset spatula or a butter knife around the edge of each bite to loosen it. You can also briefly dip the bottom of the tin in warm water to help release them.


No Bake Cheesecake Bites
Make perfect No Bake Cheesecake Bites in just 20 minutes of prep! This easy, no-bake recipe is creamy, portable, and ideal for parties. Get the simple recipe now!
Ingredients
For the base:
-
200 g digestive biscuits or graham crackers
-
75 g unsalted butter (melted)
For the filling:
-
450 g full-fat cream cheese (at room temperature)
-
100 g icing sugar
-
1 tsp vanilla extract
-
250 ml double cream (heavy cream, cold)
-
fine sea salt (pinch)
Instructions
-
First, let’s tackle the base. Add your biscuits to a food processor and pulse until you have fine, even crumbs. If you’re going the low-tech route, pop them into a sturdy zip-top bag and roll with a rolling pin until crushed. You’re aiming for the texture of damp sand—no big chunks. Transfer the crumbs to a bowl and pour over the melted butter. Mix really well until every crumb is coated and the mixture holds together when you pinch it. This buttery layer is the foundation of every great bite.01
-
Now, prepare your mold. If you’re using a mini muffin tin, I highly recommend lining it with mini paper cases for easy removal. Spoon about a teaspoon of the crumb mixture into each cavity. Use the back of a small spoon or a tamper to press the crumbs down firmly and evenly. You want a compact base that won’t fall apart. Pop the whole tin into the fridge while you work on the filling—this helps the base set a little.02
-
Time for the star of the show: the filling. In a large bowl, beat the room-temperature cream cheese with an electric mixer on medium speed until it’s completely smooth and pliable. This should take about 2 minutes. Scrape down the sides of the bowl with a spatula. Now, sift in the icing sugar—this prevents lumps—and add the vanilla extract and that all-important pinch of salt. Beat again until everything is perfectly combined and the mixture looks silky.03
-
In a separate, clean bowl, pour the cold double cream. Using the whisk attachment on your mixer, whip the cream until it reaches stiff peaks. You’ll know it’s ready when you lift the whisk and the peak stands straight up without flopping over. Be careful not to over-whip, or you’ll risk it turning grainy. This whipped cream is what gives the filling its airy, mousse-like texture.04
-
Now for the gentle part. Add about a third of the whipped cream to the cream cheese mixture and fold it in with your spatula. This first addition lightens the dense cheese. Once incorporated, gently fold in the remaining whipped cream. Use a figure-eight motion, cutting through the center and folding over, until no white streaks remain. The mixture should be thick, smooth, and beautifully pale.05
-
Retrieve your chilled bases from the fridge. You can spoon the filling into the molds, but for neatest results, transfer the filling to a piping bag (no nozzle needed, just snip the end). Pipe the filling into each cavity, swirling it slightly at the top. Smooth the tops with a small offset spatula or the back of a spoon. You should use up all the filling.06
-
The final, most crucial step: chilling. Cover the tin loosely with cling film and refrigerate for at least 4 hours, but ideally overnight. This patience-testing wait is when the magic happens—the bites firm up, the flavors meld, and they become the perfect, sliceable texture. Don’t rush it!07
Not what you're looking for?


