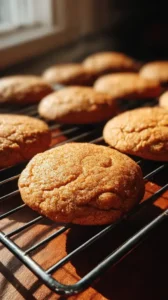
There’s a special kind of kitchen magic in realizing you can make something truly festive without ever turning on the oven. I felt it the first time I whipped up these No-Bake Chocolate Peppermint Cookies. As someone who loves the holidays but often runs short on time, finding a dessert that feels both indulgent and effortless was a total game-changer. These are the ultimate easy Christmas treats, with a fudgy, brownie-like texture and a refreshing minty crunch that makes for a truly unique Christmas cookies experience.
If your list of Christmas dessert ideas needs something wonderfully simple, this holiday cookies Christmas recipe is here for you. It’s a standout in any collection of Christmas cookies recipes, perfect when you want a delicious departure from the usual baked goods. They come together in mere minutes, making them ideal for last-minute gatherings, gift boxes, or simply as a sweet holiday treat to savor with a cup of cocoa.
Honestly, whether you’re planning your lineup of Christmas sweets or just need a little comfort food recipe, these no-bake delights are pure festive joy. They’re the kind of treat that creates those warm, happy holiday memories—simple, delicious, and completely irresistible.
Love No-Bake Chocolate Peppermint Cookies? So do we! If you're into Christmas Cookie or curious about Breakfast & Brunch, you'll find plenty of inspiration below.


Why You’ll Love This No-Bake Chocolate Peppermint Cookies
- Fast & foolproof: No preheating or baking required.
- Fudgy-chewy texture: Firm outside with a soft, rich interior.
- Festive & special: Chocolate and peppermint combo feels celebratory.
- Easily customizable: Swap peppermint for nuts, marshmallows, or dried fruit.
Ingredients & Tools
- 1 ½ cups granulated sugar
- ½ cup unsalted butter
- ½ cup whole milk
- ¼ cup unsweetened cocoa powder (use a good quality one for the best flavor)
- A pinch of salt
- 1 teaspoon pure vanilla extract
- 3 cups old-fashioned rolled oats (not instant)
- ½ cup crushed peppermint candies or candy canes, plus more for topping
Tools: A medium-sized heavy-bottomed saucepan, a wooden spoon or heatproof spatula, a baking sheet, parchment paper or a silicone baking mat, and a tablespoon or small cookie scoop.
Notes: The quality of your cocoa powder really makes a difference here—it’s the star of the show. And using old-fashioned oats is key for the right chewy texture; instant oats will turn the cookies mushy. Don’t skip the salt, either—it balances the sweetness and makes the chocolate taste even richer.
Nutrition (per serving)
| Calories: | 180 kcal |
| Protein: | 3 g |
| Fat: | 7 g |
| Carbs: | 29 g |
| Fiber: | 2 g |
Serves: 18 | Prep Time: 10 mins | Cook Time: 5 mins | Total Time: 1 hour 15 mins (includes setting)
Before You Start: Tips & Ingredient Notes
- Get your mise en place ready. This recipe moves quickly once the boiling starts. Measure everything out beforehand and have your baking sheet lined and ready to go. You won’t have time to search for ingredients once the pot is on the heat.
- Why a heavy-bottomed saucepan? It distributes heat evenly, preventing the sugary mixture from scorching or burning in hot spots. A thin pan can ruin your batch in seconds, so it’s worth using a good one.
- Crush your peppermints properly. You want a mix of fine crumbs and small chunks. Place them in a zip-top bag and use a rolling pin or the bottom of a heavy pan to crush them. This gives you those lovely little bursts of minty flavor and pretty red and white specks throughout the cookies.
- Don’t substitute the oats. Old-fashioned rolled oats are essential for the right structure and chew. Quick oats will absorb too much liquid and make the cookies gummy, and steel-cut oats are far too hard and won’t soften properly.
How to Make No-Bake Chocolate Peppermint Cookies
Step 1: Prepare your workstation. Line a large baking sheet with parchment paper or a silicone baking mat. This is your only chance to do this before the cooking process begins, which is fast and furious. Have your measured oats and crushed peppermints ready in a separate bowl.
Step 2: Combine the base ingredients. In your heavy-bottomed saucepan, combine the sugar, butter, milk, cocoa powder, and that pinch of salt. Place the pan over medium heat. Stir constantly with a wooden spoon or spatula until the butter has fully melted and the mixture is smooth and unified. You’ll notice it will look a bit grainy from the sugar at first, but it will become glossy as it heats up.
Step 3: Bring to a rolling boil. This is the most critical part! Once the mixture is smooth, stop stirring and let it come to a full, rolling boil. You should see large bubbles breaking over the entire surface that can’t be stirred down. Once it reaches this point, start your timer for exactly 1 minute and 30 seconds. Let it boil undisturbed—no stirring! This step is crucial for cooking the sugar to the right stage so your cookies will set properly instead of staying sticky.
Step 4: Remove from heat and add flavor. After the 90 seconds are up, immediately remove the pan from the heat. Stir in the vanilla extract. Be careful, as the mixture will be extremely hot and may bubble up a bit when you add the vanilla. The aroma at this point is just incredible—deep, rich chocolate with a hint of vanilla.
Step 5: Incorporate the oats and peppermints. Now, quickly pour in the rolled oats and the ½ cup of crushed peppermints. Stir vigorously until everything is completely coated in the chocolate mixture and no dry spots remain. The heat from the mixture will soften the oats slightly and start to melt the edges of the peppermint candies, which helps them bind everything together.
Step 6: Scoop and drop. Working quickly while the mixture is still warm and pliable, drop tablespoon-sized mounds onto your prepared baking sheet. I like to use a small cookie scoop for uniformity, but two spoons work just fine. If you want, you can press a few extra pieces of crushed peppermint onto the top of each cookie for a more festive look.
Step 7: Let them set. This is the test of your patience! Allow the cookies to cool at room temperature until they are firm to the touch. You can speed this up by placing the entire baking sheet in the refrigerator for about 30-45 minutes. They will firm up as the chocolate mixture cools and crystallizes.
Storage & Freshness Guide
- Fridge: Store in an airtight container for up to 1 week.
- Freezer: Freeze between parchment layers for up to 2 months.
- Reviving: If cookies soften, refrigerate briefly to re-firm.
Serving Suggestions
Complementary Dishes
- A scoop of vanilla bean ice cream — The creamy, cold vanilla is a classic partner for the rich, minty chocolate. It turns the cookies into a deconstructed peppermint patty sundae.
- A warm mug of homemade hot chocolate — Double down on the chocolate coziness. The warm drink makes the cool, firm texture of the cookies even more satisfying.
- A cheese board with sharp cheddar — This might sound odd, but the sharp, salty cheese provides a fantastic contrast to the sweet, minty cookies, cleansing the palate between bites.
Drinks
- Cold glass of milk — It’s a timeless pairing for a reason. The milk cuts through the richness and makes the whole experience feel nostalgic and comforting.
- Peppermint tea — Amplify the minty notes with a hot or iced cup of peppermint tea. It’s a refreshing and caffeine-free option that makes the treat feel a bit lighter.
- An espresso or strong coffee — The bitterness of a good espresso is the perfect counterpoint to the sweetness of the cookies, creating a well-balanced flavor experience.
Something Sweet
- Simple shortbread cookies — Their buttery, crumbly texture and mild flavor provide a lovely, simple contrast to the intense fudgy mint of these no-bake cookies.
- Creamy rice pudding — Serve a cookie or two crumbled on top of a bowl of cool, creamy rice pudding for a delightful mix of textures and temperatures.
- Fresh citrus salad — A small side of orange and grapefruit segments tossed with a little honey can brighten everything up and balance the decadence.
Top Mistakes to Avoid
- Mistake: Not reaching a full, rolling boil. If your mixture is just simmering, you haven’t cooked the sugar enough. The cookies will likely not set and will remain sticky and messy. You need those vigorous, large bubbles across the entire surface.
- Mistake: Stirring during the boil. I’ve messed this up before too—it’s tempting to stir! But stirring can cause the mixture to crystallize or prevent it from reaching the correct temperature, resulting in a grainy texture.
- Mistake: Boiling for too long or too short a time. Set a timer for exactly 1 minute 30 seconds. A shorter boil means runny cookies; a longer boil can make them dry, crumbly, and potentially burnt.
- Mistake: Using quick oats instead of old-fashioned. This will change the texture completely. Quick oats absorb liquid too readily and will turn your cookies into a soft, mushy puck instead of a chewy, textured cookie.
Expert Tips
- Tip: Use a candy thermometer for absolute precision. If you want to be 100% sure, cook the mixture until it reaches 230°F (110°C) on a candy thermometer. This is the “thread stage” and is the perfect temperature for no-bake cookies to set with a fudgy chew.
- Tip: Add a tablespoon of smooth peanut butter. For a delicious twist, stir in a spoonful of peanut butter with the vanilla. It adds a subtle salty, nutty depth that pairs amazingly well with chocolate and mint.
- Tip: For a more intense mint flavor, add extract. If you’re a mint lover, add ¼ to ½ teaspoon of pure peppermint extract along with the vanilla. This will give you a powerful, cool mint flavor that permeates the entire cookie.
- Tip: Re-soften the mixture if it hardens too fast. If the mixture becomes too stiff to scoop before you’re finished, place the saucepan back over very low heat for just 15-20 seconds, stirring constantly, to loosen it up again.
FAQs
Why are my no-bake cookies runny and not setting?
This is almost always due to not boiling the mixture for long enough or not achieving a true rolling boil. The sugar needs to reach a high enough temperature to crystallize properly as it cools. If they are still sticky after a few hours, you can try re-rolling the mixture into balls—sometimes the action of handling it helps them set. Unfortunately, if they are truly soupy, it’s best to chalk it up to experience and try again, making sure you get that vigorous, unstirred boil for the full 90 seconds.
Can I make these cookies ahead of time?
Absolutely! They are fantastic for making ahead. Once fully set, store them in an airtight container at room temperature for up to 5 days. You can also layer them between sheets of parchment paper to prevent sticking. For longer storage, they freeze beautifully for up to 2 months. Just thaw at room temperature for about 30 minutes before serving.
My cookies turned out dry and crumbly. What happened?
This usually means you boiled the mixture for too long, which cooked off too much of the liquid. The sugar then hardens too much as it cools. Another possibility is that you measured your oats with a heavy hand, adding too many dry ingredients for the amount of liquid binder. Next time, be precise with your timer and use the “spoon and level” method for measuring the oats.
Can I use a dairy-free butter and milk alternative?
You can, but the results can vary. I’ve had success with a high-fat, non-dairy butter stick and full-fat canned coconut milk. The fat content is important for the right texture and mouthfeel. Avoid watery alternatives like almond or rice milk, as they won’t provide the necessary richness and could throw off the setting chemistry.
Is it okay if some of the peppermint candy melts into the mixture?
Yes, that’s perfectly fine and actually desirable! When you stir the crushed candies into the hot mixture, some of them will melt, creating little streaks of mint flavor throughout the fudgy base. This is what you want! The remaining pieces that don’t fully melt will provide the satisfying crunchy bits.


No-Bake Chocolate Peppermint Cookies: An Easy Holiday Treat
No Bake Chocolate Peppermint Cookies are the ultimate easy Christmas treat. These fudgy, minty bites require no oven and are pure holiday magic.
Ingredients
For the Ingredients
-
1 ½ cups granulated sugar
-
½ cup unsalted butter
-
½ cup whole milk
-
¼ cup unsweetened cocoa powder
-
A pinch salt
-
1 teaspoon pure vanilla extract
-
3 cups old-fashioned rolled oats
-
½ cup crushed peppermint candies or candy canes (plus more for topping)
Instructions
-
Prepare your workstation. Line a large baking sheet with parchment paper or a silicone baking mat. This is your only chance to do this before the cooking process begins, which is fast and furious. Have your measured oats and crushed peppermints ready in a separate bowl.01
-
Combine the base ingredients. In your heavy-bottomed saucepan, combine the sugar, butter, milk, cocoa powder, and that pinch of salt. Place the pan over medium heat. Stir constantly with a wooden spoon or spatula until the butter has fully melted and the mixture is smooth and unified. You’ll notice it will look a bit grainy from the sugar at first, but it will become glossy as it heats up.02
-
Bring to a rolling boil. This is the most critical part! Once the mixture is smooth, stop stirring and let it come to a full, rolling boil. You should see large bubbles breaking over the entire surface that can’t be stirred down. Once it reaches this point, start your timer for exactly 1 minute and 30 seconds. Let it boil undisturbed—no stirring! This step is crucial for cooking the sugar to the right stage so your cookies will set properly instead of staying sticky.03
-
Remove from heat and add flavor. After the 90 seconds are up, immediately remove the pan from the heat. Stir in the vanilla extract. Be careful, as the mixture will be extremely hot and may bubble up a bit when you add the vanilla. The aroma at this point is just incredible—deep, rich chocolate with a hint of vanilla.04
-
Incorporate the oats and peppermints. Now, quickly pour in the rolled oats and the ½ cup of crushed peppermints. Stir vigorously until everything is completely coated in the chocolate mixture and no dry spots remain. The heat from the mixture will soften the oats slightly and start to melt the edges of the peppermint candies, which helps them bind everything together.05
-
Scoop and drop. Working quickly while the mixture is still warm and pliable, drop tablespoon-sized mounds onto your prepared baking sheet. I like to use a small cookie scoop for uniformity, but two spoons work just fine. If you want, you can press a few extra pieces of crushed peppermint onto the top of each cookie for a more festive look.06
-
Let them set. This is the test of your patience! Allow the cookies to cool at room temperature until they are firm to the touch. You can speed this up by placing the entire baking sheet in the refrigerator for about 30-45 minutes. They will firm up as the chocolate mixture cools and crystallizes.07
Not what you're looking for?


