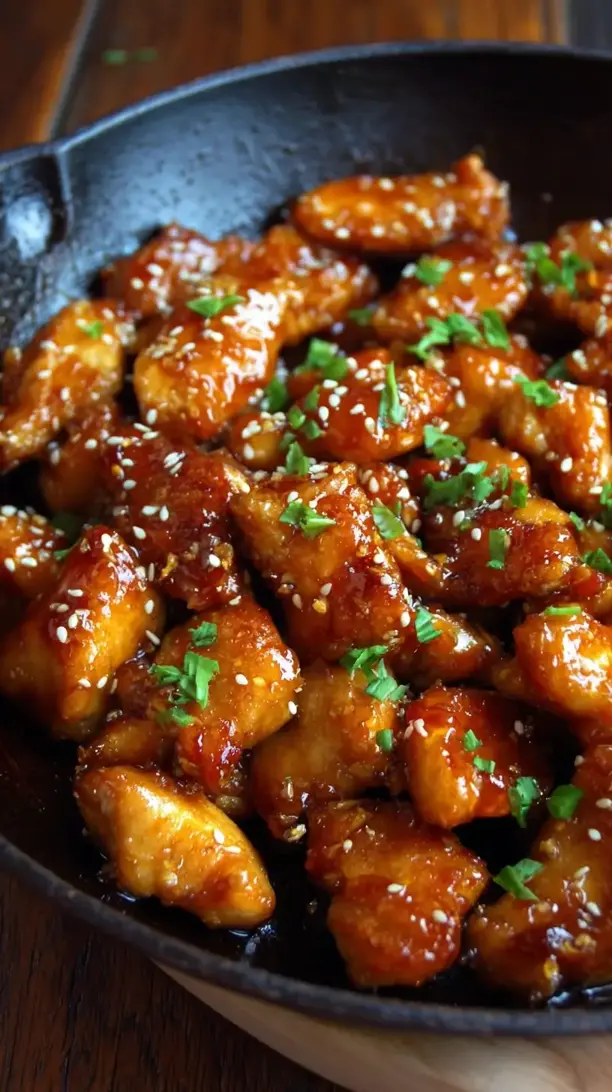
This Orange Chicken delivers crispy, golden bites of chicken coated in a glossy sweet-tangy sauce. The homemade version rivals your favorite takeout, with perfect texture and vibrant citrus flavor. You control the crispiness and balance for a truly satisfying meal.
Love Orange Chicken? So do we! If you're into Dinner Ideas or curious about Burgers, you'll find plenty of inspiration below.


Why You’ll Love This Orange Chicken
- Better-than-takeout crispiness: Double-frying creates an incredibly crunchy exterior.
- Perfectly balanced sauce: Fresh orange and savory notes create a complex, addictive flavor.
- Surprisingly simple: Straightforward steps yield a glossy, professional result.
- Incredibly versatile: Great over rice, in lettuce wraps, or as a bao bun filling.
Ingredients & Tools
For the Chicken:
- 1.5 lbs boneless, skinless chicken thighs, cut into 1-inch pieces
- 1 cup cornstarch
- 2 large eggs, lightly beaten
- 1/2 cup all-purpose flour
- 1 tsp salt
- 1/2 tsp white pepper
- 4 cups neutral oil (like vegetable or canola), for frying
For the Sauce:
- 1 cup fresh orange juice (from about 3-4 oranges)
- 1 tbsp finely grated orange zest
- 1/3 cup light brown sugar, packed
- 1/4 cup rice vinegar
- 1/4 cup soy sauce
- 2 cloves garlic, minced
- 1 tbsp fresh ginger, grated
- 1 tsp sesame oil
- 1/2 tsp red pepper flakes (optional, for heat)
- 2 tbsp cornstarch mixed with 2 tbsp cold water (slurry)
Tools: A large Dutch oven or heavy-bottomed pot for frying, a wire rack set over a baking sheet, a whisk, and a large skillet or wok for the sauce.
Notes: Using fresh orange juice and zest is non-negotiable here — it gives the sauce a vibrant, authentic citrus aroma that bottled juice just can’t match. And don’t skip the slurry; it’s the secret to that beautifully thick, glossy coating that clings to the chicken.
Nutrition (per serving)
| Calories: | 520 kcal |
| Protein: | 35 g |
| Fat: | 18 g |
| Carbs: | 55 g |
| Fiber: | 1 g |
Serves: 4 | Prep Time: 20 minutes | Cook Time: 25 minutes | Total Time: 45 minutes
Before You Start: Tips & Ingredient Notes
- Chicken thighs over breasts? Absolutely. Thighs have more fat, which means they stay incredibly juicy and tender during the frying process, while breasts can easily dry out.
- Why double-fry the chicken? The first fry cooks the chicken through, and the second fry at a slightly higher temperature creates an ultra-crispy, non-greasy crust. It’s a game-changer for texture.
- Is fresh ginger and garlic really that important? In a word, yes. The pungent, aromatic quality of fresh aromatics forms the flavor foundation of the sauce. The jarred stuff will make it taste flat in comparison.
- What’s the deal with the cornstarch slurry? This is our thickening agent. Adding it at the end gives you maximum control over the sauce’s consistency, allowing you to stop when it’s perfectly glossy and clinging to a spoon.
How to Make Orange Chicken
Step 1: Prepare the Chicken and Coating Station. Pat your cubed chicken thighs completely dry with paper towels — this is crucial for the coating to stick properly. In one shallow bowl, combine the flour, salt, and white pepper. In a second bowl, place the lightly beaten eggs. In a third bowl, add the cornstarch. You’ll create an assembly line: chicken goes into the flour, then the egg, and finally gets a thorough coating in the cornstarch. Place the coated pieces on a clean plate.
Step 2: First Fry for Cooking Through. Heat your neutral oil in a Dutch oven or heavy pot to 325°F (163°C). You want enough oil to submerge the chicken pieces. Working in batches to avoid crowding the pot, gently lower the coated chicken into the hot oil. Fry for 3-4 minutes, just until the outside is set and pale golden, and the chicken is cooked through. They won’t be super crispy yet! Remove with a slotted spoon and let them drain on the wire rack.
Step 3: Second Fry for Ultimate Crispiness. Now, increase the heat and bring the oil temperature up to 375°F (190°C). This second, hotter fry is what creates that signature crackly, crunchy exterior. Again working in batches, return the par-cooked chicken to the oil and fry for another 1-2 minutes, until deeply golden brown and incredibly crispy. Drain on the wire rack once more. You’ll notice the texture is now perfectly sturdy and ready for the sauce.
Step 4: Create the Signature Orange Sauce. While the chicken rests, make the sauce. In a large skillet or wok, combine the fresh orange juice, orange zest, brown sugar, rice vinegar, soy sauce, minced garlic, grated ginger, sesame oil, and red pepper flakes. Bring this mixture to a simmer over medium heat, stirring until the sugar dissolves. Let it bubble gently for about 3-4 minutes to allow the flavors to meld together beautifully.
Step 5: Thicken the Sauce to a Glossy Finish. Give your cornstarch and water slurry a quick re-stir (the cornstarch settles quickly). While whisking the simmering sauce constantly, slowly drizzle in the slurry. You’ll see the sauce transform almost immediately, turning from thin and watery to thick and glossy. Continue to cook for another minute, whisking, until the sauce is thick enough to coat the back of a spoon.
Step 6: Combine and Serve Immediately. Turn off the heat. Add all of your double-fried, crispy chicken pieces to the skillet with the sauce. Using a spatula, gently toss and fold the chicken until every single piece is evenly and generously coated. Be quick and confident here — you want to preserve that crunch! Serve right away over steamed rice, garnished with sliced green onions and extra sesame seeds if you like.
Storage & Freshness Guide
- Fridge: Store in an airtight container for up to 3 days.
- Freezer: Freeze sauced chicken in a sealed container for up to 1 month.
- Reviving: Reheat in an air fryer or oven at 375°F to restore crispiness.
Serving Suggestions
Complementary Dishes
- Steamed Jasmine Rice — The fluffy, slightly sticky grains are the perfect canvas to soak up every last drop of that incredible orange sauce.
- Simple Stir-Fried Bok Choy — Its mild, slightly bitter flavor and crisp texture provide a refreshing contrast to the rich, saucy chicken.
- Vegetable Spring Rolls — They add a different, lighter crunch and a savory element that complements the main dish wonderfully.
Drinks
- Iced Green Tea — Its clean, slightly astringent taste cuts through the sweetness and richness of the dish, cleansing the palate between bites.
- A Crisp Lager — The beer’s carbonation and mild bitterness are a classic pairing that balances the sticky-sweet sauce perfectly.
- Gewürztraminer White Wine — This aromatic wine has notes of lychee and spice that harmonize beautifully with the citrus and ginger in the chicken.
Something Sweet
- Mango Sorbet — Its bright, tropical fruitiness is a light and refreshing way to end the meal without feeling too heavy.
- Fortune Cookies — It’s a fun, thematic finish that brings the whole takeout-at-home experience full circle.
- Lychee Jelly — These are cool, delicately sweet, and provide a unique, gelatinous texture that’s a lovely palate cleanser.
Top Mistakes to Avoid
- Mistake: Crowding the pot while frying. Adding too much chicken at once will cause the oil temperature to plummet, resulting in greasy, soggy chicken instead of a crispy crust. Patience is key — fry in small batches.
- Mistake: Adding the sauce to the chicken in the pot. Always add the chicken to the sauce in the skillet, not the other way around. This gives you more control and helps prevent the crispy coating from getting steamed and soft.
- Mistake: Skipping the zest. The orange zest is packed with aromatic oils that provide the quintessential “orange” flavor. The juice alone will make the sauce taste one-dimensional and less vibrant.
- Mistake: Letting the coated chicken sit too long. If the cornstarch-coated chicken sits for more than 10-15 minutes before frying, the coating can become gummy and pasty, leading to a less crisp result.
Expert Tips
- Tip: Use a thermometer for the oil. Guessing the oil temperature is a recipe for disappointment. A simple candy/deep-fry thermometer ensures you hit the exact right temps for the first and second fry, which is the secret to perfect texture.
- Tip: Zest your oranges before juicing them. It is infinitely easier to zest a whole, firm orange than it is to try and zest the floppy, juiced-out rinds afterward. A little planning makes the prep so much smoother.
- Tip: Make a double batch of sauce. The sauce is so good you’ll want extra. Having more on hand means you can really drench your chicken or save some to spoon over your rice. It keeps well in the fridge for a week.
- Tip: Re-crisp leftovers in the air fryer. If you have leftovers, reheat them in an air fryer at 375°F for 3-4 minutes. It will bring back a surprising amount of the original crispiness that the microwave would destroy.
FAQs
Can I bake the chicken instead of frying it?
You can, but the texture will be different. For a baked version, toss the cornstarch-coated chicken in a little oil and bake on a wire rack set on a baking sheet at 425°F (220°C) for 15-20 minutes, flipping halfway, until cooked and crispy. Then toss with the sauce. It will be more of a “crispy-edged” texture rather than an all-over crunch, but it’s still delicious and a great lighter option.
How do I store and reheat leftovers?
Store the sauced orange chicken in an airtight container in the refrigerator for up to 3 days. The best way to reheat is in an air fryer or a conventional oven at 375°F until hot. This will help re-crisp the coating. The microwave will make it soft and steamy, so it’s not my first recommendation, but it works in a pinch if you’re short on time.
Can I make this recipe gluten-free?
Absolutely! Simply replace the all-purpose flour in the initial coating with a gluten-free 1:1 baking blend, and use tamari or a certified gluten-free soy sauce instead of regular soy sauce in the sauce. The rest of the ingredients are naturally gluten-free, so it’s a very easy swap.
My sauce didn’t thicken. What happened?
The most common culprit is that the sauce wasn’t at a full simmer when you added the cornstarch slurry. Cornstarch needs that heat to activate and thicken properly. If this happens, just mix another tablespoon of cornstarch with a tablespoon of cold water and whisk it into the simmering sauce. It should thicken up right away.
Is it okay to use bottled orange juice?
While you can use it in an absolute pinch, I really don’t recommend it. Bottled juice often has preservatives and a cooked, flat flavor that lacks the bright, fresh acidity of freshly squeezed juice. That vibrant citrus aroma is a hallmark of this dish, and fresh oranges make all the difference.


Orange Chicken
Make the best crispy Orange Chicken at home with this easy recipe. Skip the takeout and create a sweet, tangy, and perfectly textured meal. Get the recipe now!
Ingredients
For the Chicken:
-
1.5 lbs boneless, skinless chicken thighs (cut into 1-inch pieces)
-
1 cup cornstarch
-
2 large eggs (lightly beaten)
-
0.5 cup all-purpose flour
-
1 tsp salt
-
0.5 tsp white pepper
-
4 cups neutral oil (like vegetable or canola, for frying)
For the Sauce:
-
1 cup fresh orange juice (from about 3-4 oranges)
-
1 tbsp finely grated orange zest
-
0.333 cup light brown sugar (packed)
-
0.25 cup rice vinegar
-
0.25 cup soy sauce
-
2 cloves garlic (minced)
-
1 tbsp fresh ginger (grated)
-
1 tsp sesame oil
-
0.5 tsp red pepper flakes (optional, for heat)
-
2 tbsp cornstarch mixed with 2 tbsp cold water (slurry)
Instructions
-
Prepare the Chicken and Coating Station. Pat your cubed chicken thighs completely dry with paper towels — this is crucial for the coating to stick properly. In one shallow bowl, combine the flour, salt, and white pepper. In a second bowl, place the lightly beaten eggs. In a third bowl, add the cornstarch. You’ll create an assembly line: chicken goes into the flour, then the egg, and finally gets a thorough coating in the cornstarch. Place the coated pieces on a clean plate.01
-
First Fry for Cooking Through. Heat your neutral oil in a Dutch oven or heavy pot to 325°F (163°C). You want enough oil to submerge the chicken pieces. Working in batches to avoid crowding the pot, gently lower the coated chicken into the hot oil. Fry for 3-4 minutes, just until the outside is set and pale golden, and the chicken is cooked through. They won't be super crispy yet! Remove with a slotted spoon and let them drain on the wire rack.02
-
Second Fry for Ultimate Crispiness. Now, increase the heat and bring the oil temperature up to 375°F (190°C). This second, hotter fry is what creates that signature crackly, crunchy exterior. Again working in batches, return the par-cooked chicken to the oil and fry for another 1-2 minutes, until deeply golden brown and incredibly crispy. Drain on the wire rack once more. You’ll notice the texture is now perfectly sturdy and ready for the sauce.03
-
Create the Signature Orange Sauce. While the chicken rests, make the sauce. In a large skillet or wok, combine the fresh orange juice, orange zest, brown sugar, rice vinegar, soy sauce, minced garlic, grated ginger, sesame oil, and red pepper flakes. Bring this mixture to a simmer over medium heat, stirring until the sugar dissolves. Let it bubble gently for about 3-4 minutes to allow the flavors to meld together beautifully.04
-
Thicken the Sauce to a Glossy Finish. Give your cornstarch and water slurry a quick re-stir (the cornstarch settles quickly). While whisking the simmering sauce constantly, slowly drizzle in the slurry. You’ll see the sauce transform almost immediately, turning from thin and watery to thick and glossy. Continue to cook for another minute, whisking, until the sauce is thick enough to coat the back of a spoon.05
-
Combine and Serve Immediately. Turn off the heat. Add all of your double-fried, crispy chicken pieces to the skillet with the sauce. Using a spatula, gently toss and fold the chicken until every single piece is evenly and generously coated. Be quick and confident here — you want to preserve that crunch! Serve right away over steamed rice, garnished with sliced green onions and extra sesame seeds if you like.06
Not what you're looking for?


