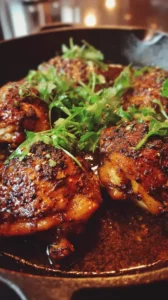
This Orange Chicken Breast recipe delivers a lighter, fresher take on the classic takeout favorite. You get crispy pan-fried chicken coated in a vibrant, glossy orange sauce made with real citrus. It’s a weeknight hero that’s surprisingly simple to master.
Craving a delicious Orange Chicken Breast? You've come to the right spot! From Chicken Breast Recipes favorites to amazing Chicken Thigh Recipes recipes, there's something here for everyone.


Why You’ll Love This Orange Chicken Breast
- Fresher, brighter take: Skip the heavy takeout for a vibrant, homemade version.
- Spot-on texture: A light dredge and pan-fry create a wonderfully crispy coating.
- Surprisingly simple: Manageable steps make restaurant-quality results achievable.
- Incredible aroma: Fresh orange zest and sizzling garlic transform your kitchen.
Ingredients & Tools
For the Chicken:
- 2 large boneless, skinless chicken breasts (about 1 lb / 450 g), cut into 1-inch pieces
- 2 large eggs
- 1/2 cup cornstarch
- 1/4 cup all-purpose flour
- 1 tsp salt
- 1/2 tsp black pepper
- 1/4 cup neutral oil (like avocado or vegetable), for frying
For the Orange Sauce:
- 1 cup fresh orange juice (from about 2-3 large oranges)
- 1 tbsp finely grated orange zest
- 1/4 cup light brown sugar
- 2 tbsp rice vinegar
- 2 tbsp soy sauce
- 2 cloves garlic, minced
- 1 tsp fresh ginger, grated
- 1 tsp cornstarch mixed with 1 tbsp water (slurry)
- Optional Garnish: thinly sliced green onions, sesame seeds, extra orange zest
Tools: Two large bowls, a whisk, a zester or fine grater, a large skillet (non-stick or cast iron works great), and a medium saucepan.
Notes: Freshly squeezed orange juice gives a vibrant, non-bitter flavor. Don’t skip the zest—it’s packed with aromatic oils.
Nutrition (per serving)
| Calories: | 420 kcal |
| Protein: | 28 g |
| Fat: | 16 g |
| Carbs: | 40 g |
| Fiber: | 1 g |
Serves: 4 | Prep Time: 20 minutes | Cook Time: 15 minutes | Total Time: 35 minutes
Before You Start: Tips & Ingredient Notes
- Cut your chicken evenly. This is the single most important step for even cooking. Aim for 1-inch pieces—if they’re too large, the inside won’t cook through before the outside burns; too small, and they can become dry.
- Get your mise en place ready. French for “everything in its place,” this means having all your ingredients measured, chopped, and within arm’s reach. The cooking process moves quickly once you start, so being prepared prevents any frantic scrambling.
- Use a neutral, high-heat oil. Oils like avocado, vegetable, or canola have a high smoke point, which means they can get nice and hot without burning and imparting a bitter taste to your beautifully crispy chicken.
- Don’t crowd the pan. It’s tempting to dump all the chicken in at once, but this will steam the pieces instead of searing them. Cook in two batches to ensure each piece gets proper contact with the hot surface for maximum crispiness.
- Fresh ginger and garlic are non-negotiable. The jarred, pre-minced versions simply don’t have the same pungent, lively flavor. A microplane makes grating both the ginger and garlic an absolute breeze and incorporates them seamlessly into the sauce.
How to Make Orange Chicken Breast
Step 1: Prepare the Chicken Coating Station. In one large bowl, whisk the two eggs until they are smooth and uniform. In a second large bowl, whisk together the 1/2 cup of cornstarch, 1/4 cup of flour, salt, and pepper. This dual-dredge method—egg followed by the cornstarch mixture—is what creates that craggy, ultra-crispy exterior that holds onto the sauce so well.
Step 2: Dredge the Chicken Pieces. Working in small batches, place a handful of the cubed chicken pieces into the bowl with the beaten eggs. Toss them around until every piece is thoroughly coated. Let the excess egg drip off, then transfer the chicken to the cornstarch mixture. Toss to coat, pressing gently to make sure the dry mixture adheres in a nice, even layer. Place the coated pieces on a clean plate or wire rack. Repeat with all the chicken.
Step 3: Pan-Fry to Golden Perfection. Heat the 1/4 cup of neutral oil in your large skillet over medium-high heat. To test if the oil is ready, flick a tiny bit of the cornstarch mixture into the pan—if it sizzles immediately, you’re good to go. Carefully add the first batch of chicken in a single layer, making sure not to overcrowd the pan. Fry for 3-4 minutes per side, until the coating is a deep golden brown and the chicken is cooked through. You’ll notice the pieces will feel firm to the touch. Transfer the cooked chicken to a paper towel-lined plate to drain any excess oil, then repeat with the second batch.
Step 4: Build the Incredible Orange Sauce. While the chicken is frying, start the sauce. In your medium saucepan, combine the fresh orange juice, orange zest, brown sugar, rice vinegar, soy sauce, minced garlic, and grated ginger. Whisk everything together and bring it to a gentle simmer over medium heat. Let it bubble away for about 2-3 minutes, which will allow the flavors to meld and the sauce to reduce slightly.
Step 5: Thicken the Sauce to a Glossy Glaze. Give your cornstarch slurry (the 1 tsp cornstarch mixed with 1 tbsp water) another quick stir—it settles quickly!—and then drizzle it into the simmering sauce while whisking constantly. Almost instantly, you’ll see the sauce begin to thicken and turn beautifully glossy. Continue to cook for another minute, whisking the entire time, until the sauce nicely coats the back of a spoon. Remove it from the heat.
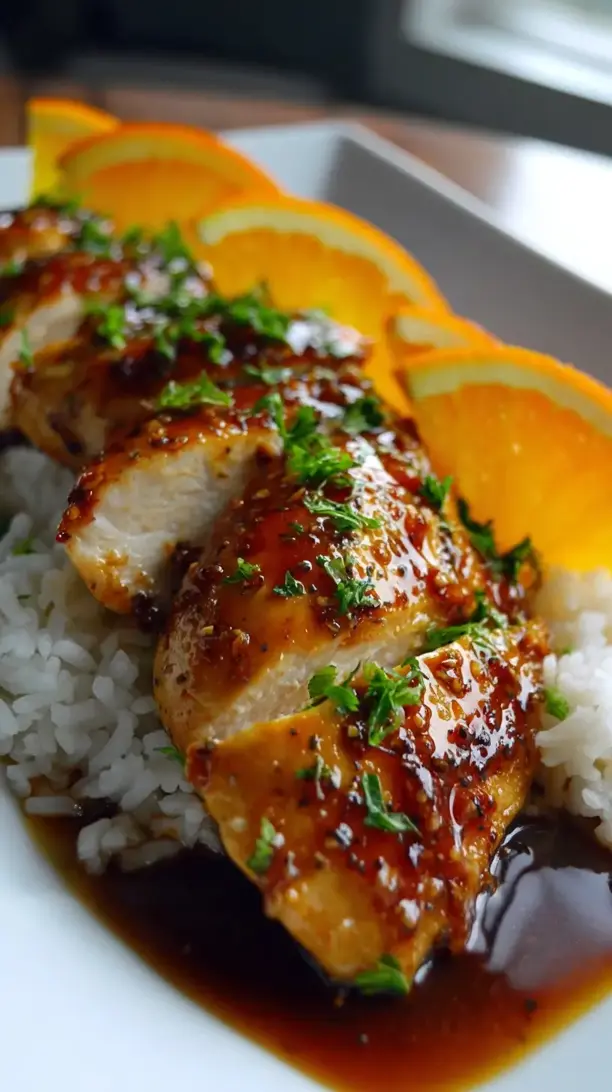
Step 6: The Grand Finale – Toss and Serve! Once all the chicken is cooked and drained, you can carefully wipe out any burnt bits from your skillet (or use a clean bowl). Add all the crispy chicken back into the skillet or bowl and pour the warm, glossy orange sauce over the top. Using a spatula or large spoon, gently toss the chicken until every single piece is luxuriously coated in that vibrant orange glaze. Transfer to a serving platter and garnish immediately with those green onions and sesame seeds for a pop of color and texture.
Storage & Freshness Guide
- Fridge: Store chicken and sauce separately in airtight containers for up to 3 days.
- Freezer: Freeze cooked chicken (without sauce) on a baking sheet, then transfer to a freezer bag for up to 2 months.
- Reviving: Reheat in oven or air fryer at 375°F (190°C) to restore crispiness; warm sauce separately.
Serving Suggestions
Complementary Dishes
- Steamed Jasmine Rice — The fluffy, slightly sticky grains are the perfect canvas for soaking up every last drop of that incredible orange sauce. It’s a classic pairing for a very good reason.
- Simple Stir-Fried Vegetables — A quick sauté of broccoli florets, snap peas, and bell peppers adds a wonderful crunch and freshness that balances the rich, saucy chicken beautifully.
- Light Asian-Inspired Slaw — A crisp slaw with a tangy rice vinegar and sesame oil dressing provides a refreshing, cool contrast to the warm, savory-sweet main dish.
Drinks
- Iced Green Tea — Its clean, slightly bitter notes help cut through the sweetness of the dish and cleanse the palate between bites, making each mouthful taste just as exciting as the first.
- Citrus-Forward Pale Ale — A beer with hints of orange or grapefruit complements the citrus theme perfectly and its carbonation helps lift the richness of the fried coating.
- Off-Dry Riesling — This wine’s natural sweetness and bright acidity are a dream team with the orange and vinegar in the sauce, creating a really harmonious pairing.
Something Sweet
- Mango Sorbet — A few scoops of this tropical, fruity sorbet feel light and refreshing after the meal, continuing the citrus theme without being too heavy.
- Fortune Cookies — It’s a fun, thematic way to end the meal on a sweet and playful note. Plus, who doesn’t love a good fortune?
- Lychee Fruit — Chilled, canned lychees are incredibly refreshing, with a floral sweetness that provides a simple, elegant, and palate-cleansing finish.
Top Mistakes to Avoid
- Mistake: Using bottled orange juice. It often contains preservatives and can have a cooked, slightly metallic or bitter flavor that will throw off the entire balance of your delicate sauce. Fresh is always best here.
- Mistake: Adding the sauce to the chicken in the pan. If you pour the sauce into the hot skillet with the chicken still in it, the crispy coating will immediately start to soften and become soggy. Always toss them together off the heat, just before serving.
- Mistake: Letting the cornstarch-coated chicken sit. Once you dredge the chicken in the cornstarch mixture, you need to cook it fairly quickly. If it sits for too long, the cornstarch will draw out moisture from the chicken and create a gummy, pasty layer instead of a crisp one.
- Mistake: Skipping the taste test on the sauce. Before you toss it with the chicken, always taste your sauce! This is your chance to adjust the balance—maybe it needs a pinch more salt from soy sauce or a splash more vinegar for tang. You’re the boss of the flavor.
Expert Tips
- Tip: Double the sauce if you’re a saucy person. Honestly, the sauce is so good you might want extra for drizzling over your rice. Simply double all the sauce ingredients (except the cornstarch slurry—start with 1.5x and only add more if it needs more thickening).
- Tip: For extra crispy chicken, use a wire rack. After dredging, let the chicken rest on a wire rack instead of a plate. This allows air to circulate around all sides, preventing the bottom from getting soggy before it even hits the pan.
- Tip: Add a hint of heat. If you like a little kick, add a teaspoon of sriracha or a pinch of red pepper flakes to the sauce as it simmers. The subtle heat plays wonderfully against the sweet and tangy orange.
- Tip: Zest your oranges before juicing them. It is infinitely easier to zest a whole, firm orange than it is to zest a floppy, juiced-out husk. Do this first and your future self will thank you.
- Tip: Reheat leftovers in the oven or air fryer. To bring back that crispy texture, avoid the microwave. A few minutes in a 375°F (190°C) oven or air fryer will re-crisp the chicken beautifully.
FAQs
Can I make this Orange Chicken Breast ahead of time?
You can prep the components ahead, but I don’t recommend assembling it until you’re ready to eat. Cook and crisp the chicken, and make the sauce, storing them separately in the fridge for up to 2 days. When ready to serve, re-crisp the chicken in the oven or air fryer, gently warm the sauce, and toss them together. This ensures the chicken stays wonderfully crispy and doesn’t get soggy.
Can I use chicken thighs instead of breasts?
Absolutely! Chicken thighs will yield an even more tender and juicy result due to their higher fat content. Just be sure to trim any excess fat and cut them into evenly sized pieces. The cooking time might be a minute or two longer, so always check for an internal temperature of 165°F (74°C) to be sure they’re done.
My sauce didn’t thicken. What happened?
This usually means the cornstarch slurry wasn’t activated properly. The sauce needs to be at a simmer when you add the slurry, and you must whisk constantly as it thickens. If it’s still thin, mix another half teaspoon of cornstarch with a tablespoon of water and whisk it in, letting the sauce bubble for another minute. Be patient—it thickens as it cools, too.
Is this recipe gluten-free?
It’s very easily adaptable! Simply replace the all-purpose flour in the chicken coating with more cornstarch (for a total of 3/4 cup) and use a certified gluten-free soy sauce or tamari in the sauce. That’s all it takes to make a delicious gluten-free version.
Why is my chicken coating falling off?
This is often due to the oil not being hot enough. If the oil isn’t at the right temperature, the coating doesn’t set and seal immediately, allowing it to slip off. Always test the oil with a bit of the dredging mixture first. Also, make sure you’re letting the excess egg drip off before the cornstarch step to prevent a too-thick, unstable layer.


Orange Chicken Breast
Make this easy Orange Chicken Breast recipe for a lighter, crispier take on the classic. Ready in 35 minutes! Get the foolproof recipe now.
Ingredients
For the Chicken:
-
2 large boneless, skinless chicken breasts (about 1 lb / 450 g, cut into 1-inch pieces)
-
2 large eggs
-
1/2 cup cornstarch
-
1/4 cup all-purpose flour
-
1 tsp salt
-
1/2 tsp black pepper
-
1/4 cup neutral oil (like avocado or vegetable, for frying)
For the Orange Sauce:
-
1 cup fresh orange juice (from about 2-3 large oranges)
-
1 tbsp finely grated orange zest
-
1/4 cup light brown sugar
-
2 tbsp rice vinegar
-
2 tbsp soy sauce
-
2 cloves garlic (minced)
-
1 tsp fresh ginger (grated)
-
1 tsp cornstarch mixed with 1 tbsp water (slurry)
-
Optional Garnish (thinly sliced green onions, sesame seeds, extra orange zest)
Instructions
-
Prepare the Chicken Coating Station. In one large bowl, whisk the two eggs until they are smooth and uniform. In a second large bowl, whisk together the 1/2 cup of cornstarch, 1/4 cup of flour, salt, and pepper. This dual-dredge method—egg followed by the cornstarch mixture—is what creates that craggy, ultra-crispy exterior that holds onto the sauce so well.01
-
Dredge the Chicken Pieces. Working in small batches, place a handful of the cubed chicken pieces into the bowl with the beaten eggs. Toss them around until every piece is thoroughly coated. Let the excess egg drip off, then transfer the chicken to the cornstarch mixture. Toss to coat, pressing gently to make sure the dry mixture adheres in a nice, even layer. Place the coated pieces on a clean plate or wire rack. Repeat with all the chicken.02
-
Pan-Fry to Golden Perfection. Heat the 1/4 cup of neutral oil in your large skillet over medium-high heat. To test if the oil is ready, flick a tiny bit of the cornstarch mixture into the pan—if it sizzles immediately, you’re good to go. Carefully add the first batch of chicken in a single layer, making sure not to overcrowd the pan. Fry for 3-4 minutes per side, until the coating is a deep golden brown and the chicken is cooked through. You’ll notice the pieces will feel firm to the touch. Transfer the cooked chicken to a paper towel-lined plate to drain any excess oil, then repeat with the second batch.03
-
Build the Incredible Orange Sauce. While the chicken is frying, start the sauce. In your medium saucepan, combine the fresh orange juice, orange zest, brown sugar, rice vinegar, soy sauce, minced garlic, and grated ginger. Whisk everything together and bring it to a gentle simmer over medium heat. Let it bubble away for about 2-3 minutes, which will allow the flavors to meld and the sauce to reduce slightly.04
-
Thicken the Sauce to a Glossy Glaze. Give your cornstarch slurry (the 1 tsp cornstarch mixed with 1 tbsp water) another quick stir—it settles quickly!—and then drizzle it into the simmering sauce while whisking constantly. Almost instantly, you’ll see the sauce begin to thicken and turn beautifully glossy. Continue to cook for another minute, whisking the entire time, until the sauce nicely coats the back of a spoon. Remove it from the heat.05
-
The Grand Finale – Toss and Serve! Once all the chicken is cooked and drained, you can carefully wipe out any burnt bits from your skillet (or use a clean bowl). Add all the crispy chicken back into the skillet or bowl and pour the warm, glossy orange sauce over the top. Using a spatula or large spoon, gently toss the chicken until every single piece is luxuriously coated in that vibrant orange glaze. Transfer to a serving platter and garnish immediately with those green onions and sesame seeds for a pop of color and texture.06
Not what you're looking for?


