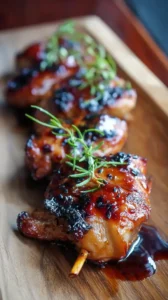
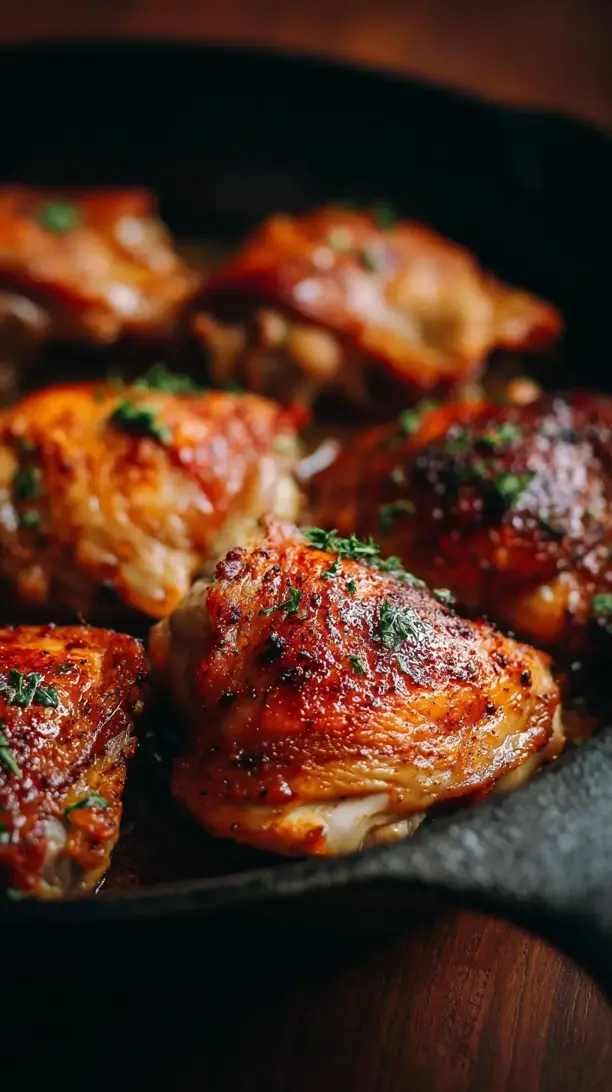
Perfectly cooked Paleo Chicken Thighs are juicy, flavorful, and irresistibly crispy. This simple, one-pan recipe uses herbs and healthy fats for a dish that’s genuinely incredible. The method is straightforward, but the results feel restaurant-worthy.
Looking for Paleo Chicken Thighs inspiration? You'll love what we have! Explore more Chicken Thigh Recipes recipes or discover our Appetizers & Snacks favorites.


Why You’ll Love This Paleo Chicken Thighs
- Crispy Skin: The secret is drying and high heat for shatteringly crisp texture.
- Juicy Meat: Chicken thighs stay incredibly moist and pull-apart tender.
- Effortless & One-Pan: Five-minute prep with minimal cleanup.
- Incredibly Versatile: Your new go-to protein for any meal.
Ingredients & Tools
- 8 bone-in, skin-on chicken thighs (about 1.5–2 lbs total)
- 2 tbsp extra virgin olive oil or avocado oil
- 1 tsp fine sea salt
- 1/2 tsp freshly cracked black pepper
- 1 tsp smoked paprika
- 1 tsp garlic powder
- 1/2 tsp dried thyme
- 1/2 tsp dried oregano
- 1 lemon, cut into wedges
- 4 cloves garlic, lightly smashed (optional, for extra aroma)
- Fresh parsley or rosemary for garnish (optional)
Tools: A large rimmed baking sheet, a medium mixing bowl, and tongs.
Notes: The quality of your chicken and oil really makes a difference here. Since the seasoning is simple, using good-quality sea salt and fresh dried herbs will elevate the entire dish from good to unforgettable.
Nutrition (per serving)
| Calories: | 310 kcal |
| Protein: | 28 g |
| Fat: | 21 g |
| Carbs: | 2 g |
| Fiber: | 1 g |
Serves: 4 | Prep Time: 10 minutes | Cook Time: 35 minutes | Total Time: 45 minutes
Before You Start: Tips & Ingredient Notes
- Pat Those Thighs Dry! This is the single most important step for crispy skin. Use paper towels to thoroughly pat the skin dry. Any surface moisture will steam the skin instead of letting it crisp up beautifully.
- Why Bone-In, Skin-On? The bone acts as a natural heat conductor, cooking the meat more evenly and keeping it incredibly juicy. The skin, when rendered properly, becomes a delicious, crispy treat and protects the meat from drying out.
- Don’t Be Shy With the Salt. Salt is crucial for both flavor and texture. It draws out a little moisture from the skin, further aiding in the crisping process, and seasons the meat all the way through.
- Room Temperature is Key. Let the chicken thighs sit out for 20-30 minutes before cooking. Starting with cold chicken can lead to uneven cooking—a overcooked exterior and an undercooked interior.
How to Make Paleo Chicken Thighs
Step 1: Preheat your oven to 425°F (220°C). This high heat is non-negotiable for achieving that perfect, crispy skin. While the oven is heating, take your chicken thighs and pat them completely dry on both sides with paper towels. Be thorough here—you’ll notice the paper towels will be quite damp. This step is what separates rubbery skin from crackling skin.
Step 2: In your mixing bowl, combine the olive oil, sea salt, black pepper, smoked paprika, garlic powder, dried thyme, and dried oregano. Stir it all together until it forms a fragrant, loose paste. The aroma at this stage is already incredible—smoky, herby, and savory.
Step 3: Add the completely dry chicken thighs to the bowl. Use your hands to toss and rub the seasoning mixture all over the chicken, making sure to get it under the skin and on all sides. Don’t rush this; give each thigh a good massage to ensure every bit is coated. You’ll see the color transform to a vibrant reddish-gold.
Step 4: Arrange the thighs on your baking sheet, skin-side up. Make sure they are not touching each other. This space allows for hot air to circulate, which is essential for even cooking and crisping. Scatter the smashed garlic cloves and lemon wedges around the pan. They’ll roast alongside the chicken, releasing their juices and creating an amazing base for a pan sauce if you want one later.
Step 5: Place the baking sheet in the preheated oven on the middle rack. Roast for 30-35 minutes. You’ll know it’s done when the skin is deep golden brown and incredibly crispy, and the internal temperature registers 165°F (74°C) at the thickest part, not touching the bone. The juices should run clear.
Step 6: Once out of the oven, let the chicken rest on the pan for about 5-10 minutes. This allows the juices to redistribute throughout the meat. If you cut into it immediately, all those beautiful juices will end up on the cutting board instead of in your mouth. Garnish with fresh parsley or rosemary before serving.
Storage & Freshness Guide
- Fridge: Store leftovers in an airtight container for 3–4 days.
- Freezer: Freeze in a single layer then transfer to a bag for up to 3 months.
- Reviving: Reheat in an air fryer or 375°F oven to re-crisp the skin.
Serving Suggestions
Complementary Dishes
- Garlic Roasted Broccoli — The crispy, caramelized florets are a perfect textural match and soak up the chicken drippings beautifully.
- Cauliflower Mash — Creamy and comforting, it acts like mashed potatoes but keeps everything 100% paleo and delicious.
- A Simple Arugula Salad — Tossed with lemon juice and olive oil, the peppery arugula provides a fresh, bright contrast to the rich chicken.
Drinks
- Dry Hard Cider — Its crisp, apple-forward flavor cuts through the richness of the chicken and cleanses the palate wonderfully.
- Sparkling Water with Lemon — For a non-alcoholic option, the bubbles and citrus are incredibly refreshing and light alongside this hearty dish.
- A Light-Bodied Red Wine — Like a Pinot Noir, which has enough acidity to complement the meal without overpowering the delicate herbs.
Something Sweet
- Baked Cinnamon Apples — Warm, soft, and spiced, it feels like a decadent dessert but is made with just fruit and paleo-friendly sweeteners.
- Dark Chocolate & Almond Clusters — A few pieces of high-cocoa dark chocolate with roasted almonds satisfy the sweet tooth with minimal sugar.
- Coconut Chia Pudding — Make it ahead of time; its cool, creamy texture is a lovely, light finish to the meal.
Top Mistakes to Avoid
- Mistake: Skipping the Drying Step. I’ve messed this up before too, thinking a little moisture was fine. It’s not. Wet skin steams and becomes chewy, no matter how long you cook it. Dry skin is the foundation of crispiness.
- Mistake: Crowding the Pan. If the thighs are too close together, they’ll steam each other. You need space for the hot, dry air of the oven to work its magic on all sides of each piece.
- Mistake: Not Letting it Rest. It’s so tempting to dig right in, but those 5-10 minutes of resting time are crucial. The muscle fibers relax and reabsorb the juices, ensuring every bite is moist.
- Mistake: Using a Low Oven Temperature. A lower temperature will slowly render the fat but won’t create the high heat blast needed to puff up and crisp the skin. 425°F is the sweet spot.
Expert Tips
- Tip: Season Under the Skin. Gently loosen the skin from the meat with your fingers and rub some of the seasoning directly onto the flesh. This infuses the meat itself with flavor, not just the surface.
- Tip: Use a Wire Rack. For the absolute crispiest skin possible, place a wire rack on your baking sheet and put the chicken on that. This elevates the thighs, allowing heat to circulate underneath for all-over crispiness.
- Tip: Finish with Fresh Herbs & Lemon. Squeeze the roasted lemon wedges over the chicken right before serving and sprinkle with fresh herbs. The bright, fresh acidity at the end lifts the entire dish and makes the flavors pop.
- Tip: Save the Drippings! The fat and juices left in the pan are liquid gold. Use them to sauté vegetables, drizzle over your cauliflower mash, or as a base for a quick pan sauce by deglazing with a little chicken broth.
FAQs
Can I use boneless, skinless chicken thighs?
You absolutely can, but the result will be different. Without the bone and skin, the cooking time will be shorter (closer to 20-25 minutes), and you won’t get that signature crispy skin. The meat will still be juicy and flavorful, but it will be a different, more weeknight-stir-fry style dish. Just keep a close eye on them as they cook faster.
How do I know when the chicken is fully cooked?
The best and most reliable way is to use an instant-read meat thermometer. Insert it into the thickest part of the thigh, avoiding the bone. It should read 165°F (74°C). Visually, the juices should run clear when you pierce the meat, and the skin will be a deep, appetizing golden brown. If you see any pink juices, it needs more time.
Can I make this ahead of time?
You can prep the seasoning and pat the chicken dry a few hours ahead, storing it covered in the fridge. But for the crispiest results, apply the oil and spice rub right before cooking. Leftovers will keep for 3-4 days in the fridge and reheat well in an air fryer or a 375°F oven to re-crisp the skin.
What’s the best way to reheat leftovers?
To avoid soggy skin, never use the microwave. Reheat in an air fryer at 375°F for 3-4 minutes or in a conventional oven at 375°F for about 10 minutes, until heated through. This will bring back some of that wonderful crispiness to the skin.
Can I use different spices?
Of course! This spice blend is a classic, but feel free to experiment. A blend of cumin and chili powder for a Tex-Mex twist, or some herbes de Provence for a French vibe would be fantastic. The core method remains the same—just make sure you’re using about 1 tablespoon of total dried seasoning per batch.


Paleo Chicken Thighs
Make perfectly crispy and juicy Paleo Chicken Thighs with this easy one-pan recipe. Ready in 45 minutes for a healthy, flavorful meal. Get the recipe now!
Ingredients
For the Ingredients
-
8 bone-in, skin-on chicken thighs (about 1.5–2 lbs total)
-
2 tbsp extra virgin olive oil or avocado oil
-
1 tsp fine sea salt
-
1/2 tsp freshly cracked black pepper
-
1 tsp smoked paprika
-
1 tsp garlic powder
-
1/2 tsp dried thyme
-
1/2 tsp dried oregano
-
1 lemon (cut into wedges)
-
4 cloves garlic (lightly smashed (optional, for extra aroma))
-
Fresh parsley or rosemary (for garnish (optional))
Instructions
-
Preheat your oven to 425°F (220°C). This high heat is non-negotiable for achieving that perfect, crispy skin. While the oven is heating, take your chicken thighs and pat them completely dry on both sides with paper towels. Be thorough here—you’ll notice the paper towels will be quite damp. This step is what separates rubbery skin from crackling skin.01
-
In your mixing bowl, combine the olive oil, sea salt, black pepper, smoked paprika, garlic powder, dried thyme, and dried oregano. Stir it all together until it forms a fragrant, loose paste. The aroma at this stage is already incredible—smoky, herby, and savory.02
-
Add the completely dry chicken thighs to the bowl. Use your hands to toss and rub the seasoning mixture all over the chicken, making sure to get it under the skin and on all sides. Don’t rush this; give each thigh a good massage to ensure every bit is coated. You’ll see the color transform to a vibrant reddish-gold.03
-
Arrange the thighs on your baking sheet, skin-side up. Make sure they are not touching each other. This space allows for hot air to circulate, which is essential for even cooking and crisping. Scatter the smashed garlic cloves and lemon wedges around the pan. They’ll roast alongside the chicken, releasing their juices and creating an amazing base for a pan sauce if you want one later.04
-
Place the baking sheet in the preheated oven on the middle rack. Roast for 30-35 minutes. You’ll know it’s done when the skin is deep golden brown and incredibly crispy, and the internal temperature registers 165°F (74°C) at the thickest part, not touching the bone. The juices should run clear.05
-
Once out of the oven, let the chicken rest on the pan for about 5-10 minutes. This allows the juices to redistribute throughout the meat. If you cut into it immediately, all those beautiful juices will end up on the cutting board instead of in your mouth. Garnish with fresh parsley or rosemary before serving.06
Not what you're looking for?


