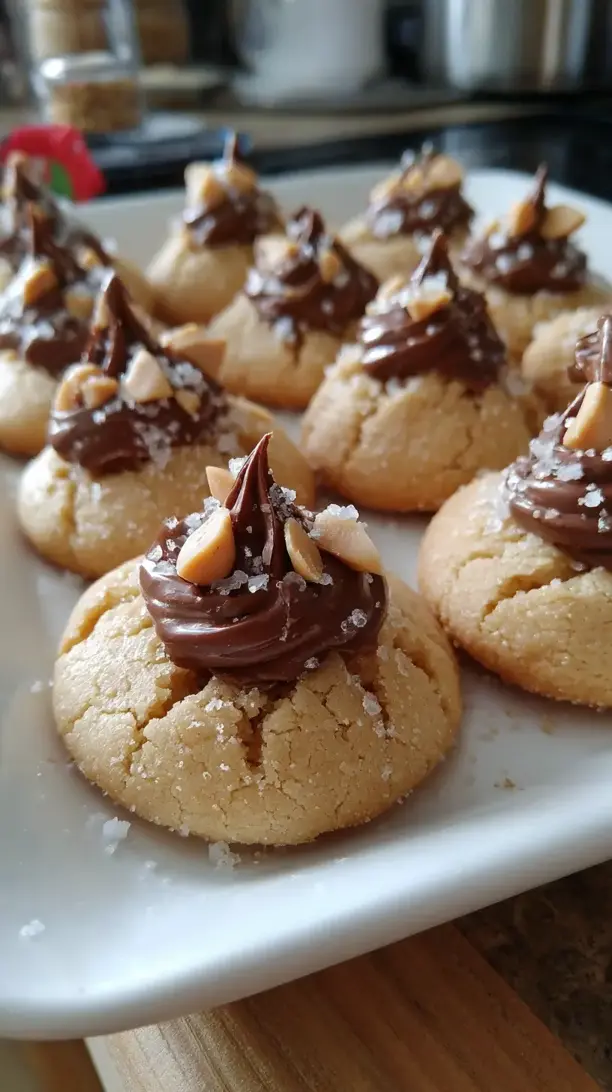
There’s something about a Peanut Butter Blossom that feels like a bite of pure, nostalgic joy. The best recipes are the ones that make you feel like a kitchen pro, and this one—with its soft, crinkly peanut butter base and that perfect chocolate kiss center—always feels like a warm hug from my childhood. It’s a quintessential star for any Christmas cookie platter and a beloved favorite in any collection of holiday cookies.
If you’re like me and searching for Christmas baking ideas that deliver maximum cheer with minimal fuss, you’ve found your answer. This dough requires no chilling, so you can go from mixing bowl to festive treat in almost no time. They truly are the ultimate easy Christmas treats, making your holiday baking session feel both joyful and wonderfully efficient.
Whether you’re planning a whole spread of Christmas dessert ideas or just want to whip up some heartfelt holiday treats for your people, these Hershey kiss cookies are a guaranteed hit. As one of the most cherished Christmas cookies recipes out there, they’re more than just a dessert; they’re a delicious piece of comfort food with a magical way of bringing everyone together.
Looking for Peanut Butter Blossoms inspiration? You'll love what we have! Explore more Christmas Cookie recipes or discover our Desserts favorites.

Why You’ll Love This Peanut Butter Blossoms
- Perfect texture contrast: Soft, chewy cookie with a smooth chocolate center.
- Deceptively simple: No-chill dough means cookies in under an hour.
- Crowd-pleasing: A guaranteed hit across all ages and occasions.
- Nostalgic flavor: Rich peanut butter and sweet chocolate feel like home.
Ingredients & Tools
- 1/2 cup (115 g) unsalted butter, softened to room temperature
- 3/4 cup (195 g) smooth peanut butter (not natural/oily style)
- 1/3 cup (65 g) granulated sugar, for rolling
- 1/2 cup (100 g) granulated sugar
- 1/2 cup (110 g) light brown sugar, packed
- 1 large egg, at room temperature
- 1 teaspoon vanilla extract
- 1 3/4 cups (220 g) all-purpose flour
- 1 teaspoon baking soda
- 1/2 teaspoon salt
- 48 milk chocolate Hershey’s Kisses, unwrapped
Tools: Stand mixer or hand mixer, mixing bowls, baking sheets, parchment paper or silicone baking mats, a small bowl for sugar, and a cooling rack.
Notes: Using room temperature butter and egg ensures smooth, non-greasy dough. Rolling in sugar gives the classic crackly top.
Nutrition (per serving)
| Calories: | 120 kcal |
| Protein: | 2 g |
| Fat: | 6 g |
| Carbs: | 15 g |
| Fiber: | 0.5 g |
Serves: 48 cookies | Prep Time: 20 minutes | Cook Time: 8 minutes | Total Time: 28 minutes
Before You Start: Tips & Ingredient Notes
- Your peanut butter matters. For the best texture and structure, use a standard, shelf-stable creamy peanut butter like Jif or Skippy. The natural, oily kinds can make the cookies spread too much and become greasy.
- Don’t skip the sugar roll. Rolling the dough balls in granulated sugar before baking is what gives these cookies their signature sparkly, crackled appearance and a delightful subtle crunch on the outside.
- Unwrap all your kisses first. This seems obvious, but it’s a step you’ll thank yourself for later. Having them all ready to go means you can press them into the hot cookies the second they come out of the oven, which is crucial for that perfect melt.
- Trust the softness of the cookie. When you take them out, the cookies will look very soft and underbaked in the center. This is correct! They firm up beautifully as they cool on the baking sheet.
How to Make Peanut Butter Blossoms
Step 1: First, preheat your oven to 375°F (190°C). Line your baking sheets with parchment paper or silicone mats. This is a crucial little step that prevents sticking and makes cleanup an absolute breeze. Now, in the bowl of your stand mixer fitted with the paddle attachment (or a large bowl if using a hand mixer), combine the softened butter, peanut butter, 1/2 cup granulated sugar, and the packed brown sugar. Beat them together on medium speed for about 2-3 minutes. You’re looking for the mixture to become light, fluffy, and well-combined. You’ll notice the color lighten slightly—this is a good sign!
Step 2: Scrape down the sides and bottom of the bowl with a spatula to make sure everything is incorporated. Now, add the room-temperature egg and the vanilla extract. Mix on medium speed just until they are fully blended in. Overmixing at this stage can incorporate too much air, so just mix until you no longer see streaks of egg. The vanilla will make your kitchen smell amazing already.
Step 3: In a separate, medium-sized bowl, whisk together the flour, baking soda, and salt. This ensures the leavening and salt are evenly distributed throughout the flour, which prevents little bitter pockets of baking soda in your finished cookies. With your mixer on low speed, gradually add the dry ingredients to the wet ingredients. Mix just until the flour streaks disappear and a soft dough forms. Be careful not to overmix! The dough will be quite soft and a little sticky, which is perfect.
Step 4: Now, for the fun part! Place the remaining 1/3 cup of granulated sugar in a small bowl. Scoop out about 1 tablespoon of dough—I like to use a small cookie scoop for uniformity, but a spoon works just fine. Roll the dough between your palms to form a smooth ball. Then, roll each ball generously in the bowl of sugar until it’s completely coated. Place the sugar-coated dough balls about 2 inches apart on your prepared baking sheets. They need a little room to spread.
Step 5: Bake for 7 to 9 minutes. The trick is to pull them out when the edges are just barely starting to turn a light golden brown, but the centers still look puffy and soft. They will look underdone, and that’s exactly what you want. If you overbake them, they’ll be dry and crumbly instead of soft and chewy. Rotate your baking sheet halfway through for even browning.
Step 6: As soon as you remove the baking sheet from the oven, work quickly but carefully. Gently press a chocolate kiss into the center of each hot cookie. You’ll hear a slight sizzle—that’s the chocolate starting to melt ever so slightly into the cookie, which is what makes it stay put. Press down just until the cookie cracks slightly around the edges of the kiss. Don’t push it all the way down to the baking sheet.
Step 7: Let the cookies cool on the baking sheet for 5 full minutes. This allows them to set enough so you can move them without them falling apart. They will deflate a bit as they cool, creating that perfect little cup for the chocolate. After 5 minutes, transfer them to a wire cooling rack to cool completely. The chocolate will firm back up as it cools, but it will remain a little softer than its original state.
Storage & Freshness Guide
- Fridge: Store in an airtight container for up to 1 week.
- Freezer: Freeze baked cookies in a single layer, then transfer to a bag for up to 3 months.
- Reviving: Warm briefly in the microwave to soften the cookie and slightly melt the chocolate.
Serving Suggestions
Complementary Dishes
- A scoop of vanilla bean ice cream — The cool, creamy ice cream against the slightly warm, soft cookie is a divine contrast. It turns a simple cookie into a decadent dessert.
- A warm mug of homemade hot chocolate — Double down on the chocolate theme for the ultimate cozy experience. The rich cocoa complements the peanut butter and milk chocolate kiss perfectly.
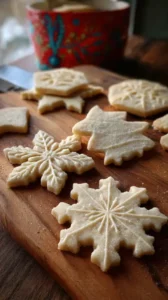
- A festive holiday cookie platter — Pair them with snickerdoodles, gingerbread men, and shortbread for a beautiful and varied assortment that has something for everyone.
Drinks
- A cold glass of milk — It’s the undisputed classic for a reason. The creaminess cuts through the sweetness and just feels right.
- Dark roast coffee — The bitterness of a good, strong coffee provides a wonderful counterpoint to the sweet and salty cookie, cleansing the palate between bites.
- Chai tea latte — The warm spices of chai—cinnamon, cardamom, cloves—add an extra layer of cozy complexity that pairs surprisingly well with the peanut butter.
Something Sweet
- Chocolate-dipped pretzel rods — For a sweet-and-salty platter, these are the perfect partner. They echo the saltiness of the peanut butter and the chocolate theme.
- Peppermint bark — The cool, crisp mint provides a refreshing contrast to the rich, nutty cookies, making your dessert spread feel complete and festive.
- Simple butter cookies — Sometimes you need a simple, less-rich option on the side, and a plain butter cookie offers a lovely, neutral palate cleanser.
Top Mistakes to Avoid
- Mistake: Using cold butter. If your butter isn’t properly softened, it won’t cream properly with the sugars. This can result in a dense, greasy cookie instead of one that’s light and tender. Your finger should leave a clear indent when you press it.
- Mistake: Overbaking the cookies. I’ve messed this up before too, thinking they needed more time. They continue to cook on the hot baking sheet, so taking them out when they look soft is key. Overbaked blossoms are dry and lose their magic.
- Mistake: Pressing the kisses in after the cookies have cooled. Timing is everything! The heat from the cookie is what slightly melts the base of the kiss, acting as an edible glue. If you wait, the chocolate will just sit on top and fall off easily.
- Mistake: Using a natural peanut butter. The oils in natural peanut butter separate and can make your dough too oily and cause excessive spreading. The stabilizers in conventional peanut butter give you a much more reliable texture.
Expert Tips
- Tip: For a flavor twist, use dark chocolate or peanut butter-filled Hershey’s Kisses instead of the classic milk chocolate. Dark chocolate adds a sophisticated bitterness, while the peanut butter ones double down on the nutty flavor.
- Tip: If your dough is too sticky to roll easily, pop it in the refrigerator for 15-20 minutes. This will firm up the butter just enough to make handling a dream, without turning it into a full “chill” dough.
- Tip: To get picture-perfect kisses that don’t smear, make sure your hands are clean and dry when you’re rolling the dough balls. Any grease or moisture on your hands can prevent the sugar from sticking evenly.
- Tip: For a holiday look, you can roll the dough balls in coarse or sanding sugar instead of granulated. It gives them an extra sparkly, festive appearance that really shines on a cookie platter.
FAQs
Can I make the dough ahead of time?
You absolutely can! The dough can be covered tightly and refrigerated for up to 3 days. Let it sit at room temperature for about 20-30 minutes before scooping and rolling, as it will be quite firm straight from the fridge. You can also freeze the shaped, sugar-rolled dough balls on a baking sheet before transferring them to a freezer bag. Bake from frozen, adding 1-2 minutes to the baking time.
Why did my cookies spread too much?
This is usually caused by butter that was too warm or using a natural-style peanut butter. If your kitchen is very warm, the dough can become greasy. Another culprit could be not using enough flour—make sure you’re measuring your flour correctly by spooning it into the measuring cup and leveling it off with a knife, rather than scooping directly from the bag.
Can I use a different kind of chocolate?
Of course! While Hershey’s Kisses are the classic, feel free to get creative. Rolo candies create a caramel center, Hugs (the striped ones) add a white chocolate twist, or even a simple chocolate star will work. Just be mindful of the size; you want a piece of chocolate that’s proportionate to the cookie.
How do I store these cookies to keep them soft?
Once completely cooled, store them in an airtight container at room temperature. I like to place a piece of bread in the container with them—the cookies will draw moisture from the bread, which helps keep them wonderfully soft for days. Just replace the bread if it gets hard.
My chocolate kisses got blotchy and white after a day. What happened?
That’s called chocolate bloom! It happens when the chocolate gets slightly warm and the cocoa butter rises to the surface, creating a whitish film. It’s perfectly safe to eat and doesn’t affect the taste, but it’s not as pretty. To prevent it, make sure the cookies are completely cool before storing them, and keep them in a cool, dry place away from direct sunlight.


Peanut Butter Blossoms: Easy No-Chill Holiday Cookies
Peanut Butter Blossoms are the ultimate easy Christmas treat. This classic recipe for peanut butter blossom cookies delivers soft, crinkly comfort with a chocolate kiss in every bite.
Ingredients
For the Ingredients
-
1/2 cup unsalted butter (softened to room temperature)
-
3/4 cup smooth peanut butter (not natural/oily style)
-
1/3 cup granulated sugar (for rolling)
-
1/2 cup granulated sugar
-
1/2 cup light brown sugar (packed)
-
1 large egg (at room temperature)
-
1 teaspoon vanilla extract
-
1 3/4 cups all-purpose flour
-
1 teaspoon baking soda
-
1/2 teaspoon salt
-
48 milk chocolate Hershey's Kisses (unwrapped)
Instructions
-
First, preheat your oven to 375°F (190°C). Line your baking sheets with parchment paper or silicone mats. Now, in the bowl of your stand mixer fitted with the paddle attachment (or a large bowl if using a hand mixer), combine the softened butter, peanut butter, 1/2 cup granulated sugar, and the packed brown sugar. Beat them together on medium speed for about 2-3 minutes. You’re looking for the mixture to become light, fluffy, and well-combined.01
-
Scrape down the sides and bottom of the bowl with a spatula to make sure everything is incorporated. Now, add the room-temperature egg and the vanilla extract. Mix on medium speed just until they are fully blended in.02
-
In a separate, medium-sized bowl, whisk together the flour, baking soda, and salt. With your mixer on low speed, gradually add the dry ingredients to the wet ingredients. Mix just until the flour streaks disappear and a soft dough forms.03
-
Place the remaining 1/3 cup of granulated sugar in a small bowl. Scoop out about 1 tablespoon of dough and roll the dough between your palms to form a smooth ball. Then, roll each ball generously in the bowl of sugar until it’s completely coated. Place the sugar-coated dough balls about 2 inches apart on your prepared baking sheets.04
-
Bake for 7 to 9 minutes. The trick is to pull them out when the edges are just barely starting to turn a light golden brown, but the centers still look puffy and soft. Rotate your baking sheet halfway through for even browning.05
-
As soon as you remove the baking sheet from the oven, work quickly but carefully. Gently press a chocolate kiss into the center of each hot cookie. Press down just until the cookie cracks slightly around the edges of the kiss.06
-
Let the cookies cool on the baking sheet for 5 full minutes. After 5 minutes, transfer them to a wire cooling rack to cool completely.07
Not what you're looking for?


