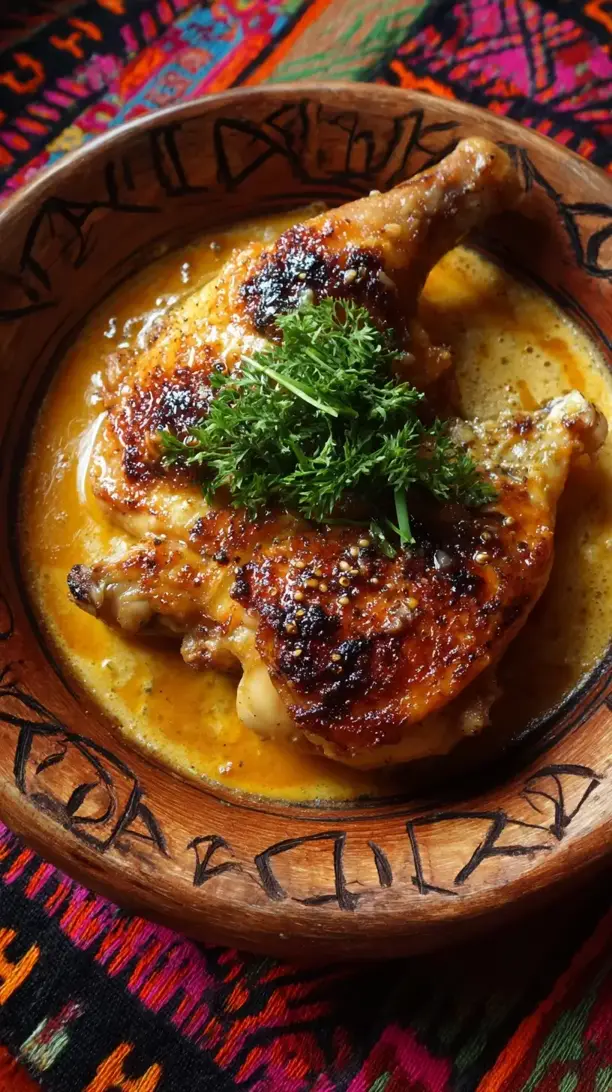
This Peruvian chicken recipe delivers incredibly juicy meat with impossibly crisp, golden skin. The magic comes from a vibrant marinade of citrus, garlic, and earthy spices that deeply flavors the bird. It’s a surprisingly doable weeknight meal with serious wow factor.
Nothing beats a great Peruvian Chicken. Whether you're a fan of Chicken Recipes or want to try something from our Drinks selection, keep scrolling!


Why You’ll Love This Peruvian Chicken
- Insanely Flavorful & Juicy: The marinade adds tons of flavor while keeping the chicken incredibly moist.
- Perfectly Crispy Skin: High heat and simple tricks give you skin that shatters.
- Feels Special: This gorgeous dish turns any dinner into a festive gathering.
- Amazing Leftovers: The flavor improves overnight, perfect for salads or sandwiches.
Ingredients & Tools
- 1 whole chicken (about 1.5 kg / 3–4 lbs), patted dry
- 4 cloves garlic, minced or pressed
- 2 tbsp white vinegar
- 2 tbsp soy sauce
- Juice of 2 limes (about ¼ cup)
- Juice of 1 orange (about ⅓ cup)
- 2 tbsp olive oil
- 1 tbsp ground cumin
- 2 tsp smoked paprika
- 1 tsp dried oregano
- 1 tsp black pepper
- 1½ tsp salt
- 1–2 tsp aji amarillo paste (optional, for a little heat)
Tools: A roasting pan (preferably with a rack), a small bowl for the marinade, and a pastry brush.
Notes: Don’t skip the vinegar—it tenderizes the skin. Aji amarillo paste adds an authentic, fruity warmth.
Nutrition (per serving)
| Calories: | 320 kcal |
| Protein: | 35 g |
| Fat: | 19 g |
| Carbs: | 2 g |
| Fiber: | 0.5 g |
Serves: 4 | Prep Time: 15 mins (plus marinating) | Cook Time: 60–75 mins | Total Time: 1 hour 30 mins
Before You Start: Tips & Ingredient Notes
- Pat that chicken DRY. This is the single most important step for crispy skin. Any moisture on the surface will steam the skin instead of letting it get beautifully brown and crackly.
- Don’t rush the marinade. I know, it’s tempting to just pop it in the oven. But letting it marinate for at least 4 hours, or ideally overnight, allows the flavors to penetrate deeply. It makes all the difference.
- Why a roasting rack? Lifting the chicken off the bottom of the pan allows hot air to circulate all around it. This means the skin crisps up evenly and the bottom doesn’t get soggy.
- The power of citrus. The lime and orange juice aren’t just for flavor—their acidity helps break down the proteins in the chicken, resulting in a more tender final product. It’s a simple science trick that works every time.
How to Make Peruvian Chicken
Step 1: Make the Marinade. In a medium bowl, whisk together the minced garlic, vinegar, soy sauce, lime juice, orange juice, olive oil, cumin, smoked paprika, oregano, black pepper, salt, and aji amarillo paste (if using). You’ll notice the marinade will be a beautiful, deep reddish-brown color and smell incredibly aromatic—that’s how you know you’re on the right track. Give it a quick taste; it should be tangy, salty, and deeply spiced.
Step 2: Prep and Marinate the Chicken. Place your thoroughly dried chicken on a clean cutting board. Using your fingers, gently loosen the skin over the breast and thighs—be careful not to tear it. This creates little pockets for the marinade to get right next to the meat. Pour about a third of the marinade under the skin, massaging it in to distribute it evenly. Place the chicken in a large zip-top bag or a bowl, and pour the remaining marinade all over it, making sure to coat every nook and cranny. Seal the bag or cover the bowl and refrigerate for at least 4 hours, or up to 24 hours. Flip it halfway through if you remember.
Step 3: Bring to Room Temperature & Preheat. About an hour before you’re ready to cook, take the chicken out of the fridge. Letting it come to room temperature is a small step that ensures it cooks evenly—no cold spots in the middle! Preheat your oven to 220°C (425°F). Place a roasting rack inside a roasting pan.
Step 4: Roast to Perfection. Remove the chicken from the marinade, letting the excess drip off (but don’t wipe it off!). Place it breast-side up on the roasting rack. Tuck the wingtips behind the shoulders to prevent burning. Roast in the preheated oven for 60 to 75 minutes. You’ll know it’s done when the skin is a deep, golden brown and an instant-read thermometer inserted into the thickest part of the thigh (without touching bone) reads 74°C (165°F). The juices should also run clear.
Step 5: The Rest is Crucial. Once out of the oven, transfer the chicken to a clean cutting board and let it rest for a full 15 minutes. I know it’s hard to wait when it smells this good, but this allows the juices to redistribute throughout the meat. If you cut into it right away, all those precious juices will just run out, leaving you with drier chicken. Use this time to make a quick side or just set the table.
Step 6: Carve and Serve. Carve the chicken into pieces—legs, thighs, wings, and breast. I like to serve it with any accumulated juices from the cutting board spooned right back over the top. That’s pure flavor gold right there.
Storage & Freshness Guide
- Fridge: Store leftovers in an airtight container for up to 4 days.
- Freezer: Freeze carved meat in a sealed bag for up to 3 months.
- Reviving: Reheat in a 350°F oven until warm to preserve crispness.
Serving Suggestions
Complementary Dishes
- A Simple Green Salad with a Zesty Vinaigrette — The fresh, crisp greens and sharp dressing cut through the richness of the chicken beautifully, balancing the whole plate.
- Cilantro-Lime Rice — The bright, herby notes in the rice are a classic pairing that soaks up all the delicious juices from the chicken.
- Grilled Corn on the Cob — A little char and sweetness from the corn is a fantastic textural and flavor contrast to the savory, spiced chicken.
Drinks
- A Crisp, Cold Pilsner — The light, bubbly beer cleanses the palate between bites and complements the spices without overpowering them.
- Chicha Morada — This traditional Peruvian purple corn drink is sweet, spiced with cinnamon and cloves, and offers a truly authentic experience.
- Sparkling Water with Lime — Sometimes you just need something refreshing and non-alcoholic to highlight the citrusy notes in the chicken.
Something Sweet
- Alfajores (Dulce de Leche Sandwich Cookies) — These delicate, crumbly cookies with a rich caramel center are a beloved Peruvian dessert that ends the meal on a perfect note.
- Fresh Mango Slices with a Sprinkle of Chili Powder — It’s a simple, refreshing, and slightly spicy way to cleanse the palate that feels light and satisfying.
- Passion Fruit Mousse — The intense, tropical tartness of passion fruit is a brilliant and vibrant finish that echoes the citrus in the main course.
Top Mistakes to Avoid
- Mistake: Not Drying the Chicken.


Peruvian Chicken
Make the best Peruvian Chicken with juicy meat and crispy skin. This easy recipe uses a zesty marinade for incredible flavor. Get the authentic recipe now!
Ingredients
For the Marinade:
-
4 cloves garlic (minced or pressed)
-
2 tbsp white vinegar
-
2 tbsp soy sauce
-
2 limes (juiced (about ¼ cup))
-
1 orange (juiced (about ⅓ cup))
-
2 tbsp olive oil
-
1 tbsp ground cumin
-
2 tsp smoked paprika
-
1 tsp dried oregano
-
1 tsp black pepper
-
1.5 tsp salt
-
1–2 tsp aji amarillo paste (optional, for a little heat)
For the Chicken:
-
1 whole chicken (about 1.5 kg / 3–4 lbs, patted dry)
Instructions
-
In a medium bowl, whisk together the minced garlic, vinegar, soy sauce, lime juice, orange juice, olive oil, cumin, smoked paprika, oregano, black pepper, salt, and aji amarillo paste (if using).01
-
Place your thoroughly dried chicken on a clean cutting board. Using your fingers, gently loosen the skin over the breast and thighs—be careful not to tear it. Pour about a third of the marinade under the skin, massaging it in to distribute it evenly. Place the chicken in a large zip-top bag or a bowl, and pour the remaining marinade all over it, making sure to coat every nook and cranny. Seal the bag or cover the bowl and refrigerate for at least 4 hours, or up to 24 hours. Flip it halfway through if you remember.02
-
About an hour before you’re ready to cook, take the chicken out of the fridge. Preheat your oven to 220°C (425°F). Place a roasting rack inside a roasting pan.03
-
Remove the chicken from the marinade, letting the excess drip off (but don’t wipe it off!). Place it breast-side up on the roasting rack. Tuck the wingtips behind the shoulders to prevent burning. Roast in the preheated oven for 60 to 75 minutes. You’ll know it’s done when the skin is a deep, golden brown and an instant-read thermometer inserted into the thickest part of the thigh (without touching bone) reads 74°C (165°F). The juices should also run clear.04
-
Once out of the oven, transfer the chicken to a clean cutting board and let it rest for a full 15 minutes.05
-
Carve the chicken into pieces—legs, thighs, wings, and breast. Serve it with any accumulated juices from the cutting board spooned right back over the top.06
Not what you're looking for?


