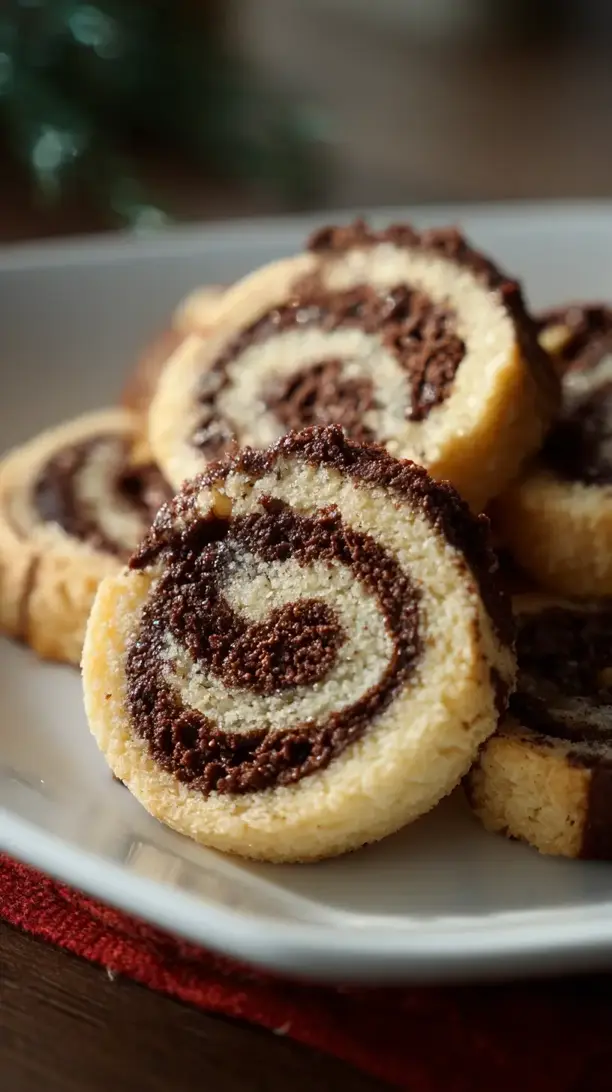
There’s something magical about pulling a tray of Pinwheel Swirl Cookies from the oven. To me, they feel like edible art—a mesmerizing spiral of chocolate and vanilla that never fails to make me smile. I love having this recipe in my back pocket during the bustling holiday season because it’s such a comforting, make-ahead project. If you’re brainstorming Christmas baking ideas, let this be your go-to: a simple dough you can chill, then slice and bake whenever you need a little delight.
What emerges from the oven are truly unique Christmas cookies—tender, buttery, and full of that nostalgic flavor we all crave. They always earn a spot on my holiday cookie tray because they look so impressive with hardly any fuss. Whether you’re searching for standout Christmas dessert ideas or just want some easy Christmas treats to wrap up for friends, these slice-and-bake wonders deliver. In the end, they’re simply wonderful Christmas sweets—proof that the coziest comfort food can also be beautifully simple to create.
If you're looking for the perfect Pinwheel Swirl Cookies, you're in the right place. Whether you love Christmas Cookie or want to explore our Breakfast & Brunch collection, we've got you covered.

Why You’ll Love This Pinwheel Swirl Cookies
- Showstopping look: They look professionally made but are totally homemade.
- Therapeutic process: Rolling and shaping the dough is a calming, hands-on activity.
- Make-ahead friendly: Dough logs freeze beautifully for slice-and-bake convenience.
- Classic flavors: The timeless duo of rich chocolate and buttery vanilla pleases everyone.
Ingredients & Tools
- 225 g (1 cup) unsalted butter, softened to room temperature
- 200 g (1 cup) granulated sugar
- 1 large egg, at room temperature
- 2 tsp pure vanilla extract
- 315 g (2 ½ cups) all-purpose flour
- ½ tsp baking powder
- ¼ tsp salt
- 30 g (¼ cup) unsweetened cocoa powder, sifted
- 1-2 tbsp milk or cream, if needed
Tools: Stand mixer or hand mixer, two mixing bowls, plastic wrap, rolling pin, sharp knife.
Notes: Using room temperature butter and egg is non-negotiable for a pliable dough. Sift cocoa powder to avoid lumps.
Nutrition (per serving)
| Calories: | 120 kcal |
| Protein: | 1.5 g |
| Fat: | 6 g |
| Carbs: | 15 g |
| Fiber: | 0.5 g |
Serves: 36 cookies | Prep Time: 30 minutes | Cook Time: 10 minutes | Total Time: 2 hours 40 minutes (includes chilling)
Before You Start: Tips & Ingredient Notes
- Butter texture is everything. Your butter should be soft enough that you can easily make an indentation with your finger, but not so soft that it’s oily or melted. This is the secret to a dough that holds its shape.
- Don’t rush the chilling. I know it’s tempting to skip this step, but chilling the dough is what makes the cookies slice cleanly and hold their beautiful pinwheel shape in the oven. It’s the most important step for success.
- Use a sharp knife for slicing. A dull knife will squish your beautiful swirls. A sharp chef’s knife, wiped clean between slices, will give you those perfect, clean-edged cookies.
- Weigh your flour for accuracy. If you’re using cup measurements, fluff your flour with a spoon, then spoon it into the cup and level it off. Scooping directly from the bag can pack in too much flour and lead to a dry dough.
How to Make Pinwheel Swirl Cookies
Step 1: Start by creaming the butter and sugar together in a large bowl. Use your mixer on medium-high speed until the mixture is light, pale, and fluffy. This should take about 2-3 minutes. You’ll notice the texture change completely—it becomes almost whipped. Now, beat in the egg and vanilla extract until everything is just combined and smooth.
Step 2: In a separate bowl, whisk together the flour, baking powder, and salt. With your mixer on low speed, gradually add the dry ingredients to the wet ingredients. Mix only until the flour streaks disappear and a soft dough forms. Be careful not to overmix at this stage.
Step 3: Now, divide the dough in half. Place one half back in your mixing bowl. Add the sifted cocoa powder to this half. Mix on low until the cocoa is fully incorporated and the dough is a uniform chocolate brown. If the dough feels a bit dry or crumbly, this is where you add a tablespoon of milk or cream to bring it together.
Step 4: This is the fun part! Place each portion of dough between two sheets of parchment paper. Using a rolling pin, roll each one out into a rectangle that’s roughly 9×7 inches and about ¼-inch thick. Try to get them as even as possible. The parchment paper prevents sticking and makes the next step so much easier.
Step 5: Carefully flip the vanilla dough rectangle on top of the chocolate dough rectangle, peeling away the top layer of parchment from both. You should now have a neat stack. If any edges are uneven, you can gently trim them with a knife or just press them together.
Step 6: Starting from one of the shorter ends, use the bottom layer of parchment paper to help you tightly and evenly roll the dough into a log, just like a jelly roll. Don’t worry if it’s not perfect—the swirl will still be beautiful. Once rolled, wrap the log tightly in plastic wrap.
Step 7: This is the crucial chilling step. Place the wrapped dough log in the refrigerator for at least 2 hours, or until it is very firm. You can even chill it overnight. A firm log is essential for clean slicing; if it’s soft, the swirls will distort.
Step 8: When you’re ready to bake, preheat your oven to 350°F (175°C) and line baking sheets with parchment paper. Unwrap the chilled dough log and, using a sharp knife, slice it into ¼-inch thick rounds. Place them about 1 inch apart on the prepared baking sheets.
Step 9: Bake for 8-10 minutes, or until the edges are just barely starting to turn golden. The centers will still look soft—that’s perfect! They will firm up as they cool. Let the cookies cool on the baking sheet for 5 minutes before transferring them to a wire rack to cool completely.
Storage & Freshness Guide
- Fridge: Store dough logs wrapped in plastic for up to 3 days before slicing and baking.
- Freezer: Freeze wrapped dough logs for up to 3 months; slice while partially frozen and bake.
- Reviving: Refresh baked cookies in a 300°F oven for 3-5 minutes to crisp slightly.
Serving Suggestions
Complementary Dishes
- A simple fruit platter — The fresh, bright acidity of berries or citrus cuts through the richness of the buttery cookies beautifully, cleansing the palate between bites.
- A cheese board with mild cheeses — A creamy brie or a mild cheddar offers a lovely savory counterpoint that makes the sweetness of the cookies even more pronounced and delightful.
Drinks
- A cold glass of milk — It’s a classic for a reason. The creaminess is the perfect partner to these nostalgic, tender cookies, especially when they’re still slightly warm.
- A cup of black coffee or espresso — The bitterness of a strong brew provides a fantastic contrast to the sweet, simple flavors of the vanilla and chocolate, making for a very sophisticated pairing.
Something Sweet
- Vanilla bean ice cream — Sandwich a small scoop between two cooled cookies for an incredible ice cream sandwich. The cold, creamy ice cream with the crisp cookie is pure heaven.
- A rich chocolate mousse — For an ultra-decadent dessert, serve a few cookies alongside a pot of dark chocolate mousse. It doubles down on the chocolate while the cookie provides a lovely textural contrast.
Top Mistakes to Avoid
- Mistake: Using melted or too-soft butter. This will create a dough that’s greasy and too soft to roll properly. It will spread excessively in the oven, blurring your beautiful swirls.
- Mistake: Skipping or shortening the chill time. I’ve messed this up before too, thinking 30 minutes would be enough. A warm log will squish when you slice it, and the cookies will spread into blobs instead of holding their shape.
- Mistake: Over-baking the cookies. You want to take them out when they still look a little soft in the center. They continue to cook on the hot baking sheet, and over-baking will make them hard and crunchy instead of tender.
- Mistake: Using a dull knife to slice. This seems minor, but it’s a game-changer. A dull knife presses down instead of slicing through, completely distorting the spiral you worked so hard to create.
Expert Tips
- Tip: Chill your dough between rolling steps. If your kitchen is warm and the dough becomes too soft to handle easily, just pop it back in the fridge for 15 minutes. This makes it much more manageable and prevents tearing.
- Tip: Create a double swirl for a dramatic effect. For an even more impressive look, divide your vanilla and chocolate dough into two portions each. Roll out two smaller rectangles of each color, stack them (vanilla, chocolate, vanilla, chocolate), and then roll. You’ll get a stunning multi-layered spiral.
- Tip: Roll the log in sprinkles or sanding sugar. Before chilling, you can roll the outside of your dough log in colorful sprinkles or coarse sugar. When you slice and bake, each cookie will have a beautiful, festive, crunchy edge.
- Tip: Freeze the logs for future baking. Once wrapped in plastic wrap, the dough logs can be placed in a freezer bag and frozen for up to 3 months. Just slice while still partially frozen and bake, adding a minute or two to the baking time.
FAQs
Why did my dough crack when I tried to roll it?
This is almost always due to the dough being too cold or too dry. If it’s straight from the fridge, let it sit on the counter for 5-10 minutes to become slightly more pliable. If it’s dry, you can knead in a teaspoon of milk at a time until it comes together smoothly. The key is a dough that’s firm but still malleable.
Can I make these cookies with other flavors?
Absolutely! The vanilla base is a perfect canvas. Instead of cocoa, you could mix in a tablespoon of matcha powder for a green tea swirl, or some ground cinnamon for a snickerdoodle effect. Just be mindful of adding any liquid flavorings, as they can throw off the dough’s consistency. A little goes a long way with powders and spices.
My cookies spread and lost their shape. What happened?
This usually points to the dough not being chilled enough before baking. The butter was likely too warm, causing it to melt too quickly in the oven. Next time, ensure your log is rock-hard before slicing. Also, double-check that your oven is properly preheated and you’re not using a hot baking sheet for subsequent batches.
How do I store these cookies to keep them fresh?
Once completely cooled, store them in an airtight container at room temperature. They’ll stay fresh and tender for about 5 days. You can place a piece of bread in the container with them—it sounds weird, but the bread will get stale while the cookies stay soft! For longer storage, freeze the baked cookies for up to 2 months.
Can I use a natural vs. Dutch-process cocoa powder?
You can use either, but they behave a little differently. Natural cocoa is acidic and will give a sharper chocolate flavor. Dutch-process is alkalized, milder, and darker in color. For this recipe, either will work fine, as the leavening is minimal. I personally prefer Dutch-process for its deep, dark swirls.


Pinwheel Swirl Cookies: An Easy Make-Ahead Holiday Recipe
Make these stunning Pinwheel Swirl Cookies, a classic chocolate vanilla swirl cookie that's an easy Christmas treat. They're buttery, tender, and perfect for your holiday dessert table.
Ingredients
For the cookie dough:
-
225 g unsalted butter (softened to room temperature)
-
200 g granulated sugar
-
1 large egg (at room temperature)
-
2 tsp pure vanilla extract
-
315 g all-purpose flour
-
½ tsp baking powder
-
¼ tsp salt
-
30 g unsweetened cocoa powder (sifted)
-
1-2 tbsp milk or cream (if needed)
Instructions
-
Start by creaming the butter and sugar together in a large bowl. Use your mixer on medium-high speed until the mixture is light, pale, and fluffy. This should take about 2-3 minutes. You’ll notice the texture change completely—it becomes almost whipped. Now, beat in the egg and vanilla extract until everything is just combined and smooth.01
-
In a separate bowl, whisk together the flour, baking powder, and salt. With your mixer on low speed, gradually add the dry ingredients to the wet ingredients. Mix only until the flour streaks disappear and a soft dough forms. Be careful not to overmix at this stage.02
-
Now, divide the dough in half. Place one half back in your mixing bowl. Add the sifted cocoa powder to this half. Mix on low until the cocoa is fully incorporated and the dough is a uniform chocolate brown. If the dough feels a bit dry or crumbly, this is where you add a tablespoon of milk or cream to bring it together.03
-
This is the fun part! Place each portion of dough between two sheets of parchment paper. Using a rolling pin, roll each one out into a rectangle that’s roughly 9x7 inches and about ¼-inch thick. Try to get them as even as possible. The parchment paper prevents sticking and makes the next step so much easier.04
-
Carefully flip the vanilla dough rectangle on top of the chocolate dough rectangle, peeling away the top layer of parchment from both. You should now have a neat stack. If any edges are uneven, you can gently trim them with a knife or just press them together.05
-
Starting from one of the shorter ends, use the bottom layer of parchment paper to help you tightly and evenly roll the dough into a log, just like a jelly roll. Don’t worry if it’s not perfect—the swirl will still be beautiful. Once rolled, wrap the log tightly in plastic wrap.06
-
This is the crucial chilling step. Place the wrapped dough log in the refrigerator for at least 2 hours, or until it is very firm. You can even chill it overnight. A firm log is essential for clean slicing; if it’s soft, the swirls will distort.07
-
When you're ready to bake, preheat your oven to 350°F (175°C) and line baking sheets with parchment paper. Unwrap the chilled dough log and, using a sharp knife, slice it into ¼-inch thick rounds. Place them about 1 inch apart on the prepared baking sheets.08
-
Bake for 8-10 minutes, or until the edges are just barely starting to turn golden. The centers will still look soft—that’s perfect! They will firm up as they cool. Let the cookies cool on the baking sheet for 5 minutes before transferring them to a wire rack to cool completely.09
Not what you're looking for?


