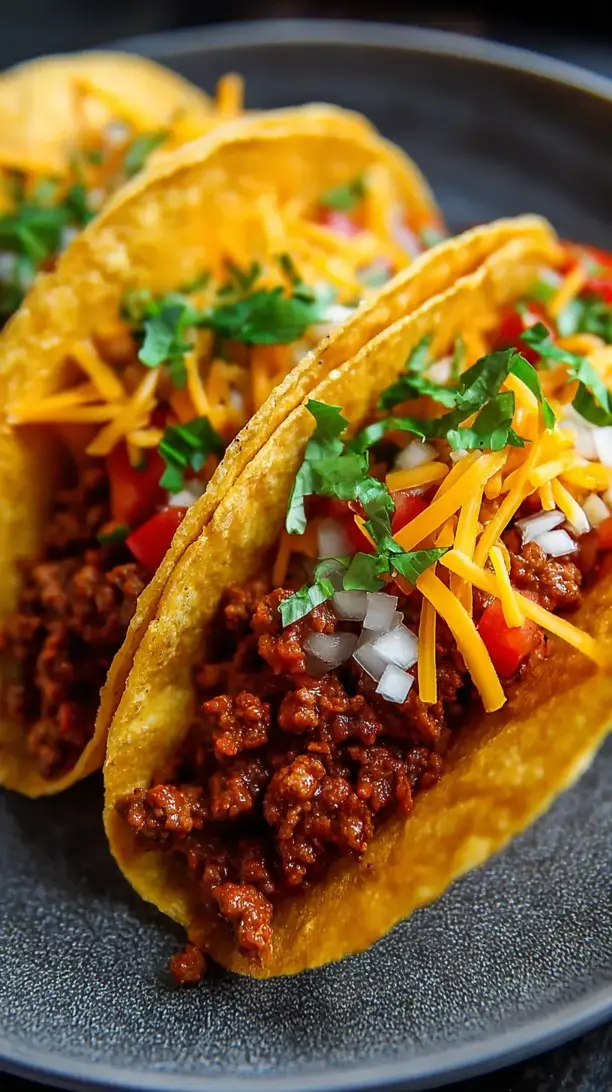
There’s something magical about taco night — the sizzle of seasoned beef hitting a hot pan and the colorful array of fresh toppings. These Quick Beef Tacos are a lifesaver for busy weeknights, delivering deep flavor in under 30 minutes. You’ll love how the aroma fills your kitchen and brings everyone running to the table.
Craving a delicious Quick Beef Tacos? You've come to the right spot! From Dinner Ideas favorites to amazing Dessert Recipes recipes, there's something here for everyone.


Why You’ll Love This Quick Beef Tacos
Seriously Speedy: From pan to plate in under 30 minutes.
Incredibly Customizable: Everyone can build their dream taco.
Packed with Flavor: Simple spice mix creates deep, savory taste.
Perfect for Any Occasion: Fun for family dinners or casual gatherings.
Ingredients & Tools
- 1 tbsp olive oil
- 1 medium yellow onion, finely diced
- 3 cloves garlic, minced
- 1 lb lean ground beef (90/10 works well)
- 2 tbsp tomato paste
- 1 tbsp chili powder
- 1 tsp ground cumin
- 1/2 tsp smoked paprika
- 1/2 tsp dried oregano
- 1/4 tsp cayenne pepper (optional, for heat)
- 1/2 cup beef broth or water
- Salt and black pepper to taste
- 8-12 small corn or flour tortillas
- For serving: shredded lettuce, diced tomatoes, shredded cheese, sour cream, salsa, lime wedges, fresh cilantro
Tools: A large skillet, a wooden spoon or spatula, and a small bowl for your spice mix.
Notes: Don’t skip the tomato paste—it adds rich, concentrated umami depth. Using beef broth instead of water gives extra savory flavor.
Nutrition (per serving)
| Calories: | 380 kcal |
| Protein: | 25 g |
| Fat: | 16 g |
| Carbs: | 32 g |
| Fiber: | 5 g |
Serves: 4 | Prep Time: 10 minutes | Cook Time: 15 minutes | Total Time: 25 minutes
Before You Start: Tips & Ingredient Notes
- Lean vs. Regular Ground Beef. I prefer a 90/10 lean beef because it renders less grease, meaning you don’t have to drain as much fat. If you use a higher fat content, just drain the excess after browning.
- The Power of Toasting Spices. Adding your dried spices directly to the beef and onion mixture in the hot pan for a minute before adding liquid “blooms” them. This quick toast wakes up their essential oils and makes the flavor so much more vibrant and complex.
- Get Your Toppings Ready First. The beef filling comes together so quickly that you’ll want your toppings prepped and in bowls before you even start cooking the meat. This makes assembly a breeze and keeps everything hot.
- Don’t Overcrowd the Pan. When browning the beef, resist the urge to stir it constantly. Let it sit for a minute to develop a nice, brown crust in spots. This fond (the browned bits on the bottom of the pan) is pure flavor gold.
How to Make Quick Beef Tacos
Step 1: Start by prepping all your vegetables and measuring out your spices. Dice the onion and mince the garlic—having everything ready to go (your *mise en place*) is key for a smooth, quick cooking process. Go ahead and get your toppings chopped and set out in little bowls too. Warm your tortillas by wrapping them in a damp paper towel and microwaving for 30-45 seconds, or by heating them one by one in a dry skillet over medium heat until soft and pliable.
Step 2: Heat the olive oil in a large skillet over medium-high heat. Add the diced onion and cook, stirring occasionally, for about 4-5 minutes until it becomes soft and translucent. You’ll notice the aroma sweeten as it cooks. Now, add the minced garlic and cook for just one more minute until it’s fragrant—be careful not to let it burn, as burnt garlic can turn bitter.
Step 3: Add the ground beef to the skillet with the onions and garlic. Use your wooden spoon to break it up into small crumbles. Cook for 5-7 minutes, stirring only occasionally, until the beef is thoroughly browned. You should see some nice browned bits forming on the bottom of the pan. If there’s a significant amount of rendered fat, you can drain some off, but leave a little for flavor.
Step 4: Push the beef to one side of the skillet and add the tomato paste to the empty space. Let it cook for about 30 seconds to a minute—this caramelizes it slightly and deepens its flavor. Then, stir it into the beef mixture until everything is well coated and that rich, red color is evenly distributed.
Step 5: Now, sprinkle all of your spices—the chili powder, cumin, smoked paprika, oregano, and cayenne if using—directly over the beef. Stir constantly for one minute. You’ll really smell the spices waking up and becoming incredibly aromatic. This is where the magic happens!
Step 6: Pour in the beef broth (or water) to deglaze the pan. Use your spoon to scrape up all those delicious browned bits from the bottom of the skillet. This liquid will help create a saucy consistency and carry all that flavor through the meat. Let the mixture simmer for 2-3 minutes, until the liquid has reduced slightly and the beef is coated in a glossy, flavorful sauce. Season generously with salt and black pepper to taste.
Step 7: Your filling is ready! Turn off the heat. Now, it’s time to assemble. Set the skillet of beef, the warm tortillas, and all your topping bowls in the middle of the table. Let everyone dive in and build their own perfect taco creation. A little squeeze of fresh lime juice over the top right before eating is absolutely non-negotiable for that bright, finishing touch.
Storage & Freshness Guide
- Fridge: Store beef filling in airtight container for up to 4 days.
- Freezer: Freeze filling for up to 3 months in freezer-safe bag or container.
- Reviving: Reheat gently in skillet with splash of water or broth to loosen.
Serving Suggestions
Complementary Dishes
- Cilantro-Lime Rice — The fresh, zesty flavor of the rice is a perfect, fluffy bed for any extra taco filling or a great side on its own.
- Charred Corn & Black Bean Salad — This adds a wonderful smoky-sweet element and a different texture that complements the savory beef beautifully.
- Simple Guacamole & Tortilla Chips — Because you can never have too much avocado, and the creamy dip with crunchy chips is the ideal starter while the tacos are finishing up.
Drinks
- Classic Margarita (or Mocktail) — The sharp, citrusy tang of a good margarita cuts through the richness of the beef and just feels right with tacos.
- Ice-Cold Mexican Lager — A light, crisp beer is a no-fuss pairing that cleanses the palate between every delicious, spicy bite.
- Jarritos Mandarin Soda — The bright, fruity fizz of this popular soda is a fun, non-alcoholic option that both kids and adults adore.
Something Sweet
- Churros with Chocolate Sauce — The warm, cinnamony crunch of a churro dipped in rich chocolate is the ultimate festive finish to taco night.
- Mango Sorbet — A scoop of refreshing, tropical sorbet is a light and palate-cleansing way to end the meal on a sweet note.
- Tres Leches Cake — If you’re feeling decadent, this supremely moist, milky cake is a show-stopping dessert that’s worth the extra effort.
Top Mistakes to Avoid
- Mistake: Using cold tortillas straight from the package. This is a surefire way to have them crack and break as you try to fold them. A warm tortilla is pliable and soft, making it the perfect vessel for your fillings.
- Mistake: Adding raw garlic too early. Garlic burns much faster than onions. If you add them at the same time, you risk ending up with bitter, acrid bits. Add the garlic after the onions have softened for just a minute of fragrance.
- Mistake: Skipping the deglazing step. All those browned bits stuck to the pan are pure flavor. Pouring in the liquid and scraping them up incorporates that deep, savory taste directly into your taco filling. Don’t leave that goodness behind!
- Mistake: Overloading your taco. It’s tempting to pile on the toppings, but an overstuffed taco is messy and difficult to eat. A little goes a long way—aim for a balanced ratio of beef, cheese, and fresh toppings for the perfect bite every time.
Expert Tips
- Tip: Make a double batch of the spice mix. Mix up a larger quantity of the chili powder, cumin, paprika, and oregano and keep it in a jar. You’ll have a homemade taco seasoning ready in seconds for future taco nights or for sprinkling on roasted veggies.
- Tip: Try a two-pan method for crispy shells. If you love crunchy tacos, heat a separate small skillet with a shallow layer of oil. Briefly fry each soft tortilla, folding it in half with tongs as it fries to form the classic U-shape. Drain on paper towels.
- Tip: Add a splash of acidity at the end. After you’ve turned off the heat, a tablespoon of lime juice or even apple cider vinegar stirred into the beef filling can brighten the entire dish and make the flavors pop even more.
- Tip: Cook the beef in batches if needed. If your skillet isn’t large enough, browning all one pound of beef at once can steam it instead of browning it. Cook in two batches for the best, crispiest texture.
FAQs
Can I make this taco meat ahead of time?
Absolutely! This beef filling is fantastic for meal prep. Let it cool completely after cooking, then store it in an airtight container in the refrigerator for up to 4 days. You can also freeze it for up to 3 months. Reheat it gently in a skillet with a tiny splash of water or broth to loosen it up. The flavors often taste even better the next day after they’ve had time to meld.
What’s the best way to warm tortillas?
You have a few great options! The simplest is to wrap a stack of 5-6 tortillas in a slightly damp paper towel and microwave for 30-45 seconds. For more flavor, heat them one at a time directly over a low gas flame for a few seconds per side until lightly charred, or warm them in a dry skillet over medium heat for about 30 seconds per side. The key is to keep them warm in a towel-lined basket until serving.
Can I use a different type of meat?
Of course! Ground turkey or chicken work wonderfully as a leaner alternative—just be mindful that they can dry out more easily, so don’t overcook them. For a plant-based option, crumbled firm tofu or a bag of your favorite plant-based ground “meat” substitute would work beautifully with this same spice blend and method.
My taco filling is a bit watery. How can I fix it?
No worries, this can happen. The easiest fix is to just let it simmer for a few more minutes over medium heat, stirring occasionally, until the excess liquid evaporates. If you’re really in a hurry, you can stir in a teaspoon of cornstarch mixed with a tablespoon of cold water, which will thicken the sauce almost instantly.
How can I make these tacos spicier?
You have a few avenues for more heat! The most direct is to increase the cayenne pepper in the spice mix. For a fresh, bright heat, add some finely diced jalapeño or serrano pepper to the skillet when you cook the onions. As a finishing touch, offering a bottle of your favorite hot sauce or some sliced pickled jalapeños at the table lets everyone customize their own spice level.


Quick Beef Tacos
Make delicious Quick Beef Tacos in under 30 minutes! This easy recipe is perfect for a fast, flavorful weeknight dinner. Get the simple steps and serve tonight!
Ingredients
For the taco filling:
-
1 tbsp olive oil
-
1 medium yellow onion (finely diced)
-
3 cloves garlic (minced)
-
1 lb lean ground beef (90/10 works well)
-
2 tbsp tomato paste
-
1 tbsp chili powder
-
1 tsp ground cumin
-
1/2 tsp smoked paprika
-
1/2 tsp dried oregano
-
1/4 tsp cayenne pepper (optional, for heat)
-
1/2 cup beef broth or water
-
Salt and black pepper (to taste)
For serving:
-
8-12 small corn or flour tortillas
-
shredded lettuce, diced tomatoes, shredded cheese, sour cream, salsa, lime wedges, fresh cilantro
Instructions
-
Start by prepping all your vegetables and measuring out your spices. Dice the onion and mince the garlic—having everything ready to go (your mise en place) is key for a smooth, quick cooking process. Go ahead and get your toppings chopped and set out in little bowls too. Warm your tortillas by wrapping them in a damp paper towel and microwaving for 30-45 seconds, or by heating them one by one in a dry skillet over medium heat until soft and pliable.01
-
Heat the olive oil in a large skillet over medium-high heat. Add the diced onion and cook, stirring occasionally, for about 4-5 minutes until it becomes soft and translucent. You’ll notice the aroma sweeten as it cooks. Now, add the minced garlic and cook for just one more minute until it’s fragrant—be careful not to let it burn, as burnt garlic can turn bitter.02
-
Add the ground beef to the skillet with the onions and garlic. Use your wooden spoon to break it up into small crumbles. Cook for 5-7 minutes, stirring only occasionally, until the beef is thoroughly browned. You should see some nice browned bits forming on the bottom of the pan. If there's a significant amount of rendered fat, you can drain some off, but leave a little for flavor.03
-
Push the beef to one side of the skillet and add the tomato paste to the empty space. Let it cook for about 30 seconds to a minute—this caramelizes it slightly and deepens its flavor. Then, stir it into the beef mixture until everything is well coated and that rich, red color is evenly distributed.04
-
Now, sprinkle all of your spices—the chili powder, cumin, smoked paprika, oregano, and cayenne if using—directly over the beef. Stir constantly for one minute. You’ll really smell the spices waking up and becoming incredibly aromatic. This is where the magic happens!05
-
Pour in the beef broth (or water) to deglaze the pan. Use your spoon to scrape up all those delicious browned bits from the bottom of the skillet. This liquid will help create a saucy consistency and carry all that flavor through the meat. Let the mixture simmer for 2-3 minutes, until the liquid has reduced slightly and the beef is coated in a glossy, flavorful sauce. Season generously with salt and black pepper to taste.06
-
Your filling is ready! Turn off the heat. Now, it’s time to assemble. Set the skillet of beef, the warm tortillas, and all your topping bowls in the middle of the table. Let everyone dive in and build their own perfect taco creation. A little squeeze of fresh lime juice over the top right before eating is absolutely non-negotiable for that bright, finishing touch.07
Not what you're looking for?


