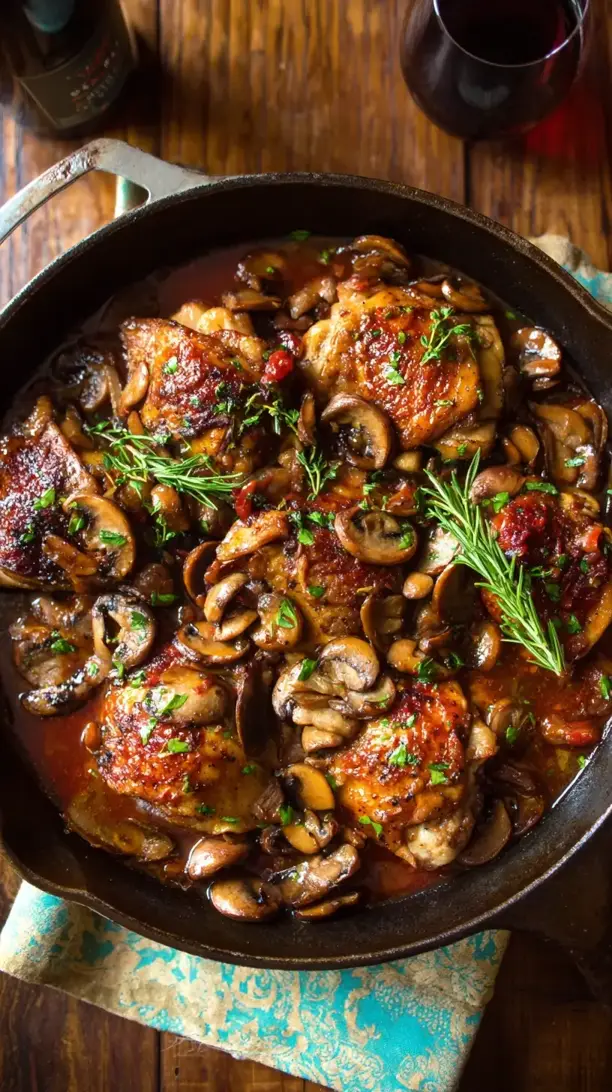
This Red Wine Chicken is a rustic, elegant one-pot wonder that transforms humble ingredients into something truly special. The deep, savory sauce and impossibly tender chicken make it perfect for a cozy dinner. The red wine adds beautiful, rounded depth you can’t get from anything else.
Looking for Red Wine Chicken inspiration? You'll love what we have! Explore more Chicken Breast Recipes recipes or discover our Appetizers & Snacks favorites.


Why You’ll Love This Red Wine Chicken
- Deep flavor, minimal effort: The oven does most of the work for you.
- Incredibly forgiving: Perfect for both weeknights and special occasions.
- Incredible aroma: Your kitchen will smell amazing as it cooks.
- Fancy without the price: Tastes far more luxurious than it actually is.
Ingredients & Tools
- 1.5 kg bone-in, skin-on chicken thighs
- 2 tbsp olive oil
- 1 large yellow onion, diced
- 4 cloves garlic, minced
- 200 g cremini mushrooms, sliced
- 3 medium carrots, chopped into chunks
- 2 stalks celery, chopped
- 375 ml dry red wine (like a Cabernet Sauvignon or Merlot)
- 240 ml chicken stock
- 2 tbsp tomato paste
- 4 sprigs fresh thyme
- 2 bay leaves
- 1 tbsp all-purpose flour
- Salt and freshly ground black pepper
Tools: A large, heavy-bottomed oven-safe pot or Dutch oven, tongs, a wooden spoon.
Notes: Don’t be intimidated by the list—most are pantry staples. Use a red wine you’d happily drink; a smooth, fruity profile works best.
Nutrition (per serving)
| Calories: | 520 kcal |
| Protein: | 42 g |
| Fat: | 22 g |
| Carbs: | 14 g |
| Fiber: | 3 g |
Serves: 4 | Prep Time: 20 minutes | Cook Time: 1 hour 15 minutes | Total Time: 1 hour 35 minutes
Before You Start: Tips & Ingredient Notes
- Choosing your chicken. I strongly recommend bone-in, skin-on thighs. The bones add immense flavor to the braising liquid, and the skin becomes wonderfully crispy when seared, providing a fantastic textural contrast to the tender meat.
- Don’t cook with wine you wouldn’t drink. This is the golden rule. If a wine tastes sharp or unpleasant in the glass, those flaws will only be amplified in the sauce. A medium-bodied, dry red is your best bet.
- Pat your chicken completely dry. This is the single most important step for achieving a beautiful, golden-brown sear instead of a pale, steamed skin. Use paper towels and really get in there—it makes all the difference.
- Prep your veggies ahead of time. Having your mirepoix (onions, carrots, celery) and mushrooms chopped and ready to go makes the cooking process smooth and stress-free, as things can move quickly once you start searing.
How to Make Red Wine Chicken
Step 1: Preheat your oven to 180°C (350°F). While it’s heating, take your chicken thighs and pat them aggressively dry with paper towels. Season both sides generously with salt and pepper. This is your flavor foundation, so don’t be shy.
Step 2: Heat the olive oil in your large Dutch oven over medium-high heat. Once the oil is shimmering, carefully place the chicken thighs in, skin-side down. You should hear a satisfying sizzle. Don’t crowd the pot—work in batches if needed. Sear for about 5-7 minutes until the skin is deeply golden and crispy. Flip and sear for another 2 minutes on the other side, then transfer to a plate. The chicken will not be cooked through, and that’s perfectly fine!
Step 3: Reduce the heat to medium. In the same pot, with all those glorious chicken drippings, add the diced onion, carrots, and celery. Sauté for about 6-8 minutes, scraping up any browned bits from the bottom of the pot, until the vegetables have softened and the onions are translucent. You’ll notice the aroma becoming sweet and fragrant.
Step 4: Add the sliced mushrooms and cook for another 5 minutes, until they’ve released their water and started to brown. Then, stir in the minced garlic and tomato paste and cook for just one more minute until fragrant. The tomato paste will deepen in color, which adds a lovely richness to the base.
Step 5: Sprinkle the flour over the vegetable mixture and stir constantly for about a minute to cook out the raw flour taste. This is our sneaky little thickener for the sauce. Now, pour in the red wine, using your wooden spoon to scrape up any remaining browned bits. Let it bubble and reduce for about 3-4 minutes.
Step 6: Pour in the chicken stock and add the fresh thyme sprigs and bay leaves. Bring everything to a gentle simmer. You’ll see the sauce start to come together. Taste the liquid and season with a bit more salt and pepper.
Step 7: Nestle the seared chicken thighs back into the pot, along with any accumulated juices from the plate. The chicken should be partially submerged in the liquid. Bring it back to a simmer, then cover the pot with a lid and carefully transfer it to the preheated oven.
Step 8: Let it braise for about 45-50 minutes. The chicken is done when it’s fall-off-the-bone tender and the sauce has thickened slightly. Carefully remove the pot from the oven—remember, the handle will be extremely hot! Discard the thyme stems and bay leaves before serving.
Storage & Freshness Guide
- Fridge: Store in an airtight container for up to 3 days.
- Freezer: Freeze for up to 3 months; thaw in fridge before reheating.
- Reviving: Reheat gently on stovetop; add a splash of stock if needed.
Serving Suggestions
Complementary Dishes
- Creamy mashed potatoes — The ultimate vehicle for that incredible red wine sauce. The fluffy, buttery potatoes soak up every last drop.
- Buttered egg noodles or polenta — A wonderfully simple base that provides a soft, comforting contrast to the rich chicken and vegetables.
- Crusty, warm bread — Non-negotiable, really. You’ll want something to mop up the sauce left on your plate.
Drinks
- The same red wine you cooked with — It’s the perfect pairing, creating a harmonious flavor experience from glass to plate.
- A light-bodied Pinot Noir — Its bright acidity and red fruit notes can cut through the richness of the dish beautifully without overpowering it.
- Sparkling water with lemon — A crisp, non-alcoholic option to cleanse the palate between bites of the deeply flavored chicken.
Something Sweet
- Dark chocolate pot de crème — The intense, bittersweet chocolate is a decadent and sophisticated follow-up to the savory main course.
- Poached pears in red wine — A playful echo of the main dish’s flavors, but in dessert form. They’re elegant and surprisingly easy to make.
- Simple vanilla bean ice cream — Sometimes, the pure, cool creaminess of vanilla is all you need after a rich meal.
Top Mistakes to Avoid
- Mistake: Not searing the chicken properly. If you rush the sear or don’t pat the skin dry, you’ll miss out on that deep, savory flavor and crispy texture that forms the foundation of the entire dish. I’ve messed this up before too, and the result is a paler, less complex sauce.
- Mistake: Using a sweet or fruity red wine. Wines like a sweet Riesling or a jammy Zinfandel can make your sauce cloying and one-dimensional. Stick to a dry, balanced red for the best results.
- Mistake: Skipping the flour. That little tablespoon of flour is crucial for giving the sauce body. Without it, your braising liquid may remain thin and watery, rather than clinging luxuriously to the chicken and vegetables.
- Mistake: Overcooking the garlic. If you add the garlic at the same time as the onions, it will burn and turn bitter by the time the onions are soft. Adding it towards the end of the veggie sauté ensures its flavor remains sweet and aromatic.
Expert Tips
- Tip: Let the chicken rest before serving. After pulling the pot from the oven, let it sit with the lid on for about 10 minutes. This allows the chicken fibers to relax, reabsorb the juices, and become even more tender.
- Tip: Skim the fat for a glossy sauce. If you have time, you can use a spoon to skim a little of the excess fat off the top of the sauce before serving. This results in a cleaner, more restaurant-quality presentation and a sauce that clings better.
- Tip: Make it a day ahead. Braised dishes like this often taste even better the next day. The flavors have more time to meld and deepen. Simply reheat gently on the stovetop.
- Tip: Thicken the sauce at the end if needed. If your sauce is thinner than you’d like after braising, you can remove the chicken and simmer the sauce on the stovetop for a few extra minutes to reduce it further. For a quick fix, a slurry of equal parts cornstarch and cold water whisked in will do the trick.
FAQs
Can I use chicken breasts instead of thighs?
You can, but I wouldn’t recommend it for a braise. Chicken breasts are very lean and are prone to drying out and becoming tough with long, slow cooking. Thighs have more fat and connective tissue, which breaks down during braising, resulting in that famously tender, juicy texture. If you must use breasts, reduce the braising time significantly to about 20-25 minutes, but keep a very close eye on them.
What’s the best red wine to use for cooking?
A good rule of thumb is to choose a dry, medium-bodied red that you enjoy drinking. Cabernet Sauvignon, Merlot, Pinot Noir, or a Côtes du Rhône blend are all excellent choices. They have enough structure and fruitiness to stand up to the cooking process without becoming bitter. Avoid “cooking wine” from the supermarket—it’s loaded with salt and preservatives.
How can I make this recipe without alcohol?
You can substitute the red wine with an equal amount of additional chicken stock mixed with a tablespoon of red wine vinegar or balsamic vinegar. This will mimic some of the acidity and depth that the wine provides. The flavor profile will be different, but it will still be a delicious, savory braised chicken dish.
How should I store and reheat leftovers?
Store any leftovers in an airtight container in the refrigerator for up to 3 days. The flavors continue to develop, making it a fantastic next-day meal! Reheat gently in a covered pot on the stovetop over low heat, adding a splash of water or stock if the sauce has thickened too much. Avoid microwaving, as it can make the chicken rubbery.
Can I freeze Red Wine Chicken?
Absolutely! This dish freezes beautifully. Let it cool completely, then transfer it to a freezer-safe container. It will keep for up to 3 months. Thaw overnight in the refrigerator before reheating gently on the stovetop. You may need to give the sauce a good stir when reheating, as it can separate slightly, but it will come back together perfectly.


Red Wine Chicken
Make this easy, one-pot Red Wine Chicken for a deeply flavorful and elegant dinner. Tender chicken braised in a rich sauce. Get the recipe now!
Ingredients
For the Ingredients
-
1.5 kg bone-in, skin-on chicken thighs
-
2 tbsp olive oil
-
1 large yellow onion (diced)
-
4 cloves garlic (minced)
-
200 g cremini mushrooms (sliced)
-
3 medium carrots (chopped into chunks)
-
2 stalks celery (chopped)
-
375 ml dry red wine (like a Cabernet Sauvignon or Merlot)
-
240 ml chicken stock
-
2 tbsp tomato paste
-
4 sprigs fresh thyme
-
2 bay leaves
-
1 tbsp all-purpose flour
-
Salt and freshly ground black pepper
Instructions
-
Preheat your oven to 180°C (350°F). While it's heating, take your chicken thighs and pat them aggressively dry with paper towels. Season both sides generously with salt and pepper.01
-
Heat the olive oil in your large Dutch oven over medium-high heat. Once the oil is shimmering, carefully place the chicken thighs in, skin-side down. Sear for about 5-7 minutes until the skin is deeply golden and crispy. Flip and sear for another 2 minutes on the other side, then transfer to a plate.02
-
Reduce the heat to medium. In the same pot, with all those glorious chicken drippings, add the diced onion, carrots, and celery. Sauté for about 6-8 minutes, scraping up any browned bits from the bottom of the pot, until the vegetables have softened and the onions are translucent.03
-
Add the sliced mushrooms and cook for another 5 minutes, until they’ve released their water and started to brown. Then, stir in the minced garlic and tomato paste and cook for just one more minute until fragrant.04
-
Sprinkle the flour over the vegetable mixture and stir constantly for about a minute to cook out the raw flour taste. Now, pour in the red wine, using your wooden spoon to scrape up any remaining browned bits. Let it bubble and reduce for about 3-4 minutes.05
-
Pour in the chicken stock and add the fresh thyme sprigs and bay leaves. Bring everything to a gentle simmer. Taste the liquid and season with a bit more salt and pepper.06
-
Nestle the seared chicken thighs back into the pot, along with any accumulated juices from the plate. Bring it back to a simmer, then cover the pot with a lid and carefully transfer it to the preheated oven.07
-
Let it braise for about 45-50 minutes. The chicken is done when it’s fall-off-the-bone tender and the sauce has thickened slightly. Carefully remove the pot from the oven—remember, the handle will be extremely hot! Discard the thyme stems and bay leaves before serving.08
Not what you're looking for?


