There’s something deeply comforting about a roasted whole chicken. This classic fills your kitchen with incredible aroma and delivers juicy meat with crispy skin. It’s surprisingly simple and perfect for a cozy dinner or impressive meal.
Looking for Roasted Whole Chicken inspiration? You'll love what we have! Explore more Chicken Recipes recipes or discover our Burgers favorites.


Why You’ll Love This Roasted Whole Chicken
- Crispy & juicy: High heat ensures golden, crackly skin and moist, tender meat.
- Simple & hands-off: Just pop it in the oven—no basting or fussing required.
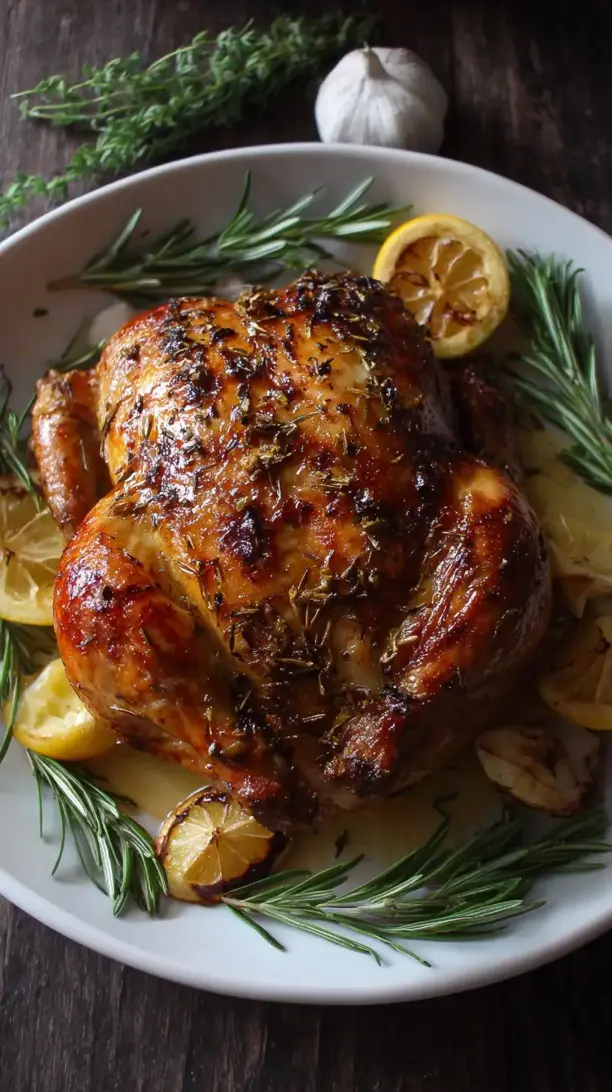
- Amazing aroma: Roasted chicken, garlic, lemon, and herbs create a heavenly scent.
- Fancy yet approachable: Impressive to serve but straightforward for any cook.
Ingredients & Tools
- 1 whole chicken (about 1.5–2 kg / 3–4 lbs), patted dry
- 2 tbsp olive oil or softened butter
- 1½ tsp fine sea salt
- 1 tsp freshly ground black pepper
- 1 lemon, halved
- 1 head of garlic, halved crosswise
- 1 small bunch fresh thyme or rosemary (or a mix)
- 1 medium onion, roughly chopped
- 2 carrots, roughly chopped (optional, for the pan)
Tools: A large roasting pan or oven-safe skillet, kitchen twine (optional but helpful), an instant-read thermometer
Notes: The quality of your chicken really matters here—look for one that’s air-chilled if you can, as it tends to have crispier skin. And don’t skip patting it dry; that’s the secret to getting that gorgeous, crackly exterior.
Nutrition (per serving)
| Calories: | 320 kcal |
| Protein: | 35 g |
| Fat: | 19 g |
| Carbs: | 2 g |
| Fiber: | 1 g |
Serves: 4–6 | Prep Time: 15 minutes | Cook Time: 1 hour 15 minutes | Total Time: 1 hour 30 minutes
Before You Start: Tips & Ingredient Notes
- Bring the chicken to room temperature. Taking the chicken out of the fridge 30–45 minutes before roasting helps it cook more evenly, preventing the outside from overcooking before the inside is done.
- Dry the skin thoroughly. Use paper towels to pat the skin until it’s completely dry. Any moisture left on the surface will steam instead of roast, resulting in soft, rubbery skin instead of crispiness.
- Season generously, inside and out. Don’t be shy with the salt and pepper! Seasoning the cavity as well as the exterior ensures flavor in every single bite.
- Why truss the chicken? Tying the legs together with kitchen twine helps the chicken cook evenly and keeps its shape, but if you don’t have any, it’s not a deal-breaker—just tuck the wings underneath.
How to Make Roasted Whole Chicken
Step 1: Preheat your oven to 220°C (425°F). While it’s heating, prepare your chicken. Place it on a clean cutting board and pat it completely dry, inside and out, with paper towels. This is the most crucial step for crispy skin—you’ll notice the paper towels get quite damp, and that’s all the moisture we’re trying to get rid of.
Step 2: Drizzle the olive oil (or rub the softened butter) all over the chicken. Use your hands to massage it into every nook and cranny. Then, sprinkle the salt and pepper evenly over the entire surface, including inside the cavity. Don’t forget the underside and the wings!
Step 3: Stuff the cavity with the halved lemon, halved garlic head, and the fresh herbs. The lemon will steam and keep the meat incredibly juicy from the inside, while the garlic and herbs will infuse the chicken with a beautiful, subtle fragrance. If you have kitchen twine, tie the legs together neatly.
Step 4: Scatter the chopped onion and carrots (if using) in the bottom of your roasting pan. These will act as a natural rack, lifting the chicken slightly and preventing it from stewing in its own juices. They’ll also caramelize and become a delicious side dish.
Step 5: Place the chicken on top of the vegetables, breast-side up. Transfer the pan to the preheated oven and roast for about 1 hour and 15 minutes. You’ll start to smell that incredible roasted aroma after about 30 minutes… it’s heavenly.
Step 6: About 50 minutes into the cooking time, start checking for doneness. The skin should be a deep, golden brown. The most reliable way to check is with an instant-read thermometer inserted into the thickest part of the thigh (without touching the bone)—it should read 74°C (165°F). The juices should also run clear.
Step 7: Once perfectly cooked, remove the chicken from the oven. The trick is to let it rest for at least 15–20 minutes before carving. This allows the juices to redistribute throughout the meat, ensuring every single slice is moist and flavorful. Don’t skip this step!
Step 8: Carefully transfer the chicken to a carving board. You can strain the pan juices from the vegetables and fat to make a simple, delicious gravy, or just spoon them over the carved meat for extra flavor. Carve and serve immediately.
Storage & Freshness Guide
- Fridge: Store leftover carved chicken in an airtight container for up to 4 days.
- Freezer: Freeze meat (off the bone) in freezer bags for up to 3 months.
- Reviving: Reheat gently in a covered dish with a splash of broth to keep moist.
Serving Suggestions
Complementary Dishes
- Garlic Mashed Potatoes — Creamy, buttery potatoes are the perfect vehicle for soaking up all those delicious chicken juices.
- Simple Roasted Vegetables — Toss some broccoli, asparagus, or Brussels sprouts in olive oil and roast them alongside the chicken for an easy, complete meal.
- A Crisp Green Salad — Something fresh and acidic with a lemony vinaigrette helps cut through the richness of the chicken beautifully.
Drinks
- A Light-Bodied Red Wine — A Pinot Noir or Gamay has enough acidity and fruitiness to complement the savory, herby notes without overpowering the chicken.
- A Crisp Chardonnay — An unoaked or lightly oaked Chardonnay mirrors the lemon and herb flavors and cleanses the palate between bites.
- Sparkling Water with Lemon — For a non-alcoholic option, the bubbles and citrus are incredibly refreshing and palate-cleansing.
Something Sweet
- Lemon Tart — The bright, zesty flavor of a lemon tart continues the citrus theme from the chicken and provides a lovely, light finish.
- Apple Crumble — Warm, spiced apples with a buttery topping feel homey and comforting, just like the roast chicken itself.
- Dark Chocolate Pots de Crème — A rich, silky chocolate dessert offers a decadent and contrasting end to the savory main course.
Top Mistakes to Avoid
- Not drying the skin thoroughly. This is the number one reason for soggy, pale skin. I’ve messed this up before too, in a rush, and the difference is night and day. Take the extra minute to pat it completely dry.
- Opening the oven door too often. Every time you open the door, the temperature drops significantly, which can extend the cooking time and prevent the skin from crisping up properly. Trust the process and use the oven light to check on progress.
- Skipping the rest time. I know it’s tempting to carve into that beautiful bird right away, but if you do, all the precious juices will end up on the cutting board instead of in the meat. Letting it rest is non-negotiable for juicy chicken.
- Relying solely on cooking time. Ovens vary, and the size of your chicken matters. Always use a meat thermometer to check for doneness to ensure it’s perfectly cooked and safe to eat.
Expert Tips
- Tip: For extra-crispy skin all over, start the chicken breast-side down for the first 20-25 minutes of cooking, then carefully flip it. This protects the delicate white meat from drying out and gives the back a chance to crisp up first.
- Tip: If you have time, salt the chicken the night before and leave it uncovered on a rack in the fridge. This dry-brining process seasons the meat deeply and dries the skin out even further for the crispiest result imaginable.
- Tip: Don’t throw away the carcass! After your meal, simmer the bones with some onion, carrot, and celery for a few hours to make the most flavorful homemade chicken stock.
- Tip: If the skin is browning too quickly, you can tent the chicken loosely with aluminum foil. Just remove it for the last 10 minutes of cooking to let the skin crisp up again.
FAQs
Can I use dried herbs instead of fresh?
You can, but the flavor will be less vibrant. Fresh herbs like thyme and rosemary release their essential oils beautifully during roasting, creating a more complex aroma. If you must use dried, use about one-third of the amount (so 1 tsp dried instead of 1 small bunch fresh) and rub them into the oil on the skin.
How do I know when the chicken is done without a thermometer?
The most common visual cue is that the juices should run completely clear when you pierce the thickest part of the thigh with a knife or skewer. Also, the leg should wiggle freely in its joint. However, a thermometer is the only way to be 100% sure, so I highly recommend investing in one—it takes the guesswork out completely.
Why is my chicken skin not crispy?
This almost always comes down to moisture. Either the skin wasn’t dried well enough before roasting, the oven temperature was too low, or the chicken was too crowded in the pan, creating steam. Ensure you pat it dry thoroughly and that your oven is fully preheated to a high temperature (220°C/425°F).
Can I prepare the chicken ahead of time?
Absolutely. You can season the chicken and stuff the cavity up to a day in advance. Keep it uncovered on a rack in the fridge—this will actually help dry the skin out even more. Just take it out 30-45 minutes before you plan to roast it to take the chill off.
What’s the best way to carve a whole chicken?
Let it rest first! Then, remove the twine. Start by cutting between the leg and the body, popping the thigh joint out. Separate the drumstick from the thigh. Next, make a cut along the breastbone and carefully slice the breast meat away from the bone in one large piece, then slice it crosswise. Finally, remove the wings. It’s easier than it looks with a little practice.


Roasted Whole Chicken
Learn how to make the perfect Roasted Whole Chicken with crispy skin and juicy meat. This easy, classic recipe is a foolproof family favorite. Get cooking now!
Ingredients
For the Ingredients
-
1 whole chicken (about 1.5–2 kg / 3–4 lbs, patted dry)
-
2 tbsp olive oil or softened butter
-
1.5 tsp fine sea salt
-
1 tsp freshly ground black pepper
-
1 lemon (halved)
-
1 head garlic (halved crosswise)
-
1 small bunch fresh thyme or rosemary (or a mix)
-
1 medium onion (roughly chopped)
-
2 carrots (roughly chopped (optional, for the pan))
Instructions
-
Preheat your oven to 220°C (425°F). While it’s heating, prepare your chicken. Place it on a clean cutting board and pat it completely dry, inside and out, with paper towels. This is the most crucial step for crispy skin—you’ll notice the paper towels get quite damp, and that’s all the moisture we’re trying to get rid of.01
-
Drizzle the olive oil (or rub the softened butter) all over the chicken. Use your hands to massage it into every nook and cranny. Then, sprinkle the salt and pepper evenly over the entire surface, including inside the cavity. Don’t forget the underside and the wings!02
-
Stuff the cavity with the halved lemon, halved garlic head, and the fresh herbs. The lemon will steam and keep the meat incredibly juicy from the inside, while the garlic and herbs will infuse the chicken with a beautiful, subtle fragrance. If you have kitchen twine, tie the legs together neatly.03
-
Scatter the chopped onion and carrots (if using) in the bottom of your roasting pan. These will act as a natural rack, lifting the chicken slightly and preventing it from stewing in its own juices. They’ll also caramelize and become a delicious side dish.04
-
Place the chicken on top of the vegetables, breast-side up. Transfer the pan to the preheated oven and roast for about 1 hour and 15 minutes. You’ll start to smell that incredible roasted aroma after about 30 minutes… it’s heavenly.05
-
About 50 minutes into the cooking time, start checking for doneness. The skin should be a deep, golden brown. The most reliable way to check is with an instant-read thermometer inserted into the thickest part of the thigh (without touching the bone)—it should read 74°C (165°F). The juices should also run clear.06
-
Once perfectly cooked, remove the chicken from the oven. The trick is to let it rest for at least 15–20 minutes before carving. This allows the juices to redistribute throughout the meat, ensuring every single slice is moist and flavorful. Don’t skip this step!07
-
Carefully transfer the chicken to a carving board. You can strain the pan juices from the vegetables and fat to make a simple, delicious gravy, or just spoon them over the carved meat for extra flavor. Carve and serve immediately.08
Not what you're looking for?


