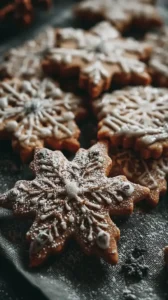
There’s something truly magical about holiday baking, isn’t there? The warmth of the oven, the scent of butter and herbs filling the kitchen—it’s pure comfort. Today, I’m sharing my recipe for Rosemary Sea Salt Cookies, a sophisticated treat that feels both rustic and elegant. With a buttery shortbread base, fragrant fresh rosemary, and a flaky sea salt finish, they are the perfect standout among unique Christmas cookies. Pulling a golden pan of these from the oven is one of my favorite December rituals.
If you’re searching through Christmas cookies recipes for something a little different, you’ve found it. These are surprisingly simple to make, truly qualifying as easy Christmas treats that wow everyone. Whether you need inspired Christmas dessert ideas or are simply looking for delightful Christmas baking ideas, these sweet-savory cookies deliver. They’re a wonderful addition to your spread of holiday treats.
So, as you’re planning your lineup of holiday baking, I hope you’ll give these a try. They’re elegant enough for a cookie tray yet cozy enough to enjoy with a cup of tea. I think you’ll find they become a new seasonal favorite among your easy Christmas treats.
Love Rosemary Sea Salt Cookies? So do we! If you're into Christmas Cookie or curious about Appetizers & Snacks, you'll find plenty of inspiration below.


Why You’ll Love These Rosemary Sea Salt Cookies
- Unique flavor profile: Sweet, herbal, and salty in perfect balance.
- Surprisingly simple: One-bowl dough with no fancy decorating.
- Gourmet vibe: Bakery-quality cookies from your own kitchen.
- Comforting aroma: Rosemary and butter make your home smell amazing.
Ingredients & Tools
- 225 g (1 cup) unsalted butter, at cool room temperature
- 150 g (¾ cup) granulated sugar
- 1 large egg yolk
- 2 tsp pure vanilla extract
- 300 g (2 ½ cups) all-purpose flour
- 2 tbsp finely chopped fresh rosemary
- ½ tsp fine sea salt (for the dough)
- 1-2 tsp flaky sea salt (for sprinkling, like Maldon)
Tools: A stand mixer or hand mixer, a baking sheet, parchment paper, a small bowl for the egg yolk
Notes: Use high-quality butter and fresh rosemary for best flavor. Flaky sea salt on top creates essential bursts of salinity.
Nutrition (per serving)
| Calories: | 150 kcal |
| Protein: | 2 g |
| Fat: | 8 g |
| Carbs: | 18 g |
| Fiber: | 0.5 g |
Serves: 24 | Prep Time: 15 minutes | Cook Time: 12-14 minutes | Total Time: 30 minutes (plus chilling)
Before You Start: Tips & Ingredient Notes
- Butter temperature is key. Your butter should be cool to the touch but soft enough that you can leave an indentation with your finger. If it’s too warm, the cookies will spread too much; if it’s too cold, they won’t cream properly.
- Chop that rosemary finely. You want little flecks of herb throughout, not large, tough pieces. A very sharp knife makes this easy and prevents bruising the leaves.
- Don’t skip the chill time. I know it’s tempting to rush, but chilling the dough solidifies the butter, which is what gives you a cookie that’s crisp, not cakey. It also allows the rosemary flavor to meld beautifully with the other ingredients.
- Use two types of salt. The fine sea salt in the dough provides a baseline seasoning, while the flaky salt on top is for texture and a final pop of flavor. They play different, crucial roles.
How to Make Rosemary Sea Salt Cookies
Step 1: Start by preheating your oven to 350°F (175°C) and lining your baking sheets with parchment paper. In the bowl of your stand mixer fitted with the paddle attachment (or using a hand mixer), cream together the cool room-temperature butter and granulated sugar. You’ll want to mix on medium speed for about 2-3 minutes, until the mixture is pale, light, and fluffy. Scrape down the sides of the bowl with a spatula to make sure everything is incorporated evenly.
Step 2: Now, add the single egg yolk and the vanilla extract to the creamed butter and sugar. Mix on low speed just until they’re fully combined. The yolk is going to add richness and help bind the dough, while the vanilla provides a warm, sweet background note that complements the rosemary perfectly. The mixture might look a little curdled at first, but it will come together—just keep mixing for another 30 seconds or so.
Step 3: It’s time for the dry ingredients. In a separate bowl, whisk together the all-purpose flour, the finely chopped fresh rosemary, and the ½ teaspoon of fine sea salt. With your mixer on low speed, gradually add the flour mixture to the wet ingredients. Mix just until the flour disappears and a soft dough forms. You’ll notice the dough will pull away from the sides of the bowl and the aroma of the rosemary will start to release. Be careful not to overmix here, as that can lead to tough cookies.
Step 4: Turn the dough out onto a lightly floured surface and gently bring it together into a cohesive ball. Divide the dough in half and shape each half into a log about 1.5 to 2 inches in diameter. You can make them round or square—it’s up to you! Wrap the logs tightly in plastic wrap and refrigerate for at least 2 hours, or up to 3 days. This chilling step is non-negotiable for the perfect texture.
Step 5: Once the dough is firm, remove one log from the fridge. Unwrap it and use a sharp knife to slice it into rounds about ¼ to ½ inch thick. If the dough cracks, let it sit at room temperature for 5-10 minutes. Place the slices about 1 inch apart on your prepared baking sheets. They don’t spread a huge amount, but they do need a little room to breathe.
Step 6: This is the final flourish! Lightly sprinkle the top of each cookie with the flaky sea salt. You don’t need a lot—just a few crystals per cookie will do the trick. A little goes a long way here, creating those perfect salty-sweet moments.
Step 7: Bake for 12-14 minutes, rotating the sheet halfway through. You’re looking for the cookies to be set and just barely starting to turn golden brown around the very edges. The centers should still look fairly pale. They will continue to firm up as they cool. Let them cool on the baking sheet for 5 minutes before transferring them to a wire rack to cool completely. This is the hardest part—resisting the urge to eat one straight from the pan!
Storage & Freshness Guide
- Fridge: Dough logs wrapped in plastic keep 3 days; baked cookies store at room temperature.
- Freezer: Dough logs freeze up to 3 months; baked cookies freeze up to 2 months in airtight container.
- Reviving: Refresh crispness by warming in 300°F oven for 3–5 minutes.
Serving Suggestions
Complementary Dishes
- A sharp cheese board — The salty, herbal cookies are fantastic with a slice of aged cheddar or creamy goat cheese, creating a perfect sweet-and-savory bite.
- Roasted tomato soup — Dunking one of these crisp cookies into a velvety, slightly acidic soup is an unexpectedly wonderful combination.
- Herb-roasted chicken — Serve these on the side instead of a dinner roll for a meal that feels cohesive and thoughtfully curated.
Drinks
- A dry Riesling — The wine’s acidity and slight sweetness play off the herbal and salty notes in the cookie beautifully.
- Earl Grey tea — The bergamot in the tea has a citrusy flair that makes a lovely companion to the piney rosemary.
- An Americano or black coffee — The bitterness of the coffee provides a robust contrast that makes the cookie’s sweetness pop.
Something Sweet
- Lemon sorbet — The bright, clean citrus is a fantastic palate cleanser that follows the rich, savory cookies perfectly.
- Dark chocolate truffles — A bite of intense, bitter chocolate after the cookie extends that sophisticated flavor journey.
- Poached pears — The soft, wine-poached fruit offers a different texture and a gentle sweetness that doesn’t compete.
Top Mistakes to Avoid
- Mistake: Using melted or overly soft butter. This is the number one reason cookies spread into sad, flat puddles. The creaming process with cool butter incorporates air, which gives the cookie structure.
- Mistake: Skipping the chill time. I’ve messed this up before too, thinking I could get away with it. The result is a cookie that bakes unevenly and loses its defined shape. Patience is a virtue here.
- Mistake: Overbaking. You want these to be crisp, not burnt. They continue to cook on the hot baking sheet, so take them out when the edges are just barely golden.
- Mistake: Using dried rosemary. Dried rosemary is tough, woody, and lacks the essential oils that give fresh rosemary its incredible fragrance and flavor. It just doesn’t work the same way.
Expert Tips
- Tip: Grate your rosemary for ultra-fine flecks. If you have a microplane, you can actually grate the rosemary leaves! This creates an even more subtle infusion of flavor throughout the entire cookie.
- Tip: Roll your log in coarse sugar before chilling. For an extra bit of sparkle and crunch, roll your shaped dough log in some coarse or sanding sugar before you wrap and chill it. When you slice and bake, you’ll have a gorgeous sugared edge.
- Tip: Freeze the dough logs for future baking. This dough freezes beautifully for up to 3 months. Just wrap the logs tightly in plastic wrap and then foil. You can slice and bake straight from the freezer, just adding a minute or two to the baking time.
- Tip: Use a serrated knife for clean slices. A gentle sawing motion with a serrated knife will give you the cleanest cuts through the chilled dough log, preventing cracks and smashes.
FAQs
Can I make these cookies without a mixer?
Absolutely! You can definitely make these by hand. Use a sturdy wooden spoon and some elbow grease to cream the butter and sugar together. It will take a bit longer—aim for a good 5 minutes of vigorous mixing until it’s light and fluffy. Then, switch to a spatula to fold in the dry ingredients. It’s a bit of a workout, but totally doable and honestly quite satisfying.
How should I store these cookies, and how long do they last?
Once completely cool, store them in an airtight container at room temperature. They’ll stay perfectly crisp and delicious for about 5 days. If you live in a humid climate, you might want to add a piece of bread to the container to help absorb any excess moisture and keep them from getting soft. They also freeze beautifully for up to 2 months.
My dough is too crumbly and won’t come together. What did I do wrong?
This usually happens if you measured your flour by scooping directly from the bag, which can pack in too much flour. The best way is to spoon the flour into your measuring cup and level it off. If it’s already happened, don’t panic! Just add a teaspoon of cold water at a time, mixing gently, until the dough just comes together. Be patient, as it can take a minute for the water to be fully absorbed.
Can I use a different herb?
You can experiment, but rosemary is really the star here. Thyme could work for a more delicate, lemony-herbal note, but I’d start with half the amount and see how you like it. Sage might be too strong and savory. Honestly, rosemary’ piney character is what makes this cookie so uniquely wonderful, so I’d stick with it for your first batch.
Why did my cookies spread too much?
This almost always comes down to butter temperature or insufficient chilling. If your butter was too soft or your dough wasn’t chilled long enough, the butter will melt too quickly in the oven before the structure has a chance to set. Next time, make sure your butter is just cool to the touch and don’t skip that 2-hour chill—it makes all the difference!


Rosemary Sea Salt Cookies: Easy Sweet and Savory Shortbread
Rosemary Sea Salt Cookies are an easy shortbread cookie with a sweet-savory twist. This unique Christmas cookie is a sophisticated, buttery treat perfect for holiday baking.
Ingredients
For the Ingredients
-
225 g unsalted butter (at cool room temperature)
-
150 g granulated sugar
-
1 large egg yolk
-
2 tsp pure vanilla extract
-
300 g all-purpose flour
-
2 tbsp fresh rosemary (finely chopped)
-
0.5 tsp fine sea salt (for the dough)
-
1-2 tsp flaky sea salt (for sprinkling, like Maldon)
Instructions
-
Start by preheating your oven to 350°F (175°C) and lining your baking sheets with parchment paper. In the bowl of your stand mixer fitted with the paddle attachment (or using a hand mixer), cream together the cool room-temperature butter and granulated sugar. You’ll want to mix on medium speed for about 2-3 minutes, until the mixture is pale, light, and fluffy. Scrape down the sides of the bowl with a spatula to make sure everything is incorporated evenly.01
-
Now, add the single egg yolk and the vanilla extract to the creamed butter and sugar. Mix on low speed just until they’re fully combined. The yolk is going to add richness and help bind the dough, while the vanilla provides a warm, sweet background note that complements the rosemary perfectly. The mixture might look a little curdled at first, but it will come together—just keep mixing for another 30 seconds or so.02
-
It’s time for the dry ingredients. In a separate bowl, whisk together the all-purpose flour, the finely chopped fresh rosemary, and the ½ teaspoon of fine sea salt. With your mixer on low speed, gradually add the flour mixture to the wet ingredients. Mix just until the flour disappears and a soft dough forms. You’ll notice the dough will pull away from the sides of the bowl and the aroma of the rosemary will start to release. Be careful not to overmix here, as that can lead to tough cookies.03
-
Turn the dough out onto a lightly floured surface and gently bring it together into a cohesive ball. Divide the dough in half and shape each half into a log about 1.5 to 2 inches in diameter. You can make them round or square—it’s up to you! Wrap the logs tightly in plastic wrap and refrigerate for at least 2 hours, or up to 3 days. This chilling step is non-negotiable for the perfect texture.04
-
Once the dough is firm, remove one log from the fridge. Unwrap it and use a sharp knife to slice it into rounds about ¼ to ½ inch thick. If the dough cracks, let it sit at room temperature for 5-10 minutes. Place the slices about 1 inch apart on your prepared baking sheets. They don’t spread a huge amount, but they do need a little room to breathe.05
-
This is the final flourish! Lightly sprinkle the top of each cookie with the flaky sea salt. You don’t need a lot—just a few crystals per cookie will do the trick. A little goes a long way here, creating those perfect salty-sweet moments.06
-
Bake for 12-14 minutes, rotating the sheet halfway through. You’re looking for the cookies to be set and just barely starting to turn golden brown around the very edges. The centers should still look fairly pale. They will continue to firm up as they cool. Let them cool on the baking sheet for 5 minutes before transferring them to a wire rack to cool completely. This is the hardest part—resisting the urge to eat one straight from the pan!07
Not what you're looking for?


