This Sesame Chicken Fried Rice is a low-carb, one-pan wonder that delivers all the savory comfort of takeout. We swap rice for cauliflower to soak up toasted sesame oil, soy sauce, and tender chicken. It’s quick, satisfying, and perfect for busy nights.
Craving a delicious Sesame Chicken Fried Rice? You've come to the right spot! From Dinner Ideas favorites to amazing Burgers recipes, there's something here for everyone.


Why You’ll Love This Sesame Chicken Fried Rice
- Flavor powerhouse: Toasted sesame oil, soy sauce, and ginger create a savory, aromatic base.
- Satisfying texture: Tender chicken, crisp veggies, and perfectly textured cauliflower rice mimic the real deal.
- One-pan wonder: Everything cooks in a single skillet for easy cleanup.
- Light yet filling: Cauliflower keeps it low-carb so you can enjoy a generous portion.
Ingredients & Tools
- 1 lb boneless, skinless chicken thighs, cut into 1-inch pieces
- 1 large head of cauliflower, riced (or about 4 cups pre-riced)
- 2 tbsp avocado oil or coconut oil, divided
- 2 large eggs, lightly beaten
- 3 green onions, sliced (whites and greens separated)
- 2 cloves garlic, minced
- 1 tbsp fresh ginger, grated
- 1/2 cup frozen peas (optional, for a pop of color)
- 1/4 cup low-sodium soy sauce or tamari
- 1 tbsp toasted sesame oil
- 1 tsp rice vinegar
- 1/2 tsp erythritol or your preferred low carb sweetener (optional, to balance saltiness)
- Toasted sesame seeds and extra green onions for garnish
Tools: A large skillet or wok, a box grater or food processor for the cauliflower, and a couple of small bowls for pre-measuring your sauce and beaten eggs.
Notes: Using fresh ginger and garlic really makes a difference here—their pungent, aromatic qualities form the flavor foundation. And don’t skip the toasted sesame oil at the end; it’s the finishing touch that gives the dish its signature, nutty fragrance.
Nutrition (per serving)
| Calories: | 320 kcal |
| Protein: | 28 g |
| Fat: | 18 g |
| Carbs: | 12 g |
| Fiber: | 5 g |
Serves: 4 | Prep Time: 15 minutes | Cook Time: 15 minutes | Total Time: 30 minutes
Before You Start: Tips & Ingredient Notes
- Get your cauliflower rice dry. If you’re using fresh cauliflower you’ve riced yourself, spread it on a clean kitchen towel and press out as much moisture as possible. This is the single biggest trick to avoiding soggy, mushy fried rice.
- Why chicken thighs? Thighs stay incredibly juicy and tender during the quick, high-heat cooking process. Breast meat can easily dry out, but thighs are much more forgiving and pack more flavor.
- Have everything prepped and ready. Fried rice cooks fast once you start. Have your sauce mixed, your veggies chopped, and your eggs beaten before the skillet even hits the heat. This is called “mise en place” and it’s a lifesaver.
- Don’t skip the toasting. That final drizzle of toasted sesame oil at the end is non-negotiable. It has a much lower smoke point and more intense flavor than regular sesame oil, so adding it off the heat preserves its amazing aroma.
How to Make Sesame Chicken Fried Rice
Step 1: Start by prepping all your ingredients. If you’re making your own cauliflower rice, cut the cauliflower into florets and pulse them in a food processor until they reach a rice-like consistency—be careful not to over-process into mush. Then, as mentioned, wrap it in a towel and squeeze out the excess water. This step is crucial, trust me. Cut your chicken into bite-sized pieces, mince the garlic, grate the ginger, and slice those green onions, keeping the white and green parts separate.
Step 2: In a small bowl or measuring cup, whisk together the soy sauce, toasted sesame oil, rice vinegar, and your optional low carb sweetener. This is your flavor bomb sauce, so give it a good mix to ensure everything is well combined. The sweetener isn’t essential, but it does a lovely job of rounding out the saltiness of the soy sauce.
Step 3: Heat a large skillet or wok over medium-high heat. Add one tablespoon of your avocado oil. Once the oil is shimmering, add the chicken pieces in a single layer. Let them cook undisturbed for 2-3 minutes to get a nice sear on one side before stirring. Cook for another 4-5 minutes, until the chicken is cooked through and golden brown. Remove the chicken from the skillet and set it aside on a plate.
Step 4: In the same skillet, push any remnants to the side and pour in your beaten eggs. Let them set for about 30 seconds before you start to scramble them with your spatula. Cook until they’re just set but still a little soft—they’ll finish cooking later. Remove the scrambled eggs to the same plate as the chicken.
Step 5: Add the remaining tablespoon of oil to the skillet. Toss in the white parts of your green onions, the minced garlic, and grated ginger. Stir-fry for just 30-60 seconds until incredibly fragrant—you’ll notice the aroma immediately, but be careful not to burn the garlic.
Step 6: Now, add your well-drained cauliflower rice and the frozen peas (if using) to the skillet. Increase the heat to high. Stir-fry for about 5-7 minutes, tossing frequently. You’re looking for the cauliflower to become tender but still have a bit of bite—it should not be mushy. A little caramelization on some bits is a good thing!
Step 7: Return the cooked chicken and scrambled eggs back to the skillet. Pour your pre-mixed sauce all over everything. Toss and stir continuously for another 2-3 minutes, ensuring every grain of cauliflower and every piece of chicken is coated in that glorious, glossy sauce.
Step 8: Take the skillet off the heat. Now, stir in the green parts of your green onions and give it one final, gentle stir. Taste and adjust seasoning if needed. Serve immediately, garnished generously with a sprinkle of toasted sesame seeds for that final nutty crunch.
Storage & Freshness Guide
- Fridge: Store in an airtight container for up to 3 days.
- Freezer: Freeze in a sealed container for up to 1 month; thaw in fridge before reheating.
- Reviving: Reheat in a skillet over medium heat with a splash of water or oil to restore texture.
Serving Suggestions
Complementary Dishes
- A simple cucumber salad — The cool, crisp freshness of sliced cucumbers with a little rice vinegar and salt provides a perfect, palate-cleansing contrast to the rich, savory fried rice.
- Quick-pickled radishes — Their sharp, tangy bite cuts through the richness of the dish beautifully and adds a fantastic pop of pink color to your plate.
- Sautéed bok choy with garlic — It’s an easy, leafy green side that complements the Asian flavor profile and adds another layer of texture and nutrients.
Drinks
- Jasmine iced tea — Its floral notes are incredibly refreshing and work wonderfully with the sesame and soy flavors without overpowering them.
- A crisp, dry Riesling — If you enjoy wine, a slightly off-dry white wine has the acidity to balance the dish and a subtle sweetness that pairs nicely with the ginger.
- Sparkling water with lime — Sometimes you just need the clean, effervescent bubbles to reset your palate between bites of this flavorful dish.
Something Sweet
- Dark chocolate-dipped strawberries — A few of these after your meal offer a rich, fruity, and low carb-friendly finish that feels indulgent without being heavy.
- A small bowl of fresh berries — Simple, sweet, and satisfying. The natural sweetness of raspberries or blueberries is a perfect, light way to end the meal.
- Chia seed pudding — Make it ahead with coconut milk and a dash of vanilla; it’s creamy, cool, and feels like a proper dessert without the sugar spike.
Top Mistakes to Avoid
- Using wet cauliflower rice. This is the number one reason for mushy fried “rice.” The excess water steams the cauliflower instead of letting it sauté, resulting in a soggy, disappointing texture. Always dry it thoroughly.
- Crowding the pan when cooking the chicken. If you add too much chicken at once, it will steam instead of sear. Cook in batches if necessary to get that beautiful, golden-brown color and locked-in juices.
- Overcooking the garlic and ginger. They burn in a heartbeat and will turn bitter, ruining the entire flavor profile of the dish. Add them for just a quick, fragrant sizzle before adding the cauliflower rice.
- Adding the sesame oil too early. Toasted sesame oil is a finishing oil. If you cook it over high heat, it will lose its delicate, nutty flavor and can become bitter. Always stir it in at the very end, off the heat.
Expert Tips
- Tip: Use day-old cauliflower rice. If you have the foresight, spread freshly riced cauliflower on a baking sheet and leave it uncovered in the fridge overnight. This dries it out perfectly for the best possible fried rice texture.
- Tip: Get that “wok hei” at home. To mimic the high-heat breath of a restaurant wok, don’t stir constantly. Let the cauliflower rice sit for 30-45 seconds at a time in the hot pan to get a little bit of a sear and smoky flavor.
- Tip: Amp up the umami. For an even deeper flavor, add a teaspoon of fish sauce to your sauce mixture. It sounds intense, but it melts into the background and adds a wonderful savory complexity.
- Tip: Customize your veggies. This recipe is a fantastic base. Feel free to throw in some diced bell peppers, shredded carrots, or even some chopped water chestnuts for extra crunch and color.
FAQs
Can I use frozen cauliflower rice?
Absolutely, you can! It’s a fantastic time-saver. The key is to thaw it completely first, and then—you guessed it—squeeze out all the excess water. I’ll often thaw a bag in a colander and then press it with paper towels. If you skip this step, you’ll end up with a very watery final dish, so don’t be tempted to rush.
What can I use instead of soy sauce for a gluten-free version?
Tamari is a great one-to-one substitute that’s typically gluten-free (just double-check the label). Coconut aminos are another excellent option; they’re a bit sweeter and less salty, so you might want to taste and adjust the seasoning at the end. Both work beautifully to maintain that essential savory flavor.
How do I store and reheat leftovers?
Store any leftovers in an airtight container in the fridge for up to 3 days. The best way to reheat is in a skillet over medium heat with a tiny splash of water or oil. This will help revive the texture. Avoid the microwave if you can, as it tends to make the cauliflower rice a bit soggy.
Can I make this vegetarian?
Of course! Simply omit the chicken and add a extra egg or two for protein. You could also toss in some cubed firm tofu—just pan-fry it until golden before you start the rest of the recipe, and then add it back in at the end with the sauce.
My fried rice turned out a bit soggy. What happened?
This almost always comes down to moisture in the cauliflower rice. Next time, be extra diligent about drying it. Also, make sure your skillet is nice and hot before adding the cauliflower—you should hear a sizzle. Finally, don’t add the sauce until the very end, and cook it just long enough to heat through and coat everything.


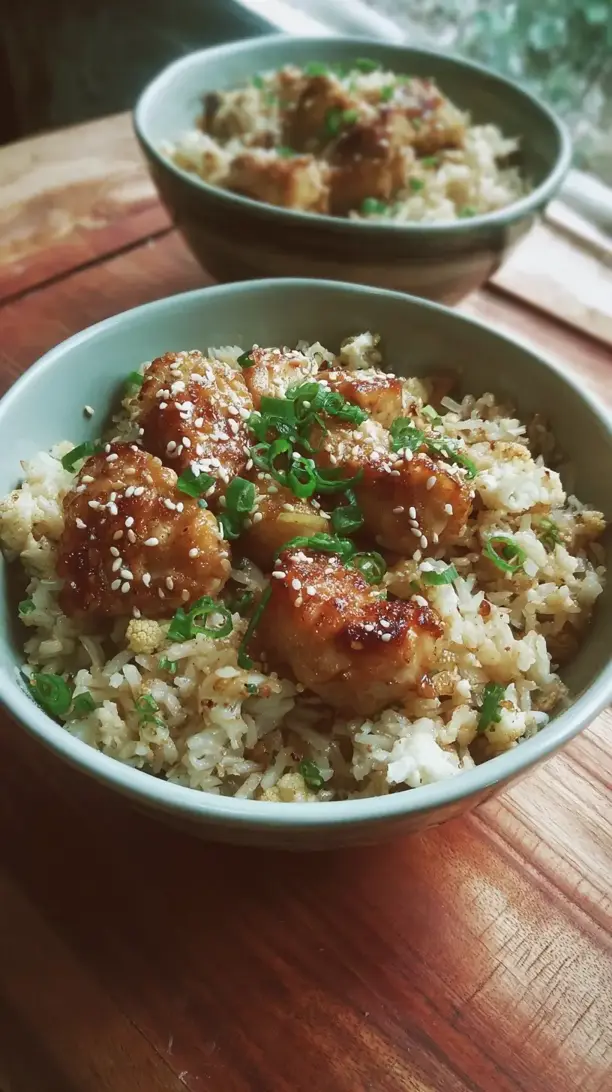
Sesame Chicken Fried Rice
Craving takeout? Try this easy Sesame Chicken Fried Rice with cauliflower rice! A low-carb, one-pan meal ready in 30 minutes. Get the recipe now!
Ingredients
For the main ingredients:
-
1 lb boneless, skinless chicken thighs (cut into 1-inch pieces)
-
1 large head cauliflower (riced (or about 4 cups pre-riced))
-
2 tbsp avocado oil or coconut oil (divided)
-
2 large eggs (lightly beaten)
-
3 green onions (sliced (whites and greens separated))
-
2 cloves garlic (minced)
-
1 tbsp fresh ginger (grated)
-
1/2 cup frozen peas (optional, for a pop of color)
-
1/4 cup low-sodium soy sauce or tamari
-
1 tbsp toasted sesame oil
-
1 tsp rice vinegar
-
1/2 tsp erythritol or your preferred low carb sweetener (optional, to balance saltiness)
-
Toasted sesame seeds and extra green onions (for garnish)
Instructions
-
Start by prepping all your ingredients. If you’re making your own cauliflower rice, cut the cauliflower into florets and pulse them in a food processor until they reach a rice-like consistency—be careful not to over-process into mush. Then, as mentioned, wrap it in a towel and squeeze out the excess water. This step is crucial, trust me. Cut your chicken into bite-sized pieces, mince the garlic, grate the ginger, and slice those green onions, keeping the white and green parts separate.01
-
In a small bowl or measuring cup, whisk together the soy sauce, toasted sesame oil, rice vinegar, and your optional low carb sweetener. This is your flavor bomb sauce, so give it a good mix to ensure everything is well combined. The sweetener isn't essential, but it does a lovely job of rounding out the saltiness of the soy sauce.02
-
Heat a large skillet or wok over medium-high heat. Add one tablespoon of your avocado oil. Once the oil is shimmering, add the chicken pieces in a single layer. Let them cook undisturbed for 2-3 minutes to get a nice sear on one side before stirring. Cook for another 4-5 minutes, until the chicken is cooked through and golden brown. Remove the chicken from the skillet and set it aside on a plate.03
-
In the same skillet, push any remnants to the side and pour in your beaten eggs. Let them set for about 30 seconds before you start to scramble them with your spatula. Cook until they’re just set but still a little soft—they’ll finish cooking later. Remove the scrambled eggs to the same plate as the chicken.04
-
Add the remaining tablespoon of oil to the skillet. Toss in the white parts of your green onions, the minced garlic, and grated ginger. Stir-fry for just 30-60 seconds until incredibly fragrant—you’ll notice the aroma immediately, but be careful not to burn the garlic.05
-
Now, add your well-drained cauliflower rice and the frozen peas (if using) to the skillet. Increase the heat to high. Stir-fry for about 5-7 minutes, tossing frequently. You’re looking for the cauliflower to become tender but still have a bit of bite—it should not be mushy. A little caramelization on some bits is a good thing!06
-
Return the cooked chicken and scrambled eggs back to the skillet. Pour your pre-mixed sauce all over everything. Toss and stir continuously for another 2-3 minutes, ensuring every grain of cauliflower and every piece of chicken is coated in that glorious, glossy sauce.07
-
Take the skillet off the heat. Now, stir in the green parts of your green onions and give it one final, gentle stir. Taste and adjust seasoning if needed. Serve immediately, garnished generously with a sprinkle of toasted sesame seeds for that final nutty crunch.08
Not what you're looking for?


