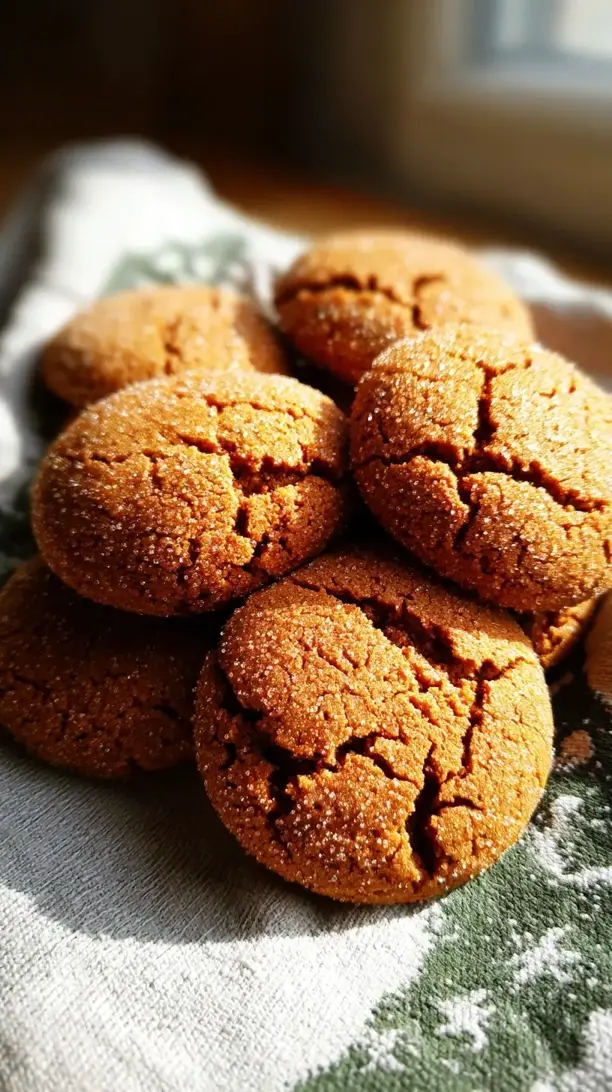
There’s something about the scent of warm spices that feels like a hug, isn’t there? For me, that feeling is perfectly captured in these Soft Molasses Cookies. They come out of the oven with a crackly sugar top and an impossibly soft, chewy center that just melts in your mouth. This is my go-to comfort food recipe when I need a moment of cozy, old-fashioned goodness.
Honestly, they become absolute stars during the festive season. Whenever I’m planning my holiday baking or looking for standout Christmas dessert ideas, this recipe is my reliable anchor. They are, without a doubt, one of my favorite Christmas cookies recipes, perfect for sharing as holiday treats. Whether you’re assembling a tray of Christmas sweets or need something special for your holiday cookies Christmas spread, these fit the bill beautifully.
So, if you’re gathering your Christmas baking ideas, I hope you’ll add these to your list. They are the kind of timeless Christmas sweets that make holiday baking feel so rewarding. From my kitchen to yours, here’s to creating delicious holiday cookies and memories.
Love Soft Molasses Cookies? So do we! If you're into Christmas Cookie or curious about Chicken Breast Recipes, you'll find plenty of inspiration below.


Why You’ll Love This Soft Molasses Cookies
- Pillowy texture: Soft and chewy with a slight crackle on top.
- Complex flavor: Deep molasses balanced with warm spices.
- Simple to make: No-fuss, one-bowl dough comes together quickly.
- Amazing aroma: Warm, spicy scent fills your kitchen.
Ingredients & Tools
- 280 g all-purpose flour
- 1 tsp baking soda
- 1/4 tsp salt
- 2 tsp ground ginger
- 1 tsp ground cinnamon
- 1/4 tsp ground cloves
- 115 g unsalted butter, softened
- 150 g dark brown sugar, packed
- 1 large egg, at room temperature
- 120 ml unsulphured molasses (not blackstrap!)
- 50 g granulated sugar, for rolling
Tools: A large mixing bowl, a hand mixer or stand mixer (you can use a wooden spoon and some elbow grease!), a baking sheet, and parchment paper or a silicone baking mat.
Notes: Dark brown sugar adds deeper caramel notes; unsulphured molasses provides classic flavor without bitterness.
Nutrition (per serving)
| Calories: | 180 kcal |
| Protein: | 2 g |
| Fat: | 6 g |
| Carbs: | 31 g |
| Fiber: | 0.5 g |
Serves: 18 | Prep Time: 15 minutes | Cook Time: 10-12 minutes | Total Time: 27 minutes (plus chilling)
Before You Start: Tips & Ingredient Notes
- Why can’t I use blackstrap molasses? Blackstrap molasses is much more bitter and intense, and it will completely overpower the other flavors in your cookies. Unsulphured molasses (often labeled “fancy” or “light”) has a milder, sweeter taste that’s perfect for baking.
- Is softening the butter really that important? Yes, it honestly is! Properly softened butter (cool to the touch but easily indented) creams beautifully with the sugar, creating tiny air pockets that help the cookies rise and become tender. If it’s melted, your cookies will spread too much.
- Don’t skip the chilling step. I know, it’s tempting to just pop them straight in the oven. But chilling the dough for at least 30 minutes firms up the butter again, which prevents the cookies from spreading into flat puddles and helps develop a richer, more concentrated flavor.
- Measure your flour correctly. The easiest way to throw off a cookie recipe is with too much flour. For the most accuracy, spoon your flour into the measuring cup and level it off with a knife. Don’t scoop directly from the bag—you’ll end up with packed, excess flour.
How to Make Soft Molasses Cookies
Step 1: First, whisk your dry ingredients. In a medium bowl, whisk together the flour, baking soda, salt, ginger, cinnamon, and cloves. You’ll notice that just whisking these together starts to release their beautiful, warm aroma. This ensures the leavening and spices are evenly distributed throughout the dough, so every single cookie is perfectly spiced.
Step 2: Now, let’s cream the butter and sugars. In your large mixing bowl, beat the softened butter and packed dark brown sugar together on medium speed for about 2-3 minutes. You’re looking for a light and fluffy, pale mixture. This step is crucial for creating that soft, airy texture. Scrape down the sides of the bowl with a spatula to make sure everything is incorporated.
Step 3: Add the wet ingredients. Beat in the egg until it’s fully combined, then pour in the molasses. The mixture might look a little curdled at this point—that’s totally normal, don’t panic! Just mix until it’s relatively smooth. The deep, dark color of the molasses will completely transform the look of your dough.
Step 4: Combine wet and dry. Gradually add the flour mixture to the wet ingredients, mixing on low speed just until the flour disappears. You don’t want to overmix here! As soon as you no longer see streaks of flour, stop. The dough will be quite soft and sticky—that’s exactly what we want for a tender cookie.
Step 5: Chill the dough. Cover the bowl with plastic wrap and refrigerate for at least 30 minutes, or up to an hour. This is the perfect time to preheat your oven to 350°F (175°C) and line your baking sheets with parchment paper. The chilled dough will be much easier to handle and roll.
Step 6: Shape and roll the cookies. Place the granulated sugar in a small bowl. Scoop out about 1.5 tablespoons of dough for each cookie and roll it into a smooth ball between your palms. Then, roll each ball in the granulated sugar until it’s completely coated. This gives them that lovely, sparkly, slightly crunchy exterior.
Step 7: Bake to perfection. Arrange the sugared dough balls on your prepared baking sheet, leaving about 2 inches between them as they will spread. Bake for 10-12 minutes. The trick is to pull them out when the tops look crackled and the edges are just set. The centers should still look a little soft and underdone—they’ll firm up as they cool, ensuring that soft, chewy center.
Step 8: Cool completely (if you can wait!). Let the cookies cool on the baking sheet for 5 minutes before transferring them to a wire rack to cool completely. This resting period on the hot pan is the final stage of cooking and helps them set without becoming hard. Then, dig in!
Storage & Freshness Guide
- Fridge: Store dough up to 3 days; baked cookies keep at room temperature.
- Freezer: Freeze dough balls up to 3 months; bake from frozen, adding 1–2 minutes.
- Reviving: Add a bread slice to the container to maintain softness for days.
Serving Suggestions
Complementary Dishes
- A sharp cheddar cheese plate — The salty, tangy bite of a good aged cheddar creates a fantastic contrast with the sweet, spicy cookies. It’s a classic pairing that just works.
- A bowl of warm apple cinnamon oatmeal — Crumble a cookie on top for a delightful textural contrast and a burst of molasses flavor that takes your breakfast to a whole new level of cozy.
Drinks
- A tall glass of ice-cold milk — It’s the ultimate, timeless pairing. The creaminess of the milk cuts through the spice and sweetness, making each bite feel fresh and new.
- Hot chai tea or a pumpkin spice latte — Double down on the warm spices! The flavors in the drink will echo and amplify the ginger and cinnamon in the cookies for a truly autumnal experience.
Something Sweet
- A scoop of vanilla bean ice cream — Sandwich a scoop between two cookies for an incredible ice cream sandwich. The cold, creamy vanilla is the perfect, simple partner for the complex spiced cookie.
- A rich, dark chocolate mousse — The deep, bitter notes of dark chocolate provide a sophisticated counterpoint to the sweet, spicy cookie, creating a dessert platter that feels incredibly elegant.
Top Mistakes to Avoid
- Mistake: Using melted butter. This is the number one reason cookies spread too much. Melted butter causes the dough to relax and flatten out immediately in the oven, resulting in thin, greasy cookies instead of soft, puffy ones.
- Mistake: Over-baking the cookies. It’s so easy to do because they might not look “done” in the center. But trust the process! They continue to cook on the hot baking sheet. Over-baking is the fast track to a crunchy, hard cookie instead of a soft one.
- Mistake: Skipping the sugar roll. That coating of granulated sugar isn’t just for looks. It creates a delicate, slightly crisp shell that protects the soft interior and provides a wonderful textural contrast. It’s a small step with a big payoff.
- Mistake: Over-mixing the dough after adding the flour. Once the flour is incorporated, stop mixing! Overworking the dough develops the gluten in the flour, which can lead to tough, dense cookies instead of tender, cake-like ones.
Expert Tips
- Tip: For an extra flavor boost, try browning your butter. Melt the butter in a saucepan and cook it until it turns a golden amber color and smells nutty. Let it cool completely and solidify again before creaming it with the sugar. It adds a incredible depth of flavor.
- Tip: Use a cookie scoop! Not only does it make the process faster and cleaner, but it ensures all your cookies are the same size, which means they’ll bake evenly. No more some-are-done-and-some-are-raw situations.
- Tip: If you love a bit of heat, add a pinch of freshly ground black pepper to the dry ingredients. It sounds wild, but it enhances the warm spices and gives the cookies a subtle, intriguing kick in the background.
- Tip: For the chewiest cookies, slightly under-bake them. When you take them out, the centers should look puffy and still quite soft. Gently tap the baking sheet on the counter right when they come out of the oven—this helps them deflate just a little for that perfect, dense chew.
FAQs
Can I make the dough ahead of time?
Absolutely! You can cover the bowl and refrigerate the dough for up to 3 days. The flavor actually deepens and improves with a longer chill. You can also scoop the dough into balls, freeze them on a parchment-lined tray, and then transfer them to a freezer bag. Bake them straight from the freezer, just adding 1-2 minutes to the baking time. It’s the best way to have warm, fresh cookies on demand.
Why are my cookies cakey and not chewy?
A cakey texture usually points to too much flour or over-mixing. Remember to measure your flour with the spoon-and-level method to avoid packing in extra. Also, check your leavening—if your baking soda is old, it might not be providing the right lift, which can also affect texture. The goal is a dense, moist crumb, not a light, airy one.
Can I use gluten-free flour?
Yes, a 1:1 gluten-free all-purpose flour blend should work well in this recipe. The texture might be a tad more crumbly, but you’ll still get a delicious cookie. Just make sure your blend contains a binder like xanthan gum, which helps replicate the structure that gluten provides.
My cookies didn’t spread much. What happened?
This usually means your dough was too cold when it went into the oven, or you had a bit too much flour. If the dough is refrigerator-cold, it needs more time to warm up and spread in the oven. Next time, let the shaped dough balls sit at room temperature for 10-15 minutes before baking. Also, double-check your flour measurement technique.
How do I store these to keep them soft?
The key to keeping them soft is trapping their own moisture. Once completely cool, store them in an airtight container at room temperature. For an extra-soft cookie, you can even add a piece of bread or a single apple slice to the container—the cookies will absorb the moisture from it and stay wonderfully soft for days.


Soft Molasses Cookies: An Easy Holiday Baking Recipe
Soft Molasses Cookies are the ultimate easy molasses cookie recipe, perfect for your holiday baking. They're impossibly soft, chewy, and full of warm spice.
Ingredients
For the Ingredients
-
280 g all-purpose flour
-
1 tsp baking soda
-
1/4 tsp salt
-
2 tsp ground ginger
-
1 tsp ground cinnamon
-
1/4 tsp ground cloves
-
115 g unsalted butter (softened)
-
150 g dark brown sugar (packed)
-
1 large egg (at room temperature)
-
120 ml unsulphured molasses (not blackstrap!)
-
50 g granulated sugar (for rolling)
Instructions
-
First, whisk your dry ingredients. In a medium bowl, whisk together the flour, baking soda, salt, ginger, cinnamon, and cloves. You’ll notice that just whisking these together starts to release their beautiful, warm aroma. This ensures the leavening and spices are evenly distributed throughout the dough, so every single cookie is perfectly spiced.01
-
Now, let's cream the butter and sugars. In your large mixing bowl, beat the softened butter and packed dark brown sugar together on medium speed for about 2-3 minutes. You’re looking for a light and fluffy, pale mixture. This step is crucial for creating that soft, airy texture. Scrape down the sides of the bowl with a spatula to make sure everything is incorporated.02
-
Add the wet ingredients. Beat in the egg until it’s fully combined, then pour in the molasses. The mixture might look a little curdled at this point—that’s totally normal, don’t panic! Just mix until it’s relatively smooth. The deep, dark color of the molasses will completely transform the look of your dough.03
-
Combine wet and dry. Gradually add the flour mixture to the wet ingredients, mixing on low speed just until the flour disappears. You don't want to overmix here! As soon as you no longer see streaks of flour, stop. The dough will be quite soft and sticky—that’s exactly what we want for a tender cookie.04
-
Chill the dough. Cover the bowl with plastic wrap and refrigerate for at least 30 minutes, or up to an hour. This is the perfect time to preheat your oven to 350°F (175°C) and line your baking sheets with parchment paper. The chilled dough will be much easier to handle and roll.05
-
Shape and roll the cookies. Place the granulated sugar in a small bowl. Scoop out about 1.5 tablespoons of dough for each cookie and roll it into a smooth ball between your palms. Then, roll each ball in the granulated sugar until it’s completely coated. This gives them that lovely, sparkly, slightly crunchy exterior.06
-
Bake to perfection. Arrange the sugared dough balls on your prepared baking sheet, leaving about 2 inches between them as they will spread. Bake for 10-12 minutes. The trick is to pull them out when the tops look crackled and the edges are just set. The centers should still look a little soft and underdone—they’ll firm up as they cool, ensuring that soft, chewy center.07
-
Cool completely (if you can wait!). Let the cookies cool on the baking sheet for 5 minutes before transferring them to a wire rack to cool completely. This resting period on the hot pan is the final stage of cooking and helps them set without becoming hard. Then, dig in!08
Not what you're looking for?


