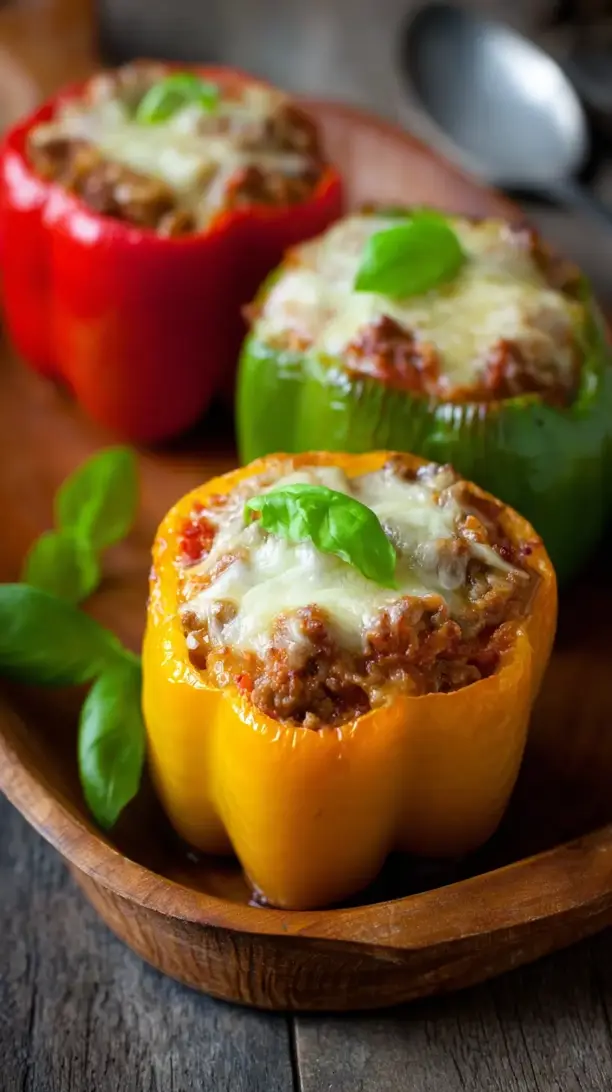
This Stuffed Bell Pepper Casserole delivers all the classic comfort of stuffed peppers with way less work. It layers savory ground beef, tender peppers, cauliflower rice, and melty cheese into one easy weeknight bake. Your family will love this deconstructed version of a timeless favorite.
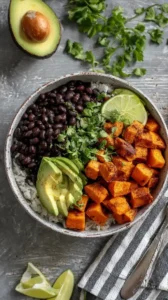
Love Stuffed Bell Pepper Casserole? So do we! If you're into Dinner Ideas or curious about Appetizer Recipes, you'll find plenty of inspiration below.

Why You’ll Love This Stuffed Bell Pepper Casserole
Weeknight Savior: One-pan prep means less mess and faster assembly.
Deep, Complex Flavor: Simmered tomato sauce and spices create a rich, savory base.
Versatile & Forgiving: Easily swap proteins or use any bell pepper colors you have.
Cheesy Comfort: A bubbly golden cheese topping adds the perfect finish.
Ingredients & Tools
- 1 tbsp olive oil
- 1 large yellow onion, diced
- 2 cloves garlic, minced
- 1 lb lean ground beef
- 3 large bell peppers (a mix of colors is nice!), chopped into 1-inch pieces
- 1 (15 oz) can tomato sauce
- 1 (14.5 oz) can diced tomatoes, undrained
- 2 cups cooked cauliflower rice
- 1 tsp dried oregano
- 1 tsp paprika
- 1.5 cups shredded mozzarella cheese
- 0.5 cup shredded cheddar cheese
- Salt and black pepper to taste
Tools: A large, oven-safe skillet (or a regular skillet and a 9×13 inch baking dish), a wooden spoon, and a cheese grater if you’re shredding your own cheese.
Notes: Using a good, lean ground beef will prevent the casserole from being too greasy, and the combination of tomato sauce and diced tomatoes gives you the best of both worlds—a smooth base and little pops of texture. Don’t skip the paprika; it adds a subtle smokiness that really makes the dish sing.
Nutrition (per serving)
| Calories: | 385 kcal |
| Protein: | 28 g |
| Fat: | 22 g |
| Carbs: | 18 g |
| Fiber: | 5 g |
Serves: 6 | Prep Time: 15 minutes | Cook Time: 35 minutes | Total Time: 50 minutes
Before You Start: Tips & Ingredient Notes
- Why use an oven-safe skillet? If you have one, it’s a game-changer for this recipe. You can cook the entire filling on the stovetop and then just transfer the same skillet to the oven. It means one less dish to wash and all those delicious browned bits from the bottom get incorporated into the final bake.
- What’s the deal with the cauliflower rice? It’s our low-carb hero here, standing in for traditional rice. You’ll want to use cooked cauliflower rice—if it’s frozen, make sure to thaw it and squeeze out any excess moisture in a clean kitchen towel. A soggy cauli-rice will make your casserole watery.
- Is pre-shredded cheese okay? Absolutely, it’s a great time-saver. But if you have a spare minute, grating your own cheese from a block will give you a much meltier, smoother result, as pre-shredded cheese is often coated to prevent clumping.
- Can I make it ahead? You sure can! Assemble the entire casserole right up to the point of adding the cheese, cover it tightly, and refrigerate for up to 24 hours. Just add the cheese and pop it in the oven when you’re ready, though you may need to add a few extra minutes to the baking time.
How to Make Stuffed Bell Pepper Casserole
Step 1: Start by preheating your oven to 375°F (190°C). This gives it plenty of time to come to the right temperature while you prepare the filling. Grab your large, oven-safe skillet and place it over medium-high heat. Add the olive oil and let it shimmer for a moment before adding your diced onion. You’ll hear a satisfying sizzle. Cook the onion, stirring occasionally, for about 4-5 minutes until it becomes translucent and fragrant.
Step 2: Add the minced garlic to the skillet and stir it for just 30 seconds—you really don’t want it to burn, as that will make it bitter. The aroma at this stage is just incredible. Now, crumble in the ground beef. Use your wooden spoon to break it up into small pieces as it cooks. You’re looking for the beef to be fully browned, with no pink spots remaining. This should take about 6-7 minutes.
Step 3: It’s time for the star of the show: the bell peppers. Stir in your chopped peppers and let them cook with the beef for about 5 minutes. You’ll notice them starting to soften and become vibrant. They don’t need to be completely soft now, as they’ll continue cooking in the oven. This step just helps to concentrate their flavor a little.
Step 4: Now, pour in the tomato sauce and the diced tomatoes with their juices. This is where the sauce base forms. Sprinkle in the dried oregano, paprika, and a good pinch of salt and pepper. Give everything a really good stir, making sure to scrape up any browned bits from the bottom of the skillet—that’s pure flavor right there. Let the mixture simmer for 2-3 minutes so the flavors can start to get to know each other.
Step 5: Turn off the heat. Stir in the cooked cauliflower rice. The trick here is to make sure it’s evenly distributed, soaking up all that saucy goodness. Taste the mixture now and adjust the seasoning if needed. Does it need more salt? A bit more pepper? This is your chance to make it perfect.
Step 6: If you’re not using an oven-safe skillet, now is the time to carefully transfer the mixture to your greased 9×13 inch baking dish. Smooth the top into an even layer. Now, for the best part—the cheese! Combine the mozzarella and cheddar and sprinkle it evenly over the entire surface. Be generous! This creates that beautiful, golden crust we’re all dreaming of.
Step 7: Carefully place the skillet or baking dish into your preheated oven. Bake for 20-25 minutes, or until the cheese is completely melted, bubbly, and has those gorgeous golden-brown spots. The casserole should be bubbling around the edges. Let it rest for about 5 minutes after pulling it out of the oven—this allows the filling to set slightly, making it much easier to serve up neat portions.
Storage & Freshness Guide
- Fridge: Cool completely, then store in an airtight container for 3–4 days.
- Freezer: Freeze tightly wrapped portions for up to 3 months. Thaw in fridge before reheating.
- Reviving: Reheat in oven at 350°F until warm for best texture; microwave works but may soften cauliflower rice.
Serving Suggestions
Complementary Dishes
- A simple arugula salad with a lemon vinaigrette — The peppery arugula and bright, acidic dressing cut through the richness of the casserole beautifully, balancing the whole meal.
- Garlic sautéed green beans or zucchini noodles — These low-carb sides add a different texture and a fresh, green element that complements the hearty, savory flavors on the plate.
- Cloud bread or a keto-friendly biscuit — Perfect for sopping up any extra sauce that might escape onto your plate. It adds a soft, bread-like component without the carbs.
Drinks
- A bold, dry red wine like a Cabernet Sauvignon — The tannins in the wine stand up wonderfully to the robust beef and tomato flavors, creating a really satisfying pairing.
- Sparkling water with a squeeze of lime — For a non-alcoholic option, the effervescence and citrus note are incredibly refreshing and help cleanse the palate between bites.
- Iced herbal tea, like mint or raspberry — A slightly sweet, cold tea offers a lovely contrast to the warm, savory casserole and is just a delight to sip on.
Something Sweet
- A few fresh raspberries with a dollop of whipped cream — The tartness of the berries and the light, airy cream provide a clean, fresh finish that doesn’t feel too heavy after a satisfying meal.
- A square of very dark chocolate (85% cacao or higher) — It’s rich, slightly bitter, and intensely chocolatey, which is the perfect little bite to signal the end of dinner.
- A small bowl of sugar-free lemon sorbet — Its bright, citrusy zing is the ultimate palate cleanser and feels like a real treat without any guilt.
Top Mistakes to Avoid
- Mistake: Not draining the ground beef. If you’re using a higher fat content beef, you might end up with a pool of grease in your skillet. After browning, tilt the skillet and spoon out the excess fat. A greasy base will make your final casserole unpleasantly oily.
- Mistake: Using watery cauliflower rice. This is the number one reason for a soupy casserole. Frozen cauliflower rice holds a lot of water. Always thaw it and wring it out in a clean kitchen towel until it feels quite dry. I’ve messed this up before too, and it makes a world of difference.
- Mistake: Skipping the rest time after baking. I know it’s tempting to dive right in, but if you let the casserole sit for 5-10 minutes after it comes out of the oven, the filling will firm up just enough to allow you to serve clean, beautiful portions instead of a cheesy slop.
- Mistake: Overcooking the garlic. Garlic burns in a heartbeat and turns bitter, which can throw off the entire flavor profile of the dish. Add it just after the onions have softened and stir constantly for only about 30 seconds before adding the beef.
Expert Tips
- Tip: Brown the beef in batches. If you crowd the skillet, the beef will steam instead of brown. Cooking it in two batches ensures you get those delicious, caramelized bits that add a ton of flavor to the final dish.
- Tip: Add a splash of Worcestershire sauce. Just a tablespoon stirred in with the tomato sauces adds a deep, savory, umami complexity that elevates the beef flavor to a whole new level. It’s a little secret I use all the time.
- Tip: Broil for the last minute. If your cheese is melted but not as golden as you’d like, switch your oven to broil for just 60-90 seconds. Watch it like a hawk! This will give you that picture-perfect, bubbly, browned cheese topping.
- Tip: Customize your spice level. Love a little heat? Add a pinch of red pepper flakes with the other dried spices, or stir in a diced jalapeño with the bell peppers. It’s an easy way to tailor the dish to your personal preference.
FAQs
Can I use a different type of meat?
Absolutely! Ground turkey, chicken, or even pork work wonderfully here. For a plant-based version, lentils or a plant-based ground “meat” are fantastic substitutes. Just keep in mind that leaner meats like turkey might need a tiny bit more oil to prevent sticking, and the cooking time should remain roughly the same until the meat is fully cooked through.
How do I store and reheat leftovers?
Leftovers will keep beautifully in an airtight container in the refrigerator for 3-4 days. To reheat, I find the oven or toaster oven (at 350°F until warm) works best to keep the cheese nice and the texture intact. The microwave can work in a pinch, but it might make the cauliflower rice a bit softer than you’d like. You can also freeze this casserole for up to 3 months.
My casserole turned out watery. What happened?
This almost always comes down to the moisture content in your vegetables. The two main culprits are the cauliflower rice and the canned tomatoes. Always squeeze your cauli-rice dry, and you can even try using a can of tomato sauce instead of diced tomatoes for a thicker result. Letting the casserole rest after baking also allows excess liquid to be reabsorbed.
Can I add other vegetables to this?
Of course! This is a very forgiving recipe. Diced zucchini, sliced mushrooms, or even some spinach (stirred in at the very end before baking) would be lovely additions. If you’re adding veggies with high water content like zucchini or mushrooms, you might want to sauté them separately first to drive off some of that moisture.
Is it necessary to cook the cauliflower rice before adding it?
Yes, I highly recommend it. Using raw cauliflower rice will release a significant amount of water as it bakes, leading to a very soggy casserole. Cooking it first—whether by sautéing, steaming, or using a frozen product that you’ve thawed and dried—ensures it’s ready to absorb the flavors of the sauce without watering everything down.


Stuffed Bell Pepper Casserole
Make this easy Stuffed Bell Pepper Casserole for a delicious, low-carb family dinner. All the flavor, none of the fuss. Get the recipe now!
Ingredients
For the Ingredients & Tools
-
1 tbsp olive oil
-
1 large yellow onion (diced)
-
2 cloves garlic (minced)
-
1 lb lean ground beef
-
3 large bell peppers (a mix of colors is nice!, chopped into 1-inch pieces)
-
1 can tomato sauce (15 oz)
-
1 can diced tomatoes (14.5 oz, undrained)
-
2 cups cooked cauliflower rice
-
1 tsp dried oregano
-
1 tsp paprika
-
1.5 cups shredded mozzarella cheese
-
0.5 cup shredded cheddar cheese
-
Salt and black pepper (to taste)
Instructions
-
Start by preheating your oven to 375°F (190°C). This gives it plenty of time to come to the right temperature while you prepare the filling. Grab your large, oven-safe skillet and place it over medium-high heat. Add the olive oil and let it shimmer for a moment before adding your diced onion. You’ll hear a satisfying sizzle. Cook the onion, stirring occasionally, for about 4-5 minutes until it becomes translucent and fragrant.01
-
Add the minced garlic to the skillet and stir it for just 30 seconds—you really don’t want it to burn, as that will make it bitter. The aroma at this stage is just incredible. Now, crumble in the ground beef. Use your wooden spoon to break it up into small pieces as it cooks. You’re looking for the beef to be fully browned, with no pink spots remaining. This should take about 6-7 minutes.02
-
It’s time for the star of the show: the bell peppers. Stir in your chopped peppers and let them cook with the beef for about 5 minutes. You’ll notice them starting to soften and become vibrant. They don’t need to be completely soft now, as they’ll continue cooking in the oven. This step just helps to concentrate their flavor a little.03
-
Now, pour in the tomato sauce and the diced tomatoes with their juices. This is where the sauce base forms. Sprinkle in the dried oregano, paprika, and a good pinch of salt and pepper. Give everything a really good stir, making sure to scrape up any browned bits from the bottom of the skillet—that’s pure flavor right there. Let the mixture simmer for 2-3 minutes so the flavors can start to get to know each other.04
-
Turn off the heat. Stir in the cooked cauliflower rice. The trick here is to make sure it’s evenly distributed, soaking up all that saucy goodness. Taste the mixture now and adjust the seasoning if needed. Does it need more salt? A bit more pepper? This is your chance to make it perfect.05
-
If you’re not using an oven-safe skillet, now is the time to carefully transfer the mixture to your greased 9x13 inch baking dish. Smooth the top into an even layer. Now, for the best part—the cheese! Combine the mozzarella and cheddar and sprinkle it evenly over the entire surface. Be generous! This creates that beautiful, golden crust we’re all dreaming of.06
-
Carefully place the skillet or baking dish into your preheated oven. Bake for 20-25 minutes, or until the cheese is completely melted, bubbly, and has those gorgeous golden-brown spots. The casserole should be bubbling around the edges. Let it rest for about 5 minutes after pulling it out of the oven—this allows the filling to set slightly, making it much easier to serve up neat portions.07
Not what you're looking for?


