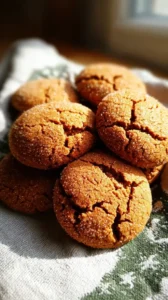
There’s something truly magical about turning simple ingredients into edible winter art, and for me, that magic lives in these Sugar Cookie Snowflake Cutouts. Pulling a golden pan of these tender, buttery canvases from the oven is one of my favorite moments of the season. I consider this easy sugar cookie recipe the ultimate comfort food—a simple joy that fills my kitchen with the warm, festive spirit of holiday baking.
I love how this project becomes a wonderful family activity. Whether you’re using a classic snowflake cutter or other shapes, rolling and decorating together creates the sweetest memories. It’s the heart of my Christmas baking ideas, resulting in beautiful Christmas sweets that everyone gathers around to admire. If you’re looking for Christmas dessert ideas that feel special yet approachable, you’ve found them.
Honestly, these cutouts are my go-to for easy Christmas treats. They’ve earned a permanent spot in my collection of Christmas cookie recipes and are always a hit. So, if you’re dreaming of delicious holiday cookies, Christmas-style, gather your sprinkles and let’s make some holiday magic together.
Looking for Sugar Cookie Snowflake Cutouts inspiration? You'll love what we have! Explore more Christmas Cookie recipes or discover our Drinks favorites.


Why You’ll Love This Sugar Cookie Snowflake Cutouts
- Perfect for decorating: Holds sharp edges and intricate details through baking.
- Incredibly tender texture: Soft, melt-in-your-mouth crumb, not hard or crunchy.
- Simple, reliable dough: Rolls smoothly, minimal re-chilling, easy to handle.
- Festive activity: Fun holiday project for family or friends to enjoy together.
Ingredients & Tools
- 315 g all-purpose flour
- 1/2 tsp baking powder
- 1/4 tsp fine sea salt
- 170 g unsalted butter, at cool room temperature
- 200 g granulated sugar
- 1 large egg
- 2 tsp pure vanilla extract
- 1/4 tsp almond extract (optional, but lovely)
Tools: Stand mixer or hand mixer, rolling pin, snowflake-shaped cookie cutters (various sizes are fun!), parchment paper, cooling racks, and an offset spatula is helpful for transferring cookies.
Notes: Using good quality vanilla and real butter really makes a difference. The optional almond extract adds a subtle, bakery-style depth.
Nutrition (per serving)
| Calories: | 150 kcal |
| Protein: | 2 g |
| Fat: | 7 g |
| Carbs: | 21 g |
| Fiber: | 0.5 g |
Serves: 24 cookies | Prep Time: 30 minutes | Cook Time: 8-10 minutes | Total Time: 1 hour 30 minutes (includes chilling & decorating)
Before You Start: Tips & Ingredient Notes
- Butter temperature is key. Your butter should be cool to the touch but able to be pressed with a finger. Too warm and the dough will be greasy; too cold and it won’t cream properly.
- Don’t skip the chill. Chilling the dough firms up the butter, which prevents the cookies from spreading too much in the oven and losing their beautiful snowflake shapes.
- Measure your flour correctly. For the most accurate results, spoon your flour into the measuring cup and level it off. Scooping directly packs in too much flour and can lead to dry cookies.
- Embrace the almond extract. I know it’s optional, but it really elevates the flavor from a simple sugar cookie to something a little more complex and wonderful. A little goes a long way!
How to Make Sugar Cookie Snowflake Cutouts
Step 1: Combine the Dry Ingredients. In a medium bowl, whisk together the flour, baking powder, and salt. This isn’t just about mixing—whisking incorporates air and ensures the leavening is evenly distributed, which gives you a consistent, tender bake. Set this bowl aside for now.
Step 2: Cream the Butter and Sugar. In the bowl of your stand mixer fitted with the paddle attachment (or using a hand mixer), beat the cool butter and granulated sugar together on medium-high speed for about 2-3 minutes. You’re looking for the mixture to become noticeably paler in color and fluffy. This step is crucial for creating a light texture, so don’t rush it!
Step 3: Add the Wet Ingredients. Scrape down the sides of the bowl with a spatula. Add the egg, vanilla extract, and almond extract (if using). Mix on medium speed until everything is fully combined, about one minute. The mixture might look a little curdled at first, but it will smooth out once you add the dry ingredients.
Step 4: Incorporate the Dry Ingredients. With the mixer on low speed, gradually add the flour mixture. Mix just until the dough comes together and no dry streaks of flour remain. You’ll notice the dough will pull away from the sides of the bowl. Be careful not to overmix at this stage, as that can develop the gluten and make the cookies tough.
Step 5: Chill the Dough. Divide the dough in half and shape each half into a flat disc. Wrap each disc tightly in plastic wrap. You’ll want to refrigerate them for at least 30 minutes, or up to 2 days. This firms up the butter, making the dough much easier to roll out and cut.
Step 6: Roll and Cut. Preheat your oven to 350°F (175°C) and line baking sheets with parchment paper. On a lightly floured surface, roll one disc of dough to about 1/4-inch thickness. Use your snowflake cutters to stamp out shapes, dipping the cutter in flour if it starts to stick. Place the cutouts about 1 inch apart on the prepared baking sheets.
Step 7: Bake to Perfection. Bake for 8-10 minutes. The trick is to pull them out when the edges are just barely starting to turn a light golden brown. The centers should still look soft and set, but not colored. They’ll firm up a lot as they cool, so this prevents overbaking.
Step 8: Cool Completely. Let the cookies cool on the baking sheet for 5 minutes before carefully transferring them to a wire rack to cool completely. This is the hardest part—waiting! But decorating warm cookies is a recipe for melted, messy icing, so patience is key.
Storage & Freshness Guide
- Fridge: Store undecorated dough discs wrapped tightly for up to 2 days.
- Freezer: Freeze baked, undecorated cookies in an airtight container for up to 3 months.
- Reviving: Thaw frozen cookies at room temperature before decorating.
Serving Suggestions
Complementary Dishes
- A warm mug of homemade hot chocolate — The rich, chocolatey drink is the perfect cozy companion to the sweet, crisp cookies, creating the ultimate winter treat experience.
- A cheese and charcuterie board — The salty, savory elements provide a wonderful contrast to the sweetness of the cookies, making for a well-rounded holiday spread.
- Spiced apple cider — The warm, aromatic spices in the cider beautifully highlight the vanilla and almond notes in the cookies.
Drinks
- Earl Grey tea — The bergamot in the tea offers a lovely, fragrant contrast that cuts through the sweetness of the icing in a really elegant way.
- Cold glass of milk — It’s a classic for a reason! The creaminess is the perfect partner for a soft, buttery cookie.
- Peppermint hot chocolate — The cool mint and rich chocolate create a festive flavor combination that feels like a holiday party in a cup.
Something Sweet
- Vanilla bean ice cream — Sandwich a small scoop between two cookies for an incredible ice cream sandwich. The creamy, cold ice cream with the soft cookie is divine.
- Dark chocolate-dipped strawberries — These offer a fruity, slightly tart counterpoint that keeps your palate refreshed between cookie bites.
- A simple gingerbread loaf — The warm spices from the gingerbread complement the simple vanilla flavor of the snowflakes without overpowering them.
Top Mistakes to Avoid
- Mistake: Using melted or overly soft butter. This is the number one reason cookies spread. The butter needs to be cool so it doesn’t melt immediately in the oven, which causes the shape to blur.
- Mistake: Rolling the dough too thin or too thick. A 1/4-inch thickness is the sweet spot. Thinner, and they can burn; thicker, and they won’t cook evenly and can be doughy in the middle.
- Mistake: Overbaking the cookies. They continue to cook on the hot baking sheet after you take them out. Pull them when the edges are just lightly golden for a soft, tender texture.
- Mistake: Decorating before completely cool. Icing on a warm cookie will slide right off, thin out, and make a huge mess. Let them cool on a rack for at least an hour.
Expert Tips
- Tip: Re-roll your scraps smartly. When you gather your dough scraps to re-roll, try to handle them as little as possible. Just press them together gently and roll. Overworking can make those cookies a bit tougher.
- Tip: Use a bench scraper for easy transfer. If you’re nervous about moving delicate cutouts, slide a flat bench scraper or offset spatula underneath them to lift without distorting the shape.
- Tip: For extra sparkle, try a pre-bake sprinkle. Before baking, you can brush the cookies with a tiny bit of heavy cream or an egg white wash and sprinkle with coarse sparkling sugar for a frosty effect that doesn’t need icing.
- Tip: Create a “flour duster”. Put a little flour in a small mesh sieve and gently tap it over your rolling surface. This gives you a light, even dusting of flour without overdoing it.
FAQs
Can I make this dough ahead of time?
Absolutely! The dough discs can be wrapped tightly and refrigerated for up to 2 days. You can also freeze them for up to 3 months. Just thaw overnight in the fridge before rolling. This makes holiday prep so much easier—you can have the dough ready to go for a spontaneous decorating session.
Why did my cookies spread and lose their shape?
This usually comes down to butter temperature or insufficient chilling. If your butter was too soft or your dough wasn’t chilled long enough, the butter will melt too quickly in the oven. Also, double-check your measurements—too little flour can cause spreading. Make sure your oven is fully preheated, too!
My royal icing is too runny/thick. Help!
Icing consistency is everything! For outlining, you want a thicker icing that holds a line. For flooding (filling in), you want a thinner, syrup-like consistency that smooths out. Add water a teaspoon at a time to thin it, or more powdered sugar to thicken it. Test on a plate first—it should hold its shape for 10-15 seconds before melting back.
Can I freeze the baked and decorated cookies?
You can, but with a caveat. Freezing can cause the colors in royal icing to bleed or become dull. For best results, freeze the undecorated, baked cookies. Once completely cool, layer them in an airtight container with parchment paper between layers. They’ll freeze beautifully for up to 3 months. Thaw and then decorate.
What’s the best way to store these cookies?
Once decorated and the icing has fully hardened (this can take several hours or overnight), store them in a single layer in an airtight container at room temperature. If you stack them, put parchment paper between the layers to protect your beautiful designs. They’ll stay fresh and delicious for about a week.


Sugar Cookie Snowflake Cutouts: An Easy Family Baking Activity
Sugar Cookie Snowflake Cutouts are the perfect easy sugar cookie recipe for holiday baking. These tender, buttery cookies are a festive and fun Christmas dessert idea for the whole family.
Ingredients
For the Ingredients
-
315 g all-purpose flour
-
1/2 tsp baking powder
-
1/4 tsp fine sea salt
-
170 g unsalted butter (at cool room temperature)
-
200 g granulated sugar
-
1 large egg
-
2 tsp pure vanilla extract
-
1/4 tsp almond extract (optional, but lovely)
Instructions
-
In a medium bowl, whisk together the flour, baking powder, and salt.01
-
In the bowl of your stand mixer fitted with the paddle attachment (or using a hand mixer), beat the cool butter and granulated sugar together on medium-high speed for about 2-3 minutes.02
-
Scrape down the sides of the bowl with a spatula.03
-
Add the egg, vanilla extract, and almond extract (if using).04
-
Mix on medium speed until everything is fully combined, about one minute.05
-
With the mixer on low speed, gradually add the flour mixture.06
-
Mix just until the dough comes together and no dry streaks of flour remain.07
-
Divide the dough in half and shape each half into a flat disc.08
-
Wrap each disc tightly in plastic wrap.09
-
Refrigerate them for at least 30 minutes, or up to 2 days.10
-
Preheat your oven to 350°F (175°C) and line baking sheets with parchment paper.11
-
On a lightly floured surface, roll one disc of dough to about 1/4-inch thickness.12
-
Use your snowflake cutters to stamp out shapes, dipping the cutter in flour if it starts to stick.13
-
Place the cutouts about 1 inch apart on the prepared baking sheets.14
-
Bake for 8-10 minutes.15
-
Let the cookies cool on the baking sheet for 5 minutes before carefully transferring them to a wire rack to cool completely.16
Not what you're looking for?


