There’s something magical about that first crisp bite of a homemade dill pickle. That perfect balance of tangy, garlicky goodness with just the right herbal punch from fresh dill – it’s enough to make any pickle lover weak in the knees. I still remember my grandmother’s cellar shelves lined with jars of her famous pickles, each one bursting with more flavor than anything you’d find at the store.
After years of perfecting my own recipe (and plenty of trial and error), I’m sharing everything I’ve learned about creating the perfect tangy dill pickles at home. These aren’t just any pickles – we’re talking about naturally fermented beauties packed with gut-friendly probiotics and flavor that develops beautifully over time.
Nothing beats a great Tangy Dill Pickles. Whether you're a fan of Appetizer Recipes or want to try something from our Appetizers & Snacks selection, keep scrolling!


Why This Recipe Works
- The fermentation factor: Unlike quick vinegar pickles, these develop complex flavors through natural lactic acid fermentation – the same process that gives us sauerkraut and Kimchi. The bacteria convert sugars into tangy lactic acid, creating that signature sourness while preserving the cucumbers.
- Crunch you can count on: We’re using a few secret weapons (hello, grape leaves!) to ensure these stay crisp for months. The tannins in grape leaves or black tea strengthen the cucumber’s cell walls during fermentation.
- Endless customization: Like them spicy? Add some chiles. Prefer more garlic? Double it up. This is your pickle playground. The basic brine acts as a perfect canvas for your flavor experiments.
Essential Ingredients & Tools
Ingredients for the Brine
- 4 cups water (filtered is best to avoid chlorine that might interfere with fermentation)
- 1 cup white vinegar (5% acidity) (the backbone of our tangy flavor profile; Apple Cider vinegar works for milder taste)
- 3 tbsp kosher salt (non-iodized is crucial here for proper fermentation – table salt can cause cloudiness)
- 1 tbsp sugar (just enough to balance without making them sweet; omit for keto-friendly version)
Ingredients for the Pickles
- 2 lbs small cucumbers (Kirby or Persian) (look for fresh varieties with no wax coating – wax blocks brine absorption)
- 4 garlic cloves, smashed (releases delicious oils; reduce to 2 cloves for milder taste)
- 2 tbsp fresh dill fronds + 1 tsp dill seeds (double dill action for maximum flavor)
- 1 tsp black peppercorns (for subtle warmth; coriander seeds make a nice alternative)
- 1 bay leaf (adds that mysterious depth you can’t quite put your finger on)
- 1 grape leaf or 1 tsp black tea leaves (optional) (the tannins are nature’s crispness preservatives)
Tools You’ll Need
- 1-gallon glass jar or clean pickle jar (non-reactive material prevents off-flavors; can use multiple smaller jars)
- Small plate or fermentation weights (to keep everything happily submerged – a ziplock bag filled with water works in a pinch)
- Wooden spoon (for stirring without scratching your jar)
- Clean cloth + rubber band (cheesecloth works great; allows airflow while keeping debris out)
How to Make Tangy Dill Pickles
- Jar Prep
Start with squeaky clean jars – I run mine through the dishwasher or give them a good boil for 10 minutes. Any lingering bacteria could throw off our fermentation party. Air-dry completely on a clean towel – residual water can dilute your brine.
- Brine Time
Combine your 4 cups water, 1 cup white vinegar, 3 tbsp kosher salt and 1 tbsp sugar in a saucepan. Heat gently over medium, stirring just until the salt dissolves – we’re not making soup here. Do not boil vigorously as this can evaporate too much liquid. Let it cool to room temperature (about 70°F/21°C); pouring hot brine over cucumbers is a one-way ticket to Soggyville.
- Layering Flavors
I like to think of this like building a flavor lasagna. Place the 4 smashed garlic cloves, 1 tsp black peppercorns, and 1 bay leaf at the bottom. Pack the 2 lbs cucumbers vertically – standing spears upright like soldiers or nestling whole pickles snugly. Leave 1 inch headspace at the top. Tuck in the 2 tbsp fresh dill fronds and that 1 grape leaf (our crispy insurance policy) last.
- The Waiting Game
Slowly pour cooled brine over cucumbers until fully submerged. Use a weight to keep everything under the brine – exposed bits can mold. Cover with a clean cloth secured with a rubber band. Store at 68-75°F (20-24°C) – a pantry away from direct sunlight works well. Check daily for bubbles – that’s the good bacteria hard at work. After about 3 days, start tasting. When they hit that perfect balance of tangy and dilly for your taste (usually 5-7 days), into the fridge they go to slow down the fermentation.
Pro Technique
- Temperature matters: My kitchen stays around 70°F which gives me perfect pickles in about 5 days. Warmer (75°F+)? They’ll ferment faster but may soften sooner. Cooler (65°F)? More patience required but develops more nuanced sourness.
- Burp your jars: If using a tight lid instead of cloth, open briefly daily to release built-up CO₂ gases that can cause off-flavors or cracked jars.
- Crispness tricks: Beyond grape leaves, I’ve had great results with oak leaves, horseradish leaves, or ½ tsp calcium chloride (sold as Pickle Crisp) for guaranteed crunch.
- Troubleshooting: White film (kahm yeast) is harmless – just skim it off. Colored or fuzzy mold? Sadly, time to discard. Cloudy brine is normal if it smells pleasantly sour.
Chef’s Wisdom
Not all cukes are created equal when it comes to pickling. Here’s what I’ve learned:
- Kirby or Persian cucumbers are the MVPs – their thick skins and small seed cavities mean they hold up best during fermentation
- Farmers market fresh is ideal – use within 48 hours of picking for peak crispness; soft cucumbers make soft pickles
- Avoid waxed cucumbers at all costs – that coating prevents the brine from penetrating properly
- Uniform size ensures even fermentation – halve larger cucumbers if needed
Storage & Freshness Guide
- In the fridge: These will keep beautifully for up to 6 months in airtight jars, though in my house they never last that long. The brine may cloud naturally – this indicates active probiotics.
- For long-term storage: Process in a water bath canner for 10 minutes to kill bacteria and extend shelf life to 1 year, but this eliminates the probiotics.
- If they soften: A 30-minute ice bath can often revive limp pickles – the cold water helps re-crisp the cell structure.
Ingredient Variations and Their Impact
One of my favorite things about this recipe is how easily you can make it your own:
- Spicy version: Add some sliced jalapeños, habaneros, or 1 tsp red pepper flakes
- Garlic lovers: Double or triple the garlic – no judgment here; slicing cloves thinly increases flavor release
- Herb variations: Try tarragon (anise-like) or thyme (earthy) instead of dill for different profiles
- Sweet and tangy: Add 2 tbsp honey or maple syrup instead of sugar with mustard seeds
- Vegetable add-ins: Toss in carrot coins, cauliflower florets, or sliced fennel for variety
Perfect Pairings
Complementary Dishes
- Smoked Salmon on Rye: The pickles’ acidity cuts through the rich salmon perfectly, while the dill echoes the fish’s herbal notes. For an elegant appetizer, serve thin slices of salmon on pumpernickel with a dollop of crème fraîche and a spear of pickle.
- Grilled Bratwurst: Tangy pickles balance the smoky, fatty flavors of grilled sausages, adding a refreshing contrast. Pile them high on a pretzel bun with spicy mustard for the ultimate street food experience.
Drinks
- Dry Riesling: This wine’s crisp acidity mirrors the pickles’ tang beautifully, while its floral notes complement the dill. The slight sweetness helps tame the brine’s sharpness.
- Gin & Tonic with Cucumber: The botanicals in gin harmonize wonderfully with the pickles’ aromatic spices. Adding fresh cucumber slices bridges the flavors between drink and pickle.
Something Sweet
- Aged Cheddar Cheese: The saltiness and crystalline texture of well-aged cheddar contrasts beautifully with the pickles’ sour crunch. Try this pairing on whole grain crackers with a drizzle of honey.
- Creamy Potato Salad: Chopped pickles add brightness and texture to rich, creamy potato salad. The vinegar in the pickles cuts through the mayonnaise, creating perfect balance.
Nutrition Profile
Beyond being delicious, these fermented pickles offer some great health benefits:
- Probiotics: The natural fermentation creates gut-friendly lactic acid bacteria that support digestion
- Low calorie: At about 5 calories per spear, snack away without guilt
- Hydration: The brine can actually help replenish electrolytes like sodium and potassium
- Antioxidants: Garlic and dill provide beneficial plant compounds
The Story Behind the Sauce
Making your own tangy dill pickles is one of those kitchen projects that seems intimidating but is actually quite simple once you understand the basics. The reward? Pickles that put anything from the grocery store to shame, with flavors you can customize exactly to your liking.
I’d love to hear about your pickle-making adventures! What variations have you tried? Any family secrets you’re willing to share? Drop your pickle wisdom in the comments below.
Now if you’ll excuse me, I think it’s time for a pickle… for research purposes, of course.


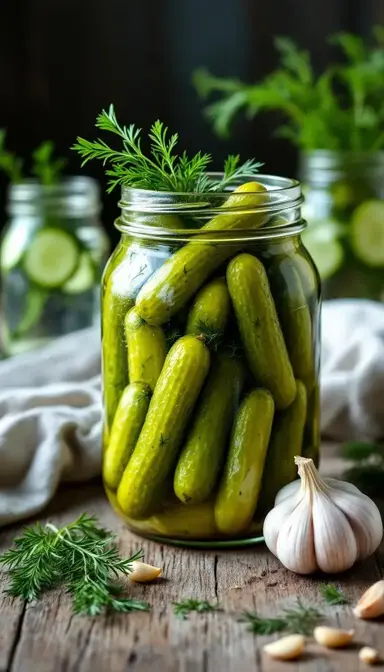
Tangy Dill Pickles
Learn how to make crisp, probiotic-rich Tangy Dill Pickles at home with my easy fermentation guide. Perfect for snacking, burgers, and more. Start pickling today!
Ingredients
For the Brine
-
4 cups water
-
1 cup white vinegar (5% acidity)
-
3 tbsp kosher salt
-
1 tbsp sugar
For the Pickles
-
2 lbs small Kirby or Persian cucumbers
-
4 cloves garlic (smashed)
-
2 tbsp fresh dill fronds
-
1 tsp dill seeds
-
1 tsp black peppercorns
-
1 bay leaf
-
1 grape leaf or 1 tsp black tea leaves (optional)
Instructions
-
Sterilize a 1-gallon jar by boiling for 10 minutes. Air-dry completely.01
-
In a saucepan, combine 4 cups water, 1 cup white vinegar, 3 tbsp kosher salt and 1 tbsp sugar. Heat until salt dissolves. Cool to room temperature.02
-
Layer 4 smashed garlic cloves, 1 tsp black peppercorns, 1 bay leaf and 2 lbs cucumbers in jar. Add 2 tbsp fresh dill fronds and 1 grape leaf last.03
-
Pour cooled brine over cucumbers, ensuring complete submersion. Use a weight to keep submerged.04
-
Cover with clean cloth secured with rubber band. Store at 68-75°F for 3-7 days, checking daily.05
-
Once desired tanginess is reached (usually day 5), transfer to refrigerator to halt fermentation.06
Not what you're looking for?