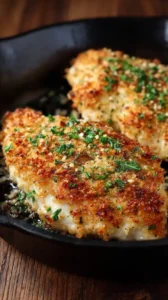
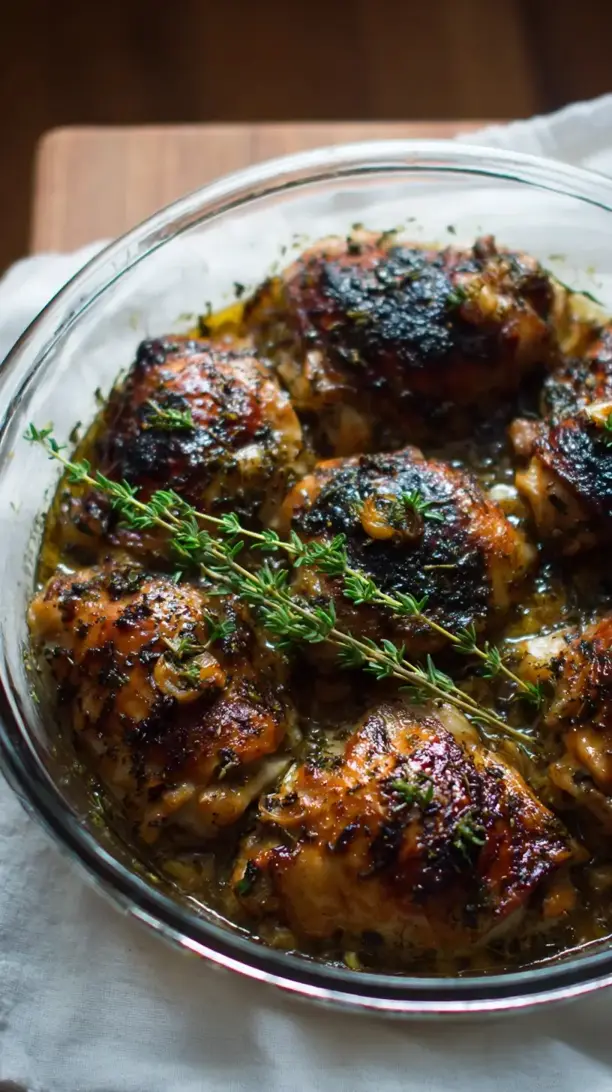
There’s something incredibly comforting about the aroma of garlic and thyme filling your kitchen. This Thyme and Garlic Chicken is a simple yet elegant weeknight hero, with a buttery, garlicky, thyme-infused sauce that’s pure liquid gold. The technique ensures irresistibly crisp skin and juicy, flavorful meat every time.
Craving a delicious Thyme and Garlic Chicken? You've come to the right spot! From Chicken Breast Recipes favorites to amazing Desserts recipes, there's something here for everyone.


Why You’ll Love This Thyme and Garlic Chicken
- Minimal effort: A short ingredient list delivers bistro-level flavor.
- Perfect texture: Crispy skin gives way to tender, succulent meat.
- Versatile pairing: Complements almost any side dish you can imagine.
- Liquid gold sauce: A glossy, garlic-thyme pan sauce you’ll want to drizzle on everything.
Ingredients & Tools
- 4 bone-in, skin-on chicken thighs (or 2 chicken breasts, halved)
- 1 tbsp olive oil
- 1 tsp fine sea salt
- 1/2 tsp freshly ground black pepper
- 8 cloves garlic, lightly smashed
- 4-5 fresh thyme sprigs, plus more for garnish
- 3 tbsp unsalted butter, cut into pieces
- 1/4 cup chicken broth (or dry white wine)
- 1 tbsp fresh lemon juice
Tools: A large, oven-safe skillet (like cast iron or stainless steel), tongs, and a meat thermometer are highly recommended.
Notes: Using bone-in, skin-on chicken is key for juiciness and crisp skin. Don’t be shy with the garlic—it mellows and sweetens as it cooks. Fresh thyme is non-negotiable for classic aromatic flavor.
Nutrition (per serving)
| Calories: | 420 kcal |
| Protein: | 35 g |
| Fat: | 29 g |
| Carbs: | 3 g |
| Fiber: | 0.5 g |
Serves: 2 | Prep Time: 10 minutes | Cook Time: 25 minutes | Total Time: 35 minutes
Before You Start: Tips & Ingredient Notes
- Bring your chicken to room temperature. Taking the chicken out of the fridge 20-30 minutes before cooking helps it cook more evenly. If it’s too cold, the outside can overcook before the inside is done.
- Pat that skin dry! This is the secret to crispy skin. Use paper towels to thoroughly pat the chicken skin dry before you season it. Any moisture on the surface will steam the skin instead of letting it sear and crisp up.
- Don’t use dried thyme. I know it’s tempting, but for this recipe, fresh thyme is essential. Dried thyme has a dustier, less vibrant flavor and its tiny leaves can burn in the hot pan. The fresh sprigs will infuse the oil and butter with a beautiful, herbaceous aroma.
- Smash, don’t mince, the garlic. Lightly smashing the cloves with the flat side of your knife releases their oils without turning them into a paste. This allows them to cook gently and sweeten in the butter without burning and becoming bitter.
How to Make Thyme and Garlic Chicken
Step 1: Preheat your oven to 400°F (200°C). While it’s heating, prepare your chicken. Pat the chicken pieces completely dry with paper towels—this is a non-negotiable step for crispiness. Season both sides generously with the salt and pepper, making sure to get the seasoning under the skin as well for maximum flavor.
Step 2: Place your oven-safe skillet over medium-high heat and add the olive oil. Once the oil is shimmering hot, carefully place the chicken in the pan, skin-side down. You should hear a confident sizzle. Resist the urge to move it! Let it cook undisturbed for 6-8 minutes to develop a deep golden-brown, crispy crust.
Step 3: Flip the chicken over so it’s skin-side up. The skin should look beautifully browned and release easily from the pan. Immediately add the butter, smashed garlic cloves, and the fresh thyme sprigs to the pan around the chicken. The butter will foam and melt—use a spoon to baste the chicken continuously with the hot, fragrant butter for about a minute. You’ll notice the aroma changing as the thyme and garlic infuse the fat.
Step 4: Transfer the entire skillet to the preheated oven. Roast for 15-18 minutes, or until the internal temperature of the chicken reaches 165°F (74°C) when checked with a meat thermometer inserted into the thickest part without touching the bone. The chicken will be juicy and cooked through, and your kitchen will smell incredible.
Step 5: Carefully remove the hot skillet from the oven—remember the handle will be extremely hot! Transfer the cooked chicken to a plate to rest. Place the skillet back on the stovetop over medium heat. Add the chicken broth (or wine) and lemon juice. Use a wooden spoon to scrape up all the delicious browned bits from the bottom of the pan. Let the sauce simmer and reduce for 2-3 minutes until it slightly thickens.
Step 6: To serve, spoon the rich pan sauce, along with the soft, roasted garlic cloves and thyme sprigs, over the rested chicken. The garlic will be soft and sweet—absolutely delicious spread on the chicken or a piece of crusty bread. Garnish with a final sprinkle of fresh thyme leaves for a pop of color and freshness.
Storage & Freshness Guide
- Fridge: Store leftover chicken and sauce in an airtight container for up to 3 days.
- Freezer: Freeze cooked chicken (without sauce) in a freezer bag for up to 2 months. Thaw in fridge before reheating.
- Reviving: Reheat gently in a covered skillet with a splash of broth to keep it moist.
Serving Suggestions
Complementary Dishes
- Creamy Parmesan Polenta — The soft, creamy texture is the perfect canvas for that glorious pan sauce to soak into.
- Garlic Sautéed Green Beans — They add a fresh, crisp-tender element that complements the rich, savory chicken beautifully.
- Rosemary Roasted Potatoes — The earthy rosemary pairs wonderfully with the thyme, making for a cohesive and comforting herb profile.
Drinks
- A Crisp Chardonnay — Its bright acidity and subtle oakiness cut through the richness of the butter and chicken fat perfectly.
- Sparkling Water with Lemon — The bubbles and citrus are a simple, refreshing palate cleanser between bites of the savory chicken.
- Light-bodied Pinot Noir — A red that’s not too heavy, with notes of cherry and earth, can stand up to the garlic and herbs without overpowering them.
Something Sweet
- Lemon Sorbet — Its sharp, clean citrus flavor is a refreshing and light way to end the meal after something so savory.
- Vanilla Bean Panna Cotta — The smooth, cool, and creamy dessert provides a lovely, simple contrast to the warm, herbaceous main course.
- Dark Chocolate Truffles — Just one or two rich, bitter-sweet bites are the perfect elegant finish without feeling too heavy.
Top Mistakes to Avoid
- Crowding the pan. If you put too many chicken pieces in the skillet at once, they’ll steam instead of sear. You need space for the moisture to evaporate so the skin can get properly crisp. Cook in batches if your pan is small.
- Moving the chicken too soon. That initial sizzle when the chicken hits the pan is a good sign! Let it be. If you try to move it before the skin has released itself from the pan, you’ll tear that beautiful crust. Patience is key.
- Burning the garlic. Garlic burns easily and becomes bitter. By adding it with the butter after you’ve flipped the chicken, it cooks more gently in the residual heat and buttery bath, sweetening instead of scorching.
- Skipping the rest time. Letting the chicken rest for 5 minutes after it comes out of the oven allows the juices to redistribute throughout the meat. If you cut into it right away, all those precious juices will end up on your plate, not in your mouth.
Expert Tips
- Tip: Use a cast iron skillet if you have one. It retains heat exceptionally well, which means you get a fantastic, even sear on the chicken skin and it transitions seamlessly from stovetop to oven. It’s the ideal tool for this recipe.
- Tip: For an extra layer of flavor, season your chicken with salt up to an hour before cooking and let it sit uncovered in the fridge. This “dry-brining” helps season the meat more deeply and results in even crispier skin.
- Tip: If you don’t have an oven-safe skillet, no worries! After searing the chicken on the stovetop, transfer it to a baking dish along with the butter, garlic, and thyme to finish cooking in the oven. You can then make the sauce in the original pan.
- Tip: Don’t discard the cooked thyme sprigs and garlic! The thyme will be crispy and the garlic soft and sweet. They are both delicious to eat alongside the chicken or mashed into the sauce for an even more intense flavor.
FAQs
Can I use boneless, skinless chicken breasts?
You can, but the cooking method and result will be different. Boneless, skinless breasts cook much faster and won’t get crispy. Reduce the initial searing time to 3-4 minutes per side and they may not need any oven time at all—just cook them through in the pan. The flavor will still be great, but you’ll miss out on that incredible crispy skin texture.
My garlic burned! What did I do wrong?
This usually happens if the heat is too high when you add the garlic and butter, or if you used minced garlic instead of smashed cloves. Minced garlic has much more surface area and can burn in seconds. Always use smashed cloves and add them with the butter off direct high heat, letting them cook more gently in the residual warmth of the pan.
Can I make this ahead of time?
You can sear the chicken ahead of time and keep it refrigerated for up to a day. When you’re ready to eat, let it come to room temperature for 30 minutes, then proceed with adding the butter, herbs, and finishing it in the oven. The sauce is best made fresh and served immediately.
What can I use instead of white wine or chicken broth?
A light beer or even a non-alcoholic option like a rich vegetable broth will work in a pinch. The goal is to have a liquid to deglaze the pan and create the sauce. Avoid anything too sweet, as it can throw off the savory balance of the dish.
How do I know when the chicken is done without a thermometer?
While a thermometer is best, you can pierce the thickest part of the chicken with a knife or skewer. The juices should run completely clear, not pink or red. Also, the meat should feel firm to the touch, and the leg joint should wiggle easily if you’re using a whole leg.


Thyme And Garlic Chicken
Make the best Thyme and Garlic Chicken with crispy skin & a savory pan sauce. This easy, elegant recipe is perfect for any night. Get the recipe now!
Ingredients
For the Ingredients
-
4 bone-in, skin-on chicken thighs (or 2 chicken breasts, halved)
-
1 tbsp olive oil
-
1 tsp fine sea salt
-
1/2 tsp freshly ground black pepper
-
8 cloves garlic (lightly smashed)
-
4-5 sprigs fresh thyme (plus more for garnish)
-
3 tbsp unsalted butter (cut into pieces)
-
1/4 cup chicken broth (or dry white wine)
-
1 tbsp fresh lemon juice
Instructions
-
Preheat your oven to 400°F (200°C). While it’s heating, prepare your chicken. Pat the chicken pieces completely dry with paper towels—this is a non-negotiable step for crispiness. Season both sides generously with the salt and pepper, making sure to get the seasoning under the skin as well for maximum flavor.01
-
Place your oven-safe skillet over medium-high heat and add the olive oil. Once the oil is shimmering hot, carefully place the chicken in the pan, skin-side down. You should hear a confident sizzle. Resist the urge to move it! Let it cook undisturbed for 6-8 minutes to develop a deep golden-brown, crispy crust.02
-
Flip the chicken over so it’s skin-side up. The skin should look beautifully browned and release easily from the pan. Immediately add the butter, smashed garlic cloves, and the fresh thyme sprigs to the pan around the chicken. The butter will foam and melt—use a spoon to baste the chicken continuously with the hot, fragrant butter for about a minute. You’ll notice the aroma changing as the thyme and garlic infuse the fat.03
-
Transfer the entire skillet to the preheated oven. Roast for 15-18 minutes, or until the internal temperature of the chicken reaches 165°F (74°C) when checked with a meat thermometer inserted into the thickest part without touching the bone. The chicken will be juicy and cooked through, and your kitchen will smell incredible.04
-
Carefully remove the hot skillet from the oven—remember the handle will be extremely hot! Transfer the cooked chicken to a plate to rest. Place the skillet back on the stovetop over medium heat. Add the chicken broth (or wine) and lemon juice. Use a wooden spoon to scrape up all the delicious browned bits from the bottom of the pan. Let the sauce simmer and reduce for 2-3 minutes until it slightly thickens.05
-
To serve, spoon the rich pan sauce, along with the soft, roasted garlic cloves and thyme sprigs, over the rested chicken. The garlic will be soft and sweet—absolutely delicious spread on the chicken or a piece of crusty bread. Garnish with a final sprinkle of fresh thyme leaves for a pop of color and freshness.06
Not what you're looking for?


