There’s something magical about the scent of cinnamon-kissed apples bubbling away in the oven, don’t you think? A classic apple crisp is like a warm hug from grandma – simple, comforting, and always hits the spot. That perfect contrast of tender, spiced fruit beneath a golden, buttery crumble is what dessert dreams are made of.
I remember the first time I made apple crisp as a teenager – I burned the topping because I was too impatient to wait for the oven to preheat properly. Lesson learned! Now, after years of perfecting this recipe (and many happy taste-testers), I can confidently say this version strikes that ideal balance between nostalgic simplicity and bakery-worthy excellence.
Craving a delicious Apple Crisp? You've come to the right spot! From Dessert Recipes favorites to amazing Christmas Cookie recipes, there's something here for everyone.


Why This Recipe Works
- Texture symphony: Imagine biting through that crisp, oat-studded topping into soft, cinnamon-laced apples – it’s like autumn in dessert form.
- Flexible friend: Whether you prefer tart Granny Smiths or sweet Honeycrisps, this recipe adapts to your apple preferences beautifully.
- Weeknight warrior: With just 20 minutes of prep and pantry staples, you’re never more than an hour away from dessert bliss.
Essential Ingredients & Tools
Ingredients
- 6 cups of thinly sliced apples (I like a mix – Granny Smith for structure and Honeycrisp for natural sweetness; skins on for extra fiber)
- 1/4 cup granulated sugar (just enough to enhance without overpowering; reduce to 2 tbsp if using very sweet apples)
- 1 tbsp lemon juice (the secret weapon against blandness; prevents browning too)
- 1 tsp ground cinnamon (the warm hug your apples deserve)
- 1/4 tsp nutmeg (optional but highly recommended for depth)
- 2 tbsp all-purpose flour (our insurance against soupy filling; cornstarch works too)
- 3/4 cup old-fashioned oats (for that signature chew; quick oats can sub in a pinch)
- 3/4 cup all-purpose flour (the backbone of our crumble; gluten-free 1:1 blend works)
- 1/2 cup packed brown sugar (hello, caramel notes! Light or dark both work)
- 1/2 cup cold unsalted butter (cold is crucial – more on that later; margarine works but alters richness)
- 1/4 tsp salt (the unsung hero that makes flavors pop)
Tools
- 9×9-inch baking dish (a pie plate works too)
- Two mixing bowls (one for filling, one for topping)
- Pastry cutter or fork (to blend butter without overworking; clean hands work in a pinch)
- Knife and cutting board (no fancy corer needed – just slice around the core)
How to Make The Ultimate Apple Crisp
- Apple Prep 101
Slice those apples about 1/4-inch thick – consistent size means even cooking. Toss them with the 1/4 cup sugar, 1 tbsp lemon juice, 1 tsp cinnamon, 1/4 tsp nutmeg, and 2 tbsp flour like you’re giving them a cozy blanket. Why this matters: The flour absorbs excess juice during baking, preventing a soggy bottom. Pro tip from my kitchen disasters: if using extra juicy apples like McIntosh, let this mixture sit for 10 minutes, then drain slightly. Nobody likes a soggy crisp!
- Topping Alchemy
Here’s where the magic happens. Combine your 3/4 cup oats, 3/4 cup flour, 1/2 cup brown sugar, and 1/4 tsp salt, then work in that 1/2 cup cold butter with a pastry cutter or fork until it looks like coarse sand with pea-sized butter bits. Cold butter science: It melts slowly in the oven, creating steam pockets that lift the topping into flaky layers. For foolproof results, freeze the cubed butter for 10 minutes first.
- Assembly Artistry
Spread your apples in that trusty 9×9 baking dish (no fancy equipment needed here). Sprinkle the topping evenly but don’t pack it down too hard – we want those steam pockets to work their magic. Leave some gaps for ventilation – think of it as giving your crisp room to breathe.
- Baking Brilliance
375°F is our sweet spot. Bake until you see those glorious golden peaks and bubbling edges – about 35-40 minutes should do it. Rotate halfway for even browning. The knife test never lies – it should slide into the apples with just a little resistance.
- The Waiting Game
I know it’s tough, but let it rest for 10 minutes. This allows the filling to thicken (thanks to “carryover cooking”) and flavors to marry. It’s worth the wait – promise!
Pro Technique
- Butter Temperature Matters
Here’s a lesson I learned the hard way: warm butter makes greasy topping. Cold butter creates steam as it bakes, giving you those irresistible flaky layers. For extra insurance, freeze your cubed butter for 10 minutes before mixing.
- Sauté for Flavor Depth
Want to impress your foodie friends? Sauté those apples in a tablespoon of butter for 5 minutes first. It caramelizes the natural sugars and reduces excess moisture – game changer! Add a pinch of salt to amplify the spices.
- Nutty Indulgence
For special occasions, I love adding 1/4 cup toasted pecans to the topping. The crunch and richness take it to another level. Toast them first in a dry skillet to wake up their flavor.
Chef’s Wisdom
Choosing your apples is like casting actors for a play – you need the right balance. Tart Granny Smiths hold their shape, while sweeter Fujis break down into luscious sauce. My perfect cast? A mix of both! And don’t peel them unless you must – the skins add fiber and rustic charm.
Storage & Freshness Guide
Leftovers (if you have any!) keep covered at room temp for a day, or refrigerated for 3 days. To revive that crisp topping, a quick 10 minutes in a 350°F oven works wonders. For freezer meals, assemble unbaked and freeze for up to 2 months – just add 15-20 minutes to the baking time when you’re ready.
Perfect Pairings
Complementary Dishes
- Vanilla Bean Ice Cream: The cold creaminess contrasts the warm crisp, while vanilla echoes the spices. For a textural twist, sprinkle with toasted oats.
- Sharp Cheddar Cheese: A traditional pairing—the cheese’s saltiness balances the sweetness. Serve thinly sliced on the side or melted over a warm portion.
Drinks
- Late-Harvest Riesling: This honeyed wine mirrors the crisp’s caramel notes. Its acidity cuts through the richness.
- Spiced Chai Tea: The warming spices in chai (cinnamon, cardamom) harmonize with the filling. Serve hot or iced.
Something Sweet
- Salted Caramel Drizzle: A decadent finish—the salt enhances the apples’ sweetness. Warm the sauce slightly for easy pouring.
- Whipped Crème Fraîche: Its tangy richness lightens the dessert. Fold in a touch of cinnamon for cohesion.


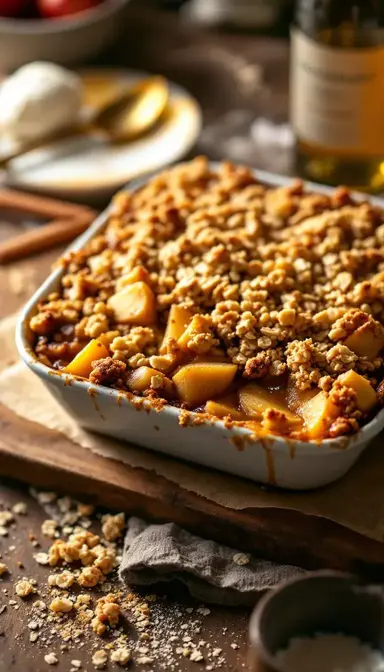
The Ultimate Apple Crisp: A Slice of Comfort in Every Bite
Craving the perfect Apple Crisp? My easy recipe delivers tender spiced apples and a golden, crunchy topping. Get the ultimate comfort dessert recipe now!
Ingredients
For the Filling
-
6 cups thinly sliced apples (about 4-5 medium)
-
1/4 cup granulated sugar
-
1 tbsp lemon juice
-
1 tsp ground cinnamon
-
1/4 tsp nutmeg
-
2 tbsp all-purpose flour
For the Topping
-
3/4 cup old-fashioned oats
-
3/4 cup all-purpose flour
-
1/2 cup packed brown sugar
-
1/2 cup cold unsalted butter (cubed)
-
1/4 tsp salt
Instructions
-
Preheat oven to 375°F (190°C).01
-
In a large bowl, toss apples with 1/4 cup sugar, 1 tbsp lemon juice, 1 tsp cinnamon, 1/4 tsp nutmeg, and 2 tbsp flour until evenly coated.02
-
In another bowl, combine 3/4 cup oats, 3/4 cup flour, 1/2 cup brown sugar, and 1/4 tsp salt. Cut in 1/2 cup cold butter until mixture resembles coarse crumbs.03
-
Spread apple mixture in a 9x9-inch baking dish. Sprinkle topping evenly over apples.04
-
Bake for 35-40 minutes until topping is golden and filling bubbles at edges.05
-
Let cool for 10 minutes before serving.06
Not what you're looking for?