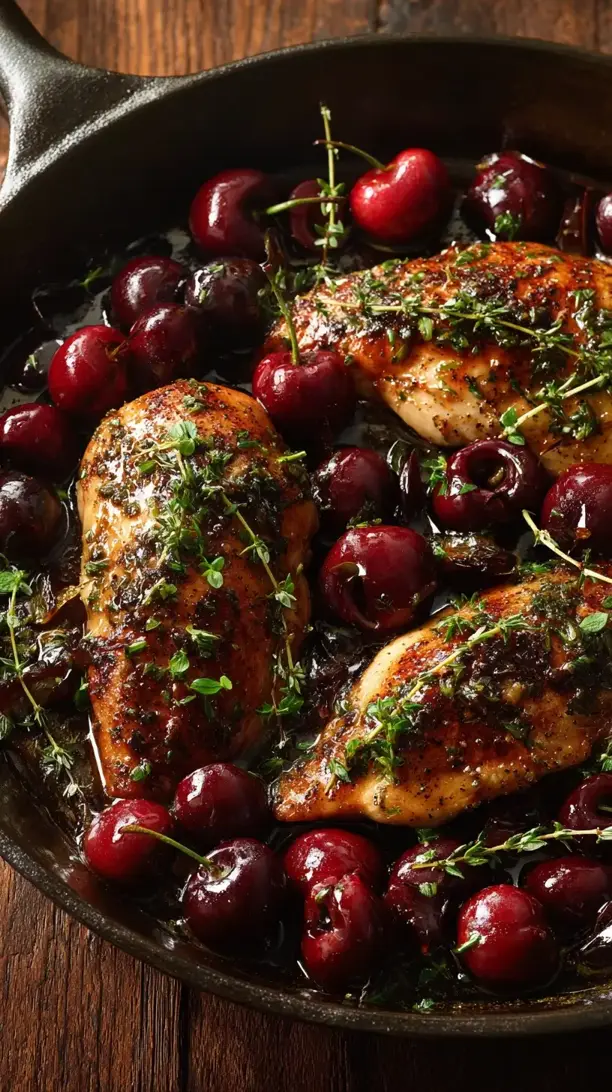
This Cherry Chicken recipe delivers tender chicken in a glossy, sweet-savory cherry sauce. It’s elegant enough for company but simple enough for a weeknight. The cherry sauce, bright with balsamic and herbs, makes this dish unforgettable.
If you're looking for the perfect Cherry Chicken, you're in the right place. Whether you love Chicken Breast Recipes or want to explore our Chicken Recipes collection, we've got you covered.


Why You’ll Love This Cherry Chicken
- Sweet-savory balance: Cherries and herbs create a perfectly harmonious sauce.
- Irresistible glossy sauce: Simmered until rich and clingy.
- Elegant yet simple: No fancy techniques or hard-to-find ingredients.
- Wonderfully versatile: Works with fresh or frozen cherries and many sides.
Ingredients & Tools
- 4 boneless, skinless chicken breasts (or 6 thighs)
- 1 tbsp olive oil
- 1 small yellow onion, finely chopped
- 2 cloves garlic, minced
- 1 ½ cups fresh or frozen pitted cherries
- ½ cup chicken broth
- 2 tbsp balsamic vinegar
- 1 tbsp honey
- 1 tsp fresh thyme leaves (or ½ tsp dried)
- 1 tsp fresh rosemary, chopped (or ½ tsp dried)
- 2 tbsp cold butter, cubed
- Salt and black pepper to taste
Tools: A large, oven-safe skillet is ideal, along with a sharp knife, cutting board, and measuring spoons/cups.
Notes: Using good-quality chicken broth and fresh herbs makes a difference. Don’t skip the cold butter at the end for a glossy finish.
Nutrition (per serving)
| Calories: | 320 kcal |
| Protein: | 35 g |
| Fat: | 12 g |
| Carbs: | 18 g |
| Fiber: | 2 g |
Serves: 4 | Prep Time: 15 minutes | Cook Time: 25 minutes | Total Time: 40 minutes
Before You Start: Tips & Ingredient Notes
- What’s the best type of cherry to use? I prefer sweet dark cherries like Bing for their deep color and flavor, but sour cherries work beautifully too — you might just want to add an extra teaspoon of honey to balance the tartness.
- Can I use frozen cherries? Absolutely! There’s no need to thaw them first; just add a couple of extra minutes to the simmering time. Frozen cherries are a fantastic year-round option.
- Why use an oven-safe skillet? If you start this dish on the stovetop and finish it in the oven, the chicken cooks more evenly and stays incredibly juicy. If you don’t have one, just keep it on a low simmer on the stove.
- What if my sauce is too thin? Let it simmer uncovered for a few more minutes to reduce, or you can mix a teaspoon of cornstarch with a tablespoon of cold water and stir it in to thicken it up quickly.
How to Make Cherry Chicken
Step 1: Start by prepping your ingredients. Pat the chicken breasts completely dry with paper towels — this is key for getting a nice sear. Season both sides generously with salt and pepper. Finely chop the onion, mince the garlic, and if you’re using fresh herbs, give them a rough chop. Measure out your cherries, broth, and other sauce ingredients so everything is ready to go.
Step 2: Heat the olive oil in your large, oven-safe skillet over medium-high heat. Once the oil is shimmering, carefully add the chicken. You should hear a satisfying sizzle. Sear for about 4-5 minutes per side, until you have a beautiful golden-brown crust. The chicken won’t be cooked through yet — that’s perfect. Remove it from the skillet and set it aside on a plate.
Step 3: Reduce the heat to medium and add the chopped onion to the same skillet. You’ll notice all those browned bits from the chicken at the bottom — that’s pure flavor! Sauté the onion for about 4-5 minutes, until it becomes soft and translucent. Then, add the minced garlic and cook for just another minute until it becomes fragrant. Be careful not to burn the garlic.
Step 4: Now, pour in the chicken broth and balsamic vinegar. Use a wooden spoon to scrape up all those delicious browned bits from the bottom of the pan. This process, called deglazing, is what builds the foundation of your incredible sauce. Add the cherries, honey, thyme, and rosemary, and give everything a good stir.
Step 5: Bring the sauce to a gentle simmer, then nestle the seared chicken breasts back into the skillet, along with any juices that accumulated on the plate. If you’re using an oven-safe skillet, transfer the whole thing to a preheated 375°F (190°C) oven. If not, just cover the skillet and let it simmer gently on the stovetop. Cook for 15-18 minutes, or until the chicken is cooked through and reaches an internal temperature of 165°F (74°C).
Step 6: Carefully remove the skillet from the oven (remember the handle will be hot!). Transfer the cooked chicken to a clean serving platter. Place the skillet back on the stovetop over low heat. The sauce might look a bit thin, but here comes the magic trick: whisk in the cold, cubed butter, one piece at a time, until the sauce becomes glossy and slightly thickened. This final step, called mounting with butter, gives the sauce a beautiful sheen and a velvety texture.
Step 7: Taste the sauce and adjust the seasoning, adding more salt or pepper if needed. Pour the luscious cherry sauce over the waiting chicken, making sure to scoop up plenty of those soft, jammy cherries. Garnish with an extra sprinkle of fresh herbs, and it’s ready to serve immediately.
Storage & Freshness Guide
- Fridge: Store in an airtight container for up to 3 days.
- Freezer: Freeze chicken and sauce for up to 2 months in a sealed container.
- Reviving: Reheat gently in a skillet with a splash of broth to refresh the sauce.
Serving Suggestions
Complementary Dishes
- Creamy Parmesan Polenta — The soft, cheesy polenta is a dreamy base that soaks up the cherry sauce beautifully.
- Garlic Mashed Potatoes — You can’t go wrong with classic mashed potatoes; they provide a comforting, buttery contrast to the vibrant sauce.
- Simple Buttered Egg Noodles — For a quick and easy side, these noodles are neutral enough to let the cherry chicken truly shine.
- Sautéed Green Beans with Almonds — The crisp-tender beans and nutty crunch add a lovely textural element to the plate.
Drinks
- A Light-Bodied Pinot Noir — The red fruit notes in the wine mirror the cherry flavors in the dish, creating a perfect pairing.
- Sparkling Water with a Lemon Twist — The bubbles and citrus help cleanse the palate between bites of the rich sauce.
- Iced Hibiscus Tea — Its tart and floral notes are a surprisingly refreshing match for the sweet and savory profile of the chicken.
Something Sweet
- Lemon Sorbet — Its bright, clean citrus flavor is the perfect palate-cleanser after a rich meal.
- Dark Chocolate Truffles — A few bites of intense, dark chocolate provide a sophisticated and satisfying end to the dinner.
- Almond Biscotti — The nutty, crunchy cookies are lovely for dipping into a final cup of coffee or tea.
Top Mistakes to Avoid
- Mistake: Not patting the chicken dry before searing. Any surface moisture will steam the chicken instead of searing it, and you’ll miss out on that gorgeous, flavorful crust.
- Mistake> Overcooking the garlic. Garlic burns easily and becomes bitter. Add it after the onions have softened and cook it for just a minute until fragrant.
- Mistake: Skipping the deglazing step. Those browned bits stuck to the pan are packed with flavor. Not scraping them up means you’re leaving the best part behind!
- Mistake: Adding the butter when the sauce is boiling. If the sauce is too hot, the butter will separate and make the sauce greasy instead of glossy. Always take the pan off the heat or reduce it to low first.
Expert Tips
- Tip: Use a meat mallet for even cooking. Before seasoning, place the chicken breasts between two pieces of plastic wrap and gently pound them to an even ½-inch thickness. This ensures they cook through at the same rate.
- Tip: Add a splash of red wine. When you deglaze the pan, try adding a quarter cup of dry red wine along with the broth. Let it reduce by half before adding the other liquids — it adds a wonderful depth.
- Tip: Infuse the sauce with whole herbs. If you have fresh thyme or rosemary sprigs, toss them in whole while the sauce simmers and fish them out before serving for a more subtle, infused herb flavor.
- Tip: Let the chicken rest. After you take it out of the oven, let the chicken sit for 5 minutes before slicing. This allows the juices to redistribute throughout the meat, keeping it incredibly moist.
FAQs
Can I make this Cherry Chicken ahead of time?
Absolutely! You can sear the chicken and prepare the sauce base a day in advance. Store them separately in the fridge. When you’re ready to eat, gently reheat the sauce, add the chicken, and finish cooking in the oven. The flavors often meld and become even better overnight. Just be aware that the color of the sauce might darken slightly, but the taste will be fantastic.
What can I use instead of balsamic vinegar?
If you don’t have balsamic, red wine vinegar is a great substitute. It will provide a similar tangy acidity, though the flavor profile will be a little brighter and less sweet. You could also use a tablespoon of fresh lemon juice for acidity, though you might want to add an extra half-tablespoon of honey to balance it out.
My sauce turned out too tart. How can I fix it?
No worries, this is an easy fix! The simplest solution is to stir in an extra half-tablespoon of honey or a pinch of brown sugar until the sweetness balances the tartness to your liking. Taste as you go — a little sweetener can go a long way.
Can I use chicken thighs instead of breasts?
Yes, chicken thighs work wonderfully in this recipe. They are more forgiving and stay incredibly juicy. Just increase the initial searing time by a minute or two per side, as they often have a bit more fat to render. The total cooking time in the sauce will be roughly the same.
How should I store and reheat leftovers?
Store any leftovers in an airtight container in the refrigerator for up to 3 days. To reheat, place the chicken and sauce in a covered skillet over low heat with a tiny splash of water or broth to loosen the sauce. Gently warm it through, stirring occasionally. Avoid the microwave if you can, as it can make the chicken rubbery.


Cherry Chicken
Make this easy Cherry Chicken with a sweet-savory cherry sauce. Perfect for a quick weeknight meal or elegant dinner. Get the simple recipe now!
Ingredients
For the Ingredients
-
4 boneless, skinless chicken breasts (or 6 thighs)
-
1 tbsp olive oil
-
1 small yellow onion (finely chopped)
-
2 cloves garlic (minced)
-
1.5 cups fresh or frozen pitted cherries
-
0.5 cup chicken broth
-
2 tbsp balsamic vinegar
-
1 tbsp honey
-
1 tsp fresh thyme leaves (or ½ tsp dried)
-
1 tsp fresh rosemary (chopped (or ½ tsp dried))
-
2 tbsp cold butter (cubed)
-
Salt and black pepper (to taste)
Instructions
-
Start by prepping your ingredients. Pat the chicken breasts completely dry with paper towels — this is key for getting a nice sear. Season both sides generously with salt and pepper. Finely chop the onion, mince the garlic, and if you’re using fresh herbs, give them a rough chop. Measure out your cherries, broth, and other sauce ingredients so everything is ready to go.01
-
Heat the olive oil in your large, oven-safe skillet over medium-high heat. Once the oil is shimmering, carefully add the chicken. You should hear a satisfying sizzle. Sear for about 4-5 minutes per side, until you have a beautiful golden-brown crust. The chicken won’t be cooked through yet — that’s perfect. Remove it from the skillet and set it aside on a plate.02
-
Reduce the heat to medium and add the chopped onion to the same skillet. You’ll notice all those browned bits from the chicken at the bottom — that’s pure flavor! Sauté the onion for about 4-5 minutes, until it becomes soft and translucent. Then, add the minced garlic and cook for just another minute until it becomes fragrant. Be careful not to burn the garlic.03
-
Now, pour in the chicken broth and balsamic vinegar. Use a wooden spoon to scrape up all those delicious browned bits from the bottom of the pan. This process, called deglazing, is what builds the foundation of your incredible sauce. Add the cherries, honey, thyme, and rosemary, and give everything a good stir.04
-
Bring the sauce to a gentle simmer, then nestle the seared chicken breasts back into the skillet, along with any juices that accumulated on the plate. If you’re using an oven-safe skillet, transfer the whole thing to a preheated 375°F (190°C) oven. If not, just cover the skillet and let it simmer gently on the stovetop. Cook for 15-18 minutes, or until the chicken is cooked through and reaches an internal temperature of 165°F (74°C).05
-
Carefully remove the skillet from the oven (remember the handle will be hot!). Transfer the cooked chicken to a clean serving platter. Place the skillet back on the stovetop over low heat. The sauce might look a bit thin, but here comes the magic trick: whisk in the cold, cubed butter, one piece at a time, until the sauce becomes glossy and slightly thickened. This final step, called mounting with butter, gives the sauce a beautiful sheen and a velvety texture.06
-
Taste the sauce and adjust the seasoning, adding more salt or pepper if needed. Pour the luscious cherry sauce over the waiting chicken, making sure to scoop up plenty of those soft, jammy cherries. Garnish with an extra sprinkle of fresh herbs, and it’s ready to serve immediately.07
Not what you're looking for?


