There’s something truly magical about chocolate and mint together, especially during the holidays. I like to think of these Chocolate Mint Cookies as little bites of pure bliss—a rich, fudgy chocolate base with a cool, refreshing mint kick that makes them utterly irresistible. If you love having a stash of homemade comfort food ready to share, you’ll appreciate how this easy cookie recipe comes together in just one bowl, making it a fantastic choice for your holiday baking. They’re the kind of simple yet impressive holiday treats that fill your kitchen with the best kind of anticipation.
Whenever I’m brainstorming christmas baking ideas, I want something that feels special. This recipe is my go-to for unique christmas cookies that always stand out on a dessert platter. They offer a delightful twist on the classic, making them a memorable addition to your collection of christmas sweets. Whether you’re planning a festive gathering or just craving something cozy, these cookies are a wonderful answer to your christmas dessert ideas.
So, if you’re looking for easy christmas treats to gift or simply enjoy with a cup of cocoa, keep this recipe in mind. It’s a foolproof way to bring a touch of minty freshness to your christmas baking, ensuring your holiday baking is as delicious as it is joyful.
If you're looking for the perfect Chocolate Mint Cookies, you're in the right place. Whether you love Christmas Cookie or want to explore our Chicken Thigh Recipes collection, we've got you covered.


Why You’ll Love This Chocolate Mint Cookies
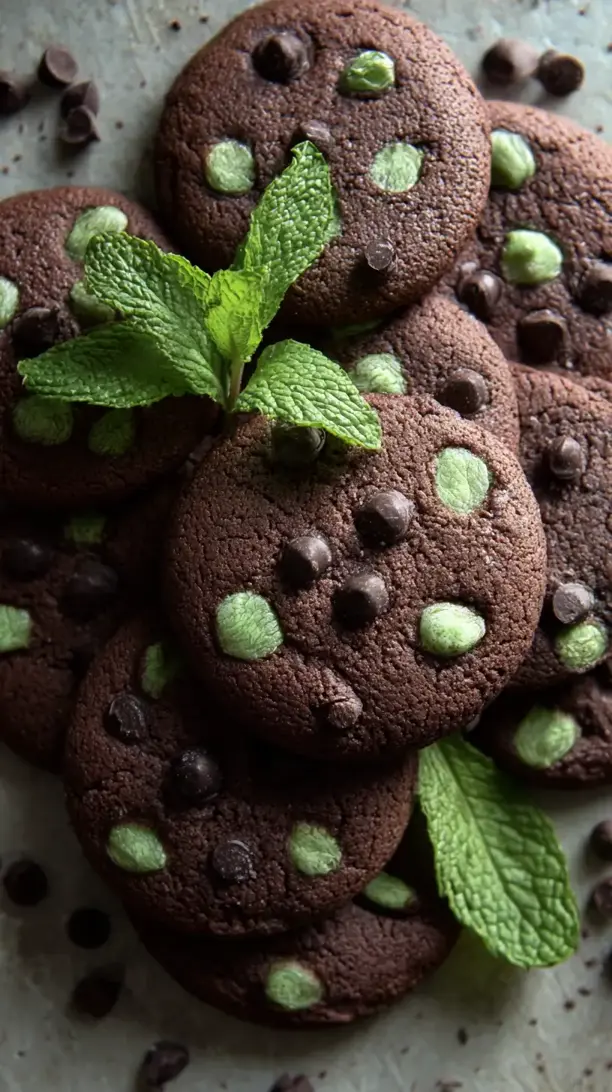
- Perfect Texture: Crisp outside with a fudgy, chewy center.
- Bold Flavor: Refreshing mint cuts through the intense chocolate base.
- Simple Process: One-bowl dough with minimal fuss.
- Heavenly Aroma: Your kitchen will smell incredible as they bake.
Ingredients & Tools
- 115 g unsalted butter, softened
- 150 g granulated sugar
- 100 g light brown sugar, packed
- 1 large egg, at room temperature
- 1 tsp pure vanilla extract
- 125 g all-purpose flour
- 60 g unsweetened cocoa powder (natural, not Dutch-process)
- 1/2 tsp baking soda
- 1/4 tsp fine sea salt
- 180 g mint chocolate chips (or chopped mint chocolate bars)
Tools: A stand mixer or electric hand mixer, baking sheets, parchment paper, and a cooling rack.
Notes: Using room temperature ingredients is key for a smooth dough. Don’t skimp on cocoa quality—it drives the flavor.
Nutrition (per serving)
| Calories: | 185 kcal |
| Protein: | 2 g |
| Fat: | 9 g |
| Carbs: | 26 g |
| Fiber: | 1 g |
Serves: 18 | Prep Time: 15 minutes | Cook Time: 10 minutes | Total Time: 1 hour 25 minutes (includes chilling)
Before You Start: Tips & Ingredient Notes
- Your butter needs to be just right. Softened butter should be cool to the touch but leave a slight indent when you press it. If it’s melty and greasy, your cookies will spread too much. If it’s too cold, your dough won’t cream properly.
- Don’t use Dutch-process cocoa. This recipe relies on the acidity of natural cocoa powder to react with the baking soda. Using Dutch-process (which is neutralized) will result in a flatter, denser cookie that lacks that classic rise.
- The chill time is non-negotiable. I know it’s tempting to skip it, but chilling the dough is what prevents your cookies from turning into flat, greasy puddles. It allows the flour to hydrate and the fats to firm up, giving you that perfect thick, chewy texture.
- Weigh your flour for best results. Scooping with a measuring cup can pack in too much flour, leading to dry, cakey cookies. If you must use cups, fluff your flour first, then spoon it lightly into the cup and level it off.
How to Make Chocolate Mint Cookies
Step 1: Cream the Butter and Sugars. In the bowl of your stand mixer fitted with the paddle attachment, beat the softened butter, granulated sugar, and brown sugar together on medium speed for about 2-3 minutes. You’re looking for the mixture to become light, pale, and fluffy. This step is crucial—it incorporates air into the dough, which helps with the cookie’s texture. Scrape down the sides of the bowl with a spatula to ensure everything is well combined.
Step 2: Add the Wet Ingredients. Beat in the egg and vanilla extract until the mixture is completely smooth and emulsified. It should look creamy and uniform, with no streaks of egg visible. Again, scrape down the sides of the bowl. You’ll notice the mixture might look a little grainy still—that’s perfectly normal because of the sugar.
Step 3: Combine the Dry Ingredients. In a separate, medium-sized bowl, whisk together the flour, cocoa powder, baking soda, and salt. Whisking them first ensures the leavening and salt are evenly distributed throughout the flour, so you don’t get any bitter pockets in your finished cookies.
Step 4: Bring the Dough Together. With the mixer on low speed, gradually add the dry ingredients to the wet ingredients. Mix just until the flour streaks disappear and a thick, dark dough forms. Be careful not to overmix at this stage, as it can develop the gluten and make the cookies tough.
Step 5: Fold in the Mint Chocolate. Switch to a sturdy spatula and gently fold in the mint chocolate chips or chunks. Make sure they’re evenly distributed throughout the dark, fudgy dough. The contrast is just beautiful.
Step 6: Chill the Dough. This is the secret step! Cover the bowl with plastic wrap and refrigerate the dough for at least 1 hour, or up to 24 hours. The dough will firm up significantly, and you’ll notice it’s much easier to handle. This resting period deepens the chocolate flavor and guarantees that perfect, thick cookie.
Step 7: Portion and Bake. Preheat your oven to 175°C (350°F) and line baking sheets with parchment paper. Using a cookie scoop or a tablespoon, portion the dough into 18 equal-sized balls (about 1.5 tablespoons each). Place them about 2 inches apart on the baking sheets, as they will spread a little. You can roll them gently in your hands to smooth them out.
Step 8: Bake to Perfection. Bake for 9-11 minutes. The trick is to pull them out when the edges look set but the centers still appear soft, puffy, and slightly underdone. They will continue to cook on the hot baking sheet out of the oven. For that classic crinkled top, you can gently bang the hot pan on the counter once as soon as they come out of the oven.
Step 9: Cool and Enjoy. Let the cookies cool on the baking sheet for at least 5 minutes before transferring them to a wire rack to cool completely. This allows them to set up properly. But let’s be honest—eating one warm, when the chocolate chips are still gooey, is a truly transcendent experience.
Storage & Freshness Guide
- Fridge: Not recommended; store at room temp or freeze.
- Freezer: Freeze dough balls or baked cookies up to 3 months.
- Reviving: Warm in oven at 300°F for 3–5 minutes to refresh.
Serving Suggestions
Complementary Dishes
- A scoop of vanilla bean ice cream — The warm cookie melts the ice cream slightly, creating a fantastic hot-and-cold, creamy-and-chewy dessert that’s pure bliss.
- Fresh berries like raspberries or strawberries — Their bright, tart acidity cuts through the richness of the chocolate and provides a lovely, refreshing contrast on the palate.
- A small cup of strong, black coffee — The bitterness of the coffee enhances the deep chocolate notes and cleanses your palate, making each bite of cookie taste new and exciting.
Drinks
- A tall glass of cold milk — It’s a classic for a reason. The creaminess of the milk is the perfect partner to the rich, fudgy cookie and cools the minty sensation beautifully.
- Peppermint hot chocolate — Double down on the cozy mint-chocolate vibe for the ultimate winter treat. It’s like wrapping yourself in a warm, edible blanket.
- A rich, malty stout beer — The roasted, coffee-like flavors in the beer complement the dark cocoa incredibly well, creating a surprisingly sophisticated pairing for a cookie.
Something Sweet
- A simple citrus sorbet — A scoop of lemon or orange sorbet is incredibly refreshing after the decadent chocolate mint, acting as a perfect palate cleanser.
- Chewy caramel squares — The buttery, salty-sweet flavor of caramel adds another layer of complexity and texture that plays wonderfully with the mint and chocolate.
- A light, fruit-based mousse — A mango or passionfruit mousse provides a bright, airy finish that doesn’t feel too heavy after the dense, satisfying cookies.
Top Mistakes to Avoid
- Mistake: Using melted butter. This is the number one reason cookies spread too much. Melted butter causes the dough to be too liquid before it hits the oven, resulting in a flat, greasy cookie instead of a thick, chewy one.
- Mistake: Over-baking the cookies. They might not look “done” when you take them out, but they are! They continue to set as they cool. Over-baking them will give you a dry, crumbly texture instead of that dreamy, fudgy center.
- Mistake: Skipping the dough chilling. I’ve messed this up before too, thinking I could save time. Warm dough spreads rapidly in the oven. Chilling is what gives you control over the final shape and texture.
- Mistake: Using hot baking sheets. Always allow your baking sheets to cool completely between batches. Placing dough on a hot pan will cause it to start melting and spreading before it even enters the oven.
Expert Tips
- Tip: Make your own mint chocolate chunks. If you can’t find mint chips, simply chop up a high-quality mint chocolate bar. The irregular chunks will create wonderful pools of melted chocolate throughout the cookie.
- Tip: Add a pinch of espresso powder. You won’t taste coffee, but a half teaspoon of instant espresso powder blended with the dry ingredients will deepen and intensify the chocolate flavor, making it taste even more rich and complex.
- Tip: For extra chewy cookies, use more brown sugar. Brown sugar contains more moisture than white sugar due to the molasses. If you love a super chewy cookie, you can try a ratio of 200g brown sugar to 50g white sugar.
- Tip: Freeze the dough balls for later. After portioning, freeze the dough balls on a tray, then transfer to a zip-top bag. You can bake them straight from the freezer, adding just a minute or two to the baking time for fresh cookies anytime.
FAQs
Can I make these cookies without a mixer?
Absolutely! You can make them by hand with a sturdy wooden spoon and a bit of elbow grease. The key is to really work the butter and sugars together until they are well combined and look slightly fluffy. It might take a few minutes of vigorous stirring, but it’s totally doable. Just make sure your butter is properly softened to make the job easier.
My cookies came out flat. What happened?
This is almost always due to butter that was too warm or dough that wasn’t chilled. If your butter was melty or your kitchen is very hot, the fat will liquefy too quickly in the oven. Next time, ensure your butter is just softened (not melted) and don’t skip the chilling step. Also, check that your baking soda is fresh, as old leavening can lose its potency.
Can I use a different type of chocolate chip?
Of course! While the mint is what makes them special, you can easily swap in semi-sweet, dark, or even white chocolate chips. The base chocolate cookie dough is incredibly versatile. If you’re using a non-mint chip, you could even add 1/4 teaspoon of peppermint extract to the wet ingredients to keep that signature flavor profile.
How should I store these cookies, and how long do they last?
Store them in an airtight container at room temperature for up to 5 days. To keep them soft, you can add a piece of bread to the container—the cookies will absorb moisture from the bread. They also freeze beautifully for up to 3 months. Just thaw at room temperature or warm them gently in the oven.
Can I make the dough ahead of time?
Yes, and I often do! The dough actually benefits from a longer rest. You can keep it covered in the refrigerator for up to 72 hours. The flavor deepens and the texture becomes even better. Just let it sit at room temperature for 10-15 minutes before portioning if it’s too hard to scoop.


Chocolate Mint Cookies: An Easy Holiday Baking Recipe
Whip up these Chocolate Mint Cookies, an easy cookie recipe perfect for your holiday baking. These fudgy, minty bites are a festive and comforting treat everyone will love.
Ingredients
For the Ingredients & Tools
-
115 g unsalted butter (softened)
-
150 g granulated sugar
-
100 g light brown sugar (packed)
-
1 large egg (at room temperature)
-
1 tsp pure vanilla extract
-
125 g all-purpose flour
-
60 g unsweetened cocoa powder (natural, not Dutch-process)
-
0.5 tsp baking soda
-
0.25 tsp fine sea salt
-
180 g mint chocolate chips (or chopped mint chocolate bars)
Instructions
-
In the bowl of your stand mixer fitted with the paddle attachment, beat the softened butter, granulated sugar, and brown sugar together on medium speed for about 2-3 minutes. You’re looking for the mixture to become light, pale, and fluffy. This step is crucial—it incorporates air into the dough, which helps with the cookie’s texture. Scrape down the sides of the bowl with a spatula to ensure everything is well combined.01
-
Beat in the egg and vanilla extract until the mixture is completely smooth and emulsified. It should look creamy and uniform, with no streaks of egg visible. Again, scrape down the sides of the bowl. You’ll notice the mixture might look a little grainy still—that’s perfectly normal because of the sugar.02
-
In a separate, medium-sized bowl, whisk together the flour, cocoa powder, baking soda, and salt. Whisking them first ensures the leavening and salt are evenly distributed throughout the flour, so you don’t get any bitter pockets in your finished cookies.03
-
With the mixer on low speed, gradually add the dry ingredients to the wet ingredients. Mix just until the flour streaks disappear and a thick, dark dough forms. Be careful not to overmix at this stage, as it can develop the gluten and make the cookies tough.04
-
Switch to a sturdy spatula and gently fold in the mint chocolate chips or chunks. Make sure they’re evenly distributed throughout the dark, fudgy dough. The contrast is just beautiful.05
-
Cover the bowl with plastic wrap and refrigerate the dough for at least 1 hour, or up to 24 hours. The dough will firm up significantly, and you’ll notice it’s much easier to handle. This resting period deepens the chocolate flavor and guarantees that perfect, thick cookie.06
-
Preheat your oven to 175°C (350°F) and line baking sheets with parchment paper. Using a cookie scoop or a tablespoon, portion the dough into 18 equal-sized balls (about 1.5 tablespoons each). Place them about 2 inches apart on the baking sheets, as they will spread a little. You can roll them gently in your hands to smooth them out.07
-
Bake for 9-11 minutes. The trick is to pull them out when the edges look set but the centers still appear soft, puffy, and slightly underdone. They will continue to cook on the hot baking sheet out of the oven. For that classic crinkled top, you can gently bang the hot pan on the counter once as soon as they come out of the oven.08
-
Let the cookies cool on the baking sheet for at least 5 minutes before transferring them to a wire rack to cool completely. This allows them to set up properly. But let’s be honest—eating one warm, when the chocolate chips are still gooey, is a truly transcendent experience.09
Not what you're looking for?


