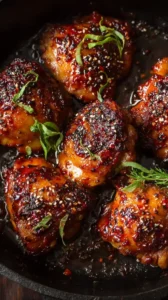
These Garlic Soy Chicken Thighs deliver crispy skin and juicy meat in a sticky, savory glaze. With just a handful of pantry staples, this one-pan wonder is a weeknight hero that feels fancy. The aroma alone is worth it.
If you're looking for the perfect Garlic Soy Chicken Thighs, you're in the right place. Whether you love Chicken Thigh Recipes or want to explore our Christmas Cookie collection, we've got you covered.


Why You’ll Love This Garlic Soy Chicken Thighs
- Deep flavor: Savory soy, sweet honey, and pungent garlic create a perfect balance.
- Perfect texture: Skin-on, bone-in thighs guarantee juicy meat and crackling-crisp skin.
- Simple process: A handful of pantry staples and one skillet yield restaurant-quality results.
- Endlessly versatile: Fantastic over rice, noodles, or with roasted veggies.
Ingredients & Tools
- 6 bone-in, skin-on chicken thighs
- 1 tbsp neutral oil (like avocado or canola)
- 8-10 garlic cloves, thinly sliced
- 1/3 cup soy sauce (or tamari for gluten-free)
- 3 tbsp honey or maple syrup
- 2 tbsp rice vinegar
- 1 tsp sesame oil
- 1/2 cup chicken broth or water
- 2 scallions, thinly sliced, for garnish
- 1 tsp sesame seeds, for garnish
Tools: A large, heavy-bottomed oven-safe skillet (cast iron is perfect), tongs, and a small bowl for the sauce.
Notes: Don’t use boneless, skinless thighs—the bone keeps the meat moist and the skin is essential for crispiness. Fresh garlic gives the best flavor.
Nutrition (per serving)
| Calories: | 420 kcal |
| Protein: | 28 g |
| Fat: | 25 g |
| Carbs: | 18 g |
| Fiber: | 0.5 g |
Serves: 3-4 | Prep Time: 10 minutes | Cook Time: 30 minutes | Total Time: 40 minutes
Storage & Freshness Guide
- Fridge: Store in an airtight container for up to 3 days.
- Freezer: Freeze chicken and sauce separately for up to 2 months.
- Reviving: Reheat gently in a skillet with a splash of broth to restore sauciness.
Serving Suggestions
Complementary Dishes
- Steamed Jasmine Rice — The ultimate sauce vehicle. The fluffy, slightly sticky grains soak up the glorious garlic soy glaze, making sure you get every last drop.
- Simple Sautéed Greens — Bok choy or spinach quickly wilted with a little garlic makes a perfect, vibrant side that cuts through the richness of the chicken.
- Quick-Pickled Cucumbers — Their bright, acidic crunch provides a refreshing contrast to the savory, sticky chicken and cleanses the palate beautifully between bites.
Drinks
- A Crisp Lager or Pilsner — The clean, effervescent bubbles and mild bitterness of a light beer help to cut through the savory, umami-rich sauce perfectly.
- An Off-Dry Riesling — A wine with a touch of sweetness and high acidity balances the saltiness of the soy and complements the sweet notes from the honey.
- Iced Green Tea with Lemon — A non-alcoholic option that’s light and refreshing, with a subtle bitterness that stands up well to the robust flavors of the dish.
Something Sweet
- Mango Sticky Rice — The sweet, creamy coconut and fresh mango continue the Asian flavor profile and provide a wonderfully satisfying, tropical end to the meal.
- Ginger-Lemon Sorbet — This is a palate-cleansing dream. The zingy, sharp flavors of ginger and lemon are incredibly refreshing after the rich, savory chicken.
- Fortune Cookies — A fun, thematic, and light way to finish the meal that doesn’t leave you feeling overly full but still satisfies that need for a little sweetness.
Before You Start: Tips & Ingredient Notes
- Pat your chicken completely dry. This is the single most important step for getting that skin crispy. Any moisture on the surface will steam the skin instead of letting it fry to a perfect golden brown. Use paper towels and really press down.
- Don’t skimp on the garlic. It might seem like a lot, but the garlic mellows and sweetens as it cooks in the chicken fat and sauce. Thinly slicing it, rather than mincing, prevents it from burning and gives you lovely little caramelized slivers.
- Use an oven-safe skillet. Starting on the stovetop and finishing in the oven is the secret to cooking the thighs through without burning the skin. If you don’t have one, you can cover the skillet with foil, but a cast-iron pan is ideal for even heat distribution.
- Let your sauce ingredients come together. Whisk the soy, honey, and vinegar together in a separate bowl before adding it to the pan. This ensures everything is perfectly combined and prevents the honey from sticking to one spot in the hot pan.
How to Make Garlic Soy Chicken Thighs
Step 1: Preheat your oven to 400°F (200°C). Take your chicken thighs and pat them aggressively dry with paper towels. Season both sides generously with salt and pepper. This initial seasoning is crucial as it penetrates the meat and seasons the skin.
Step 2: Heat the neutral oil in your large, oven-safe skillet over medium-high heat. Once the oil is shimmering, place the chicken thighs in the pan, skin-side down. You should hear an immediate sizzle—that’s what you want! Resist the urge to move them; let them cook undisturbed for 6-8 minutes to render the fat and develop a deep golden-brown, crispy crust.
Step 3: Carefully flip the chicken thighs using tongs. You’ll notice the skin has shrunk and tightened, and it should release from the pan easily if it’s properly crisped. Cook for another 3-4 minutes on the flesh side just to give it some color, then transfer the chicken to a clean plate. It will not be cooked through yet, and that’s perfectly fine.
Step 4: Reduce the heat to medium. Drain off all but about one tablespoon of the rendered chicken fat from the skillet. Add your thinly sliced garlic to the pan. It will sizzle furiously. Cook for just 45-60 seconds, stirring constantly, until it’s fragrant and just starting to turn a light golden color. You have to watch it like a hawk—garlic can go from golden to burnt in seconds.
Step 5: Quickly pour in your pre-mixed sauce of soy, honey, and rice vinegar, followed by the chicken broth. Be careful, as it will bubble and steam dramatically. Use a wooden spoon to scrape up all the delicious browned bits from the bottom of the pan—that’s pure flavor right there.
Step 6: Let the sauce simmer for about 2 minutes to reduce slightly. It should coat the back of a spoon. Now, return the chicken thighs to the pan, skin-side up, nestling them into the sauce. The sauce should come about halfway up the sides of the chicken.
Step 7: Carefully transfer the entire skillet to your preheated oven. Bake for 15-18 minutes, or until the chicken is cooked through (an internal thermometer should read 165°F / 74°C at the thickest part, not touching the bone). The sauce will have thickened further and become beautifully glossy.
Step 8: Remove the skillet from the oven—remember, the handle is extremely hot! Stir in the teaspoon of sesame oil for a final aromatic punch. Let the chicken rest in the pan for 5 minutes; this allows the juices to redistribute, ensuring every bite is moist.
Step 9: To serve, spoon plenty of the pan sauce over each thigh. Garnish generously with the sliced scallions and a sprinkle of sesame seeds for a fresh, colorful finish and a little textural crunch.
Top Mistakes to Avoid
- Mistake: Moving the chicken too soon. When you first place the chicken skin-side down, you must let it sear undisturbed. If you try to peek or move it early, you’ll tear the skin and it won’t get that shatteringly crisp texture we’re after.
- Mistake: Burning the garlic. Burnt garlic turns bitter and will ruin the entire sauce. Once you add it to the pan, stay right there and stir constantly. It needs only a minute to become fragrant and lightly golden.
- Mistake: Skipping the deglazing step. Those dark, stuck-on bits in the pan after searing the chicken are called “fond,” and they are packed with flavor. When you add the liquid, make sure you scrape them all up—that’s what gives the sauce its deep, complex character.
- Mistake: Overcooking the chicken in the oven. Since the chicken continues to cook while resting, pulling it out right when it hits 165°F is key. Overcooked thigh meat can become dry and stringy, even with all the fat and bone.
Expert Tips
- Tip: Score the chicken skin. Use a very sharp knife to make a few shallow slashes through the skin and fat (but not into the meat) before seasoning. This helps the fat render more efficiently, leading to an even crispier skin.
- Tip: Add a flavor boost. For an extra layer of flavor, add a few thin slices of fresh ginger or a star anise pod to the pan along with the garlic. Just remember to fish them out before serving.
- Tip: Make it a complete sheet pan meal. After searing the chicken, place it on a sheet pan surrounded by broccoli florets or chopped sweet potato. Pour the sauce over everything and roast. The veggies will caramelize in the sauce as the chicken finishes cooking.
- Tip: Thicken your sauce at the end. If your sauce is a bit too thin after baking, remove the chicken and place the skillet back on the stovetop. Let the sauce simmer for a few more minutes until it reaches your desired syrupy consistency.
FAQs
Can I use boneless, skinless chicken thighs?
You can, but the result will be different. You’ll lose the incredible textural contrast of the crispy skin, and the meat may be slightly less juicy without the bone. If you do use them, reduce the initial searing time by a couple of minutes per side and the oven time by about 5 minutes, as they will cook through much faster. The sauce will still be delicious, so it’s a solid option for a quicker, leaner meal.
How do I store and reheat leftovers?
Store any leftover chicken and sauce in an airtight container in the refrigerator for up to 3 days. The best way to reheat it is gently in a covered skillet over low heat with a splash of water or broth to loosen the sauce. You can use the microwave, but the skin will lose its crispness and become soft. The sauce might also separate a little, but it will still taste great.
Is this recipe gluten-free?
Yes, it can be very easily! Simply ensure you use tamari instead of regular soy sauce, as tamari is typically wheat-free. Always double-check the label on your specific brand to be certain. All the other core ingredients are naturally gluten-free.
My sauce is too salty. What can I do?
This can happen if your soy sauce is particularly salty. To balance it, stir in an extra tablespoon of honey or a squeeze of fresh lime juice at the end. You can also add a bit more chicken broth to dilute it. For next time, you might try using a reduced-sodium soy sauce, or a half-and-half mix of regular and low-sodium.
Can I make this ahead of time?
You can do some prep to make things faster! You can slice the garlic and make the sauce mixture a day in advance and keep them separate in the fridge. I don’t recommend searing the chicken ahead of time, as the skin will lose its crispness. The dish is best cooked and served immediately for the ultimate texture experience, but the components can be prepped for a speedy assembly.


Garlic Soy Chicken Thighs
Make these easy Garlic Soy Chicken Thighs for a crispy, juicy, one-pan meal. Ready in 40 minutes with pantry staples. Get the recipe and cook tonight!
Ingredients
For the Chicken & Sauce:
-
6 bone-in, skin-on chicken thighs
-
1 tbsp neutral oil (like avocado or canola)
-
8-10 garlic cloves (thinly sliced)
-
1/3 cup soy sauce (or tamari for gluten-free)
-
3 tbsp honey or maple syrup
-
2 tbsp rice vinegar
-
1 tsp sesame oil
-
1/2 cup chicken broth or water
For the Garnish:
-
2 scallions (thinly sliced, for garnish)
-
1 tsp sesame seeds (for garnish)
Instructions
-
Preheat your oven to 400°F (200°C). Take your chicken thighs and pat them aggressively dry with paper towels. Season both sides generously with salt and pepper.01
-
Heat the neutral oil in your large, oven-safe skillet over medium-high heat. Once the oil is shimmering, place the chicken thighs in the pan, skin-side down. Let them cook undisturbed for 6-8 minutes to render the fat and develop a deep golden-brown, crispy crust.02
-
Carefully flip the chicken thighs using tongs. Cook for another 3-4 minutes on the flesh side just to give it some color, then transfer the chicken to a clean plate.03
-
Reduce the heat to medium. Drain off all but about one tablespoon of the rendered chicken fat from the skillet. Add your thinly sliced garlic to the pan. Cook for just 45-60 seconds, stirring constantly, until it’s fragrant and just starting to turn a light golden color.04
-
Quickly pour in your pre-mixed sauce of soy, honey, and rice vinegar, followed by the chicken broth. Use a wooden spoon to scrape up all the delicious browned bits from the bottom of the pan.05
-
Let the sauce simmer for about 2 minutes to reduce slightly. Now, return the chicken thighs to the pan, skin-side up, nestling them into the sauce.06
-
Carefully transfer the entire skillet to your preheated oven. Bake for 15-18 minutes, or until the chicken is cooked through (an internal thermometer should read 165°F / 74°C at the thickest part, not touching the bone).07
-
Remove the skillet from the oven. Stir in the teaspoon of sesame oil for a final aromatic punch. Let the chicken rest in the pan for 5 minutes.08
-
To serve, spoon plenty of the pan sauce over each thigh. Garnish generously with the sliced scallions and a sprinkle of sesame seeds.09
Not what you're looking for?


