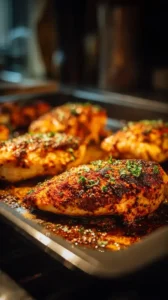
This Honey Garlic Chicken recipe is a weeknight hero—tender chicken in a sweet, savory, sticky glaze that comes together with minimal fuss. The combination of honey and garlic creates a deeply flavorful, caramelized sauce that’s perfectly balanced. It’s a crowd-pleasing dish that delivers restaurant-quality results every time.
Looking for Honey Garlic Chicken inspiration? You'll love what we have! Explore more Chicken Breast Recipes recipes or discover our Burgers favorites.


Why You’ll Love This Honey Garlic Chicken
- Easy & quick: No fancy techniques—just straightforward, delicious results.
- Perfectly balanced sauce: Sweet honey and pungent garlic with savory depth.
- Versatile crowd-pleaser: Appeals to all ages and easily adjustable.
- Amazing leftovers: Flavors deepen overnight and reheat beautifully.
Ingredients & Tools
- 600 g boneless, skinless chicken thighs, cut into bite-sized pieces
- 3 tbsp soy sauce (light or regular, but not dark)
- 4 tbsp honey
- 5 cloves garlic, finely minced
- 1 tbsp rice vinegar or apple cider vinegar
- 1 tsp freshly grated ginger
- 2 tbsp vegetable or avocado oil
- 1 tbsp cornstarch
- 2 tbsp water
- 2 spring onions, thinly sliced
- 1 tsp sesame seeds, for garnish
Tools: A large skillet or non-stick frying pan, a small mixing bowl, measuring spoons, and a sharp knife.
Notes: Using fresh garlic and ginger really makes a difference here—they provide a vibrant, aromatic base that powdered versions just can’t match. And when it comes to the chicken, thighs are my go-to for their juiciness, but breast will work too if you’re careful not to overcook it.
Nutrition (per serving)
| Calories: | 320 kcal |
| Protein: | 28 g |
| Fat: | 12 g |
| Carbs: | 24 g |
| Fiber: | 1 g |
Serves: 4 | Prep Time: 10 minutes | Cook Time: 15 minutes | Total Time: 25 minutes
Before You Start: Tips & Ingredient Notes
- Use fresh garlic and ginger. The pre-minced stuff in jars can lack punch and sometimes adds extra moisture. Freshly grated ginger and finely minced garlic will give your sauce a brighter, more aromatic flavor that really shines through.
- Cut your chicken evenly. Try to keep the pieces roughly the same size—this ensures they cook at the same rate, so you don’t end up with some overcooked and some underdone. Bite-sized is perfect for quick cooking and maximum sauce coverage.
- Don’t skip the cornstarch slurry. This is what gives the sauce its lovely glossy, clingy texture. If you add it directly to the sauce without mixing with water first, you might get lumps, and nobody wants that.
- Choose the right honey. A mild, runny honey works best here—something like clover or wildflower. Avoid very strong, dark honeys (like buckwheat) as they can overpower the other flavors.
How to Make Honey Garlic Chicken
Step 1: Start by prepping your ingredients—this dish comes together quickly, so having everything ready is key. Mince the garlic finely, grate the ginger, and slice the spring onions. Cut the chicken into evenly sized pieces, about 1-inch chunks, and pat them dry with a paper towel. You’ll notice that dry chicken browns much better than wet, which is crucial for flavor.
Step 2: In a small bowl, whisk together the soy sauce, honey, minced garlic, grated ginger, and rice vinegar. This is your sauce base—taste it quickly and adjust if you like. Want a little more tang? Add another splash of vinegar. Prefer it less sweet? Reduce the honey by half a tablespoon. Remember, the flavors will concentrate slightly as they cook.
Step 3: Heat the oil in a large skillet over medium-high heat. Once the oil is shimmering, add the chicken in a single layer, making sure not to overcrowd the pan—you might need to do this in two batches. Let the chicken cook undisturbed for 2–3 minutes until a golden-brown crust forms on one side. This initial sear adds tons of flavor, so don’t rush it.
Step 4: Flip the chicken and cook for another 2–3 minutes until it’s cooked through and no longer pink in the center. You don’t need to cook it fully at this stage—it will simmer in the sauce later. Remove the chicken from the pan and set it aside on a plate. The pan will have some browned bits left—that’s flavor gold, so don’t wash it out!
Step 5: Reduce the heat to medium and pour the sauce mixture into the same skillet. Let it simmer for about a minute, scraping up all those delicious browned bits from the bottom of the pan with a wooden spoon. You’ll notice the sauce will start to bubble and become fragrant—that’s the garlic and ginger working their magic.
Step 6: In a small separate bowl, mix the cornstarch with water until smooth to create a slurry. Pour this into the simmering sauce while stirring continuously. The sauce will begin to thicken almost immediately, becoming glossy and coat-the-back-of-a-spoon ready. This should take just 30–60 seconds—be careful not to over-thicken it.
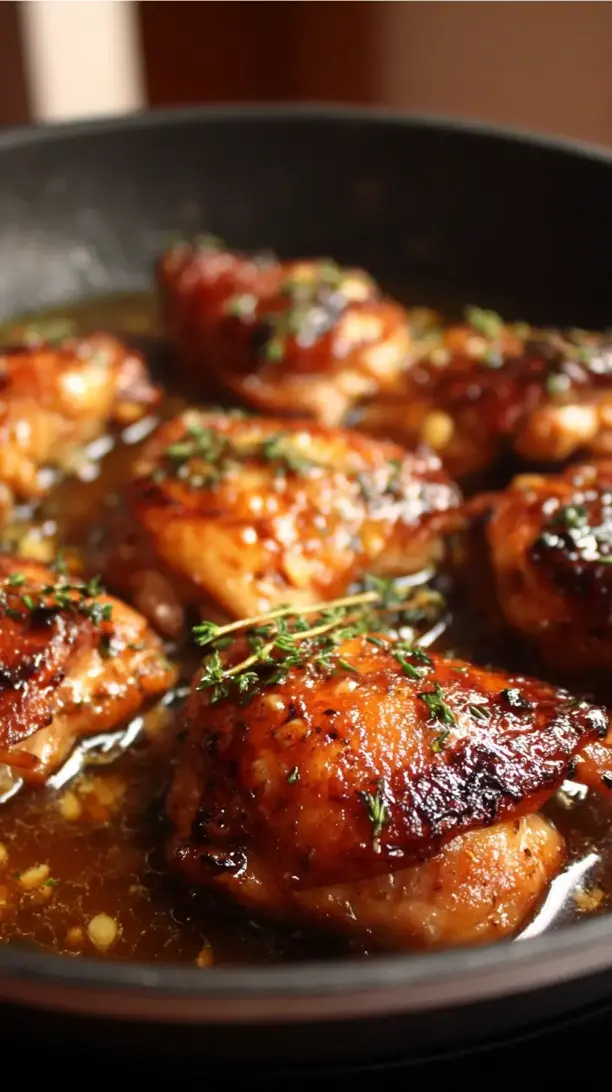
Step 7: Return the cooked chicken to the skillet, tossing to coat every piece in that beautiful glaze. Let everything simmer together for another 1–2 minutes so the chicken reheats and absorbs the sauce. The texture should be sticky and glossy, with the chicken perfectly coated. If the sauce seems too thick, add a tablespoon of water to loosen it up.
Step 8: Turn off the heat and stir in most of the sliced spring onions, reserving some for garnish. Give everything one final toss, then transfer to a serving plate. Sprinkle with sesame seeds and the remaining spring onions. Serve immediately while it’s hot and the sauce is at its shiniest!
Storage & Freshness Guide
- Fridge: Store in an airtight container for up to 3 days.
- Freezer: Freeze for up to 1 month; thaw in fridge before reheating.
- Reviving: Reheat gently in a skillet with a splash of water to refresh the sauce.
Serving Suggestions
Complementary Dishes
- Steamed jasmine rice — The fluffy grains soak up the extra sauce beautifully, making every bite a perfect balance of sticky chicken and mild rice.
- Simple stir-fried vegetables — Think bok choy, broccoli, or snap peas quickly sautéed with garlic—they add freshness and crunch that contrast the rich chicken.
- Egg fried rice — A slightly more indulgent option that complements the Asian-inspired flavors and turns the meal into a feast.
Drinks
- Cold jasmine green tea — Its floral, slightly sweet notes cleanse the palate between bites of the savory-sweet chicken without overpowering it.
- Light lager or pilsner — The crisp, effervescent quality of a cold beer cuts through the richness of the glaze and refreshes your taste buds.
- Off-dry Riesling — A wine with a touch of sweetness and bright acidity mirrors the honey and garlic notes while balancing the dish’s intensity.
Something Sweet
- Mango sorbet — The tropical fruitiness and icy texture provide a refreshing, light finish that doesn’t feel too heavy after the main course.
- Fortune cookies and green tea ice cream — A playful, thematic dessert combo that continues the Asian-inspired theme with cool, creamy contrast.
- Lychee and raspberry fruit salad — Simple, naturally sweet, and slightly tart—it’s a vibrant way to end the meal on a fresh note.
Top Mistakes to Avoid
- Overcrowding the pan when browning the chicken. If you add too much chicken at once, it steams instead of sears, and you’ll miss out on those delicious caramelized bits that build flavor in the sauce. I’ve messed this up before too—patience pays off here.
- Using old or powdered garlic and ginger. They simply don’t pack the same aromatic punch and can lend a slightly stale, musty flavor to your sauce. Fresh is definitely best in this recipe.
- Boiling the sauce after adding the cornstarch. Once you add the slurry, keep the heat at a gentle simmer. A rolling boil can break down the starch and make the sauce thin again instead of thick and glossy.
- Skipping the taste-test of the sauce. Before you add the cornstarch, taste the sauce and adjust the seasoning. Is it too sweet? Add a splash more soy sauce. Too salty? A bit more honey can balance it out.
Expert Tips
- Tip: For extra caramelization, briefly broil the finished dish. Transfer the sauced chicken to a baking sheet and pop it under the broiler for 1–2 minutes—this adds a slightly charred, sticky edge that’s absolutely divine.
- Tip: Make a double batch of the sauce and freeze half. It’s perfect for a quick meal later—just thaw, heat, and toss with freshly cooked chicken or even tofu.
- Tip: Add a teaspoon of gochujang (Korean chili paste) to the sauce if you like a subtle kick. It introduces a complex, spicy depth without overwhelming the honey-garlic balance.
- Tip: Let the chicken rest after cutting and before cooking. Pat it thoroughly dry—this helps achieve a better sear and prevents the chicken from stewing in its own juices.
FAQs
Can I use chicken breast instead of thighs?
Absolutely! Chicken breast works well, but since it’s leaner, it can dry out faster. I’d recommend cutting it into slightly larger pieces and reducing the initial cooking time by a minute or so. Keep a close eye on it—you want it cooked through but still juicy. Some people also like to brine the breast briefly in salted water before cooking to help retain moisture.
How do I store and reheat leftovers?
Store any leftovers in an airtight container in the refrigerator for up to 3 days. To reheat, gently warm it in a skillet over low heat with a splash of water to loosen the sauce. Microwaving can work too, but it might make the chicken a bit rubbery—if you do, cover it and use medium power in short bursts.
Can I make this recipe ahead of time?
You can prep the components ahead—mix the sauce and cut the chicken, storing them separately in the fridge for up to a day. But for the best texture, cook it just before serving. The sauce can thicken too much if left sitting, and the chicken is most tender when freshly cooked.
Is there a substitute for honey?
Maple syrup or agave nectar will work in a pinch, though they’ll impart their own distinct flavors. Maple syrup will add a warm, woody note, while agave is more neutral. I wouldn’t recommend granulated sugar—it won’t provide the same sticky glaze or moisture.
Why is my sauce not thickening?
This usually happens if the cornstarch wasn’t properly dissolved in water before adding, or if the sauce wasn’t hot enough when the slurry went in. Make sure your slurry is smooth and your sauce is at a gentle simmer. If it’s still thin, mix another half tablespoon of cornstarch with water and add it slowly until it reaches the desired consistency.


Honey Garlic Chicken
Make the best Honey Garlic Chicken in just 25 minutes! This easy recipe features a sticky, sweet, and savory glaze perfect for dinner. Get the recipe now!
Ingredients
For the Ingredients
-
600 g boneless, skinless chicken thighs (cut into bite-sized pieces)
-
3 tbsp soy sauce (light or regular, but not dark)
-
4 tbsp honey
-
5 cloves garlic (finely minced)
-
1 tbsp rice vinegar or apple cider vinegar
-
1 tsp freshly grated ginger
-
2 tbsp vegetable or avocado oil
-
1 tbsp cornstarch
-
2 tbsp water
-
2 spring onions (thinly sliced)
-
1 tsp sesame seeds (for garnish)
Instructions
-
Start by prepping your ingredients—this dish comes together quickly, so having everything ready is key. Mince the garlic finely, grate the ginger, and slice the spring onions. Cut the chicken into evenly sized pieces, about 1-inch chunks, and pat them dry with a paper towel. You’ll notice that dry chicken browns much better than wet, which is crucial for flavor.01
-
In a small bowl, whisk together the soy sauce, honey, minced garlic, grated ginger, and rice vinegar. This is your sauce base—taste it quickly and adjust if you like. Want a little more tang? Add another splash of vinegar. Prefer it less sweet? Reduce the honey by half a tablespoon. Remember, the flavors will concentrate slightly as they cook.02
-
Heat the oil in a large skillet over medium-high heat. Once the oil is shimmering, add the chicken in a single layer, making sure not to overcrowd the pan—you might need to do this in two batches. Let the chicken cook undisturbed for 2–3 minutes until a golden-brown crust forms on one side. This initial sear adds tons of flavor, so don’t rush it.03
-
Flip the chicken and cook for another 2–3 minutes until it’s cooked through and no longer pink in the center. You don’t need to cook it fully at this stage—it will simmer in the sauce later. Remove the chicken from the pan and set it aside on a plate. The pan will have some browned bits left—that’s flavor gold, so don’t wash it out!04
-
Reduce the heat to medium and pour the sauce mixture into the same skillet. Let it simmer for about a minute, scraping up all those delicious browned bits from the bottom of the pan with a wooden spoon. You’ll notice the sauce will start to bubble and become fragrant—that’s the garlic and ginger working their magic.05
-
In a small separate bowl, mix the cornstarch with water until smooth to create a slurry. Pour this into the simmering sauce while stirring continuously. The sauce will begin to thicken almost immediately, becoming glossy and coat-the-back-of-a-spoon ready. This should take just 30–60 seconds—be careful not to over-thicken it.06
-
Return the cooked chicken to the skillet, tossing to coat every piece in that beautiful glaze. Let everything simmer together for another 1–2 minutes so the chicken reheats and absorbs the sauce. The texture should be sticky and glossy, with the chicken perfectly coated. If the sauce seems too thick, add a tablespoon of water to loosen it up.07
-
Turn off the heat and stir in most of the sliced spring onions, reserving some for garnish. Give everything one final toss, then transfer to a serving plate. Sprinkle with sesame seeds and the remaining spring onions. Serve immediately while it’s hot and the sauce is at its shiniest!08
Not what you're looking for?


