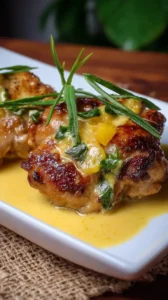
These Maple Glazed Chicken Thighs deliver a perfect sweet-savory balance with minimal effort. The sticky maple glaze caramelizes onto juicy, crispy-skinned thighs for a comforting yet impressive meal. This recipe is forgiving and sure to become a weeknight favorite.
Nothing beats a great Maple Glazed Chicken Thighs. Whether you're a fan of Chicken Thigh Recipes or want to try something from our Desserts selection, keep scrolling!


Why You’ll Love This Maple Glazed Chicken Thighs
- Sweet & savory: The maple glaze caramelizes for complex depth.
- Forgiving & foolproof: Chicken thighs stay juicy even if slightly overcooked.
- Crispy & sticky: Crackly skin meets a lacquered, addictive glaze.
- Fancy but easy: Impressive results with minimal active effort.
Ingredients & Tools
- 8 bone-in, skin-on chicken thighs (about 1.5 lbs / 680 g)
- 1/2 cup pure maple syrup (please, not pancake syrup!)
- 3 tbsp soy sauce (or tamari for gluten-free)
- 2 tbsp olive oil
- 2 cloves garlic, minced
- 1 tbsp apple cider vinegar
- 1 tsp smoked paprika
- 1/2 tsp freshly ground black pepper
- 1/2 tsp salt, plus more for seasoning
- 1 tbsp fresh thyme leaves (or 1 tsp dried)
Tools: A large oven-safe skillet (cast iron is ideal), a small saucepan, a whisk, and tongs.
Notes: Use pure maple syrup, not imitation. Apple cider vinegar balances sweetness.
Nutrition (per serving)
| Calories: | 420 kcal |
| Protein: | 28 g |
| Fat: | 22 g |
| Carbs: | 26 g |
| Fiber: | 0.5 g |
Serves: 4 | Prep Time: 10 minutes | Cook Time: 35 minutes | Total Time: 45 minutes
Before You Start: Tips & Ingredient Notes
- Why bone-in, skin-on thighs? The bone keeps the meat incredibly moist and flavorful during the longer cooking time, and the skin is essential for getting that crispy, textural contrast against the sticky glaze. Boneless, skinless thighs will work in a pinch, but you’ll lose that signature crispiness.
- Is pure maple syrup really that important? Absolutely. The flavor profile is deeper and more complex than imitation syrups, which are mostly corn syrup and flavoring. Pure maple syrup reduces beautifully into a thick, glossy glaze, while the fake stuff tends to burn or become unpleasantly sticky.
- Can I make this ahead of time? You can whisk the glaze ingredients together up to two days in advance and store it in the fridge. Pat the chicken dry and season it, but wait to cook it until you’re ready to serve for the best texture.
- What if I don’t have an oven-safe skillet? No problem! You can sear the chicken in any large skillet, then transfer it to a baking dish for the oven portion. The result will be very similar, though you might lose a few of the delicious browned bits from the skillet.
How to Make Maple Glazed Chicken Thighs
Step 1: First, preheat your oven to 400°F (200°C). Take your chicken thighs and pat them completely dry with paper towels—this is the secret to getting that skin really crispy. Season both sides generously with the salt and black pepper. Let them sit at room temperature for about 10 minutes while you make the glaze; this helps them cook more evenly.
Step 2: Now, let’s make that magical glaze. In your small saucepan, combine the maple syrup, soy sauce, minced garlic, apple cider vinegar, smoked paprika, and fresh thyme. Whisk it all together and bring it to a gentle simmer over medium heat. Let it bubble away for 3-4 minutes, stirring occasionally, until it thickens slightly. You’ll notice it becoming more fragrant and syrupy. Remove it from the heat and set it aside.
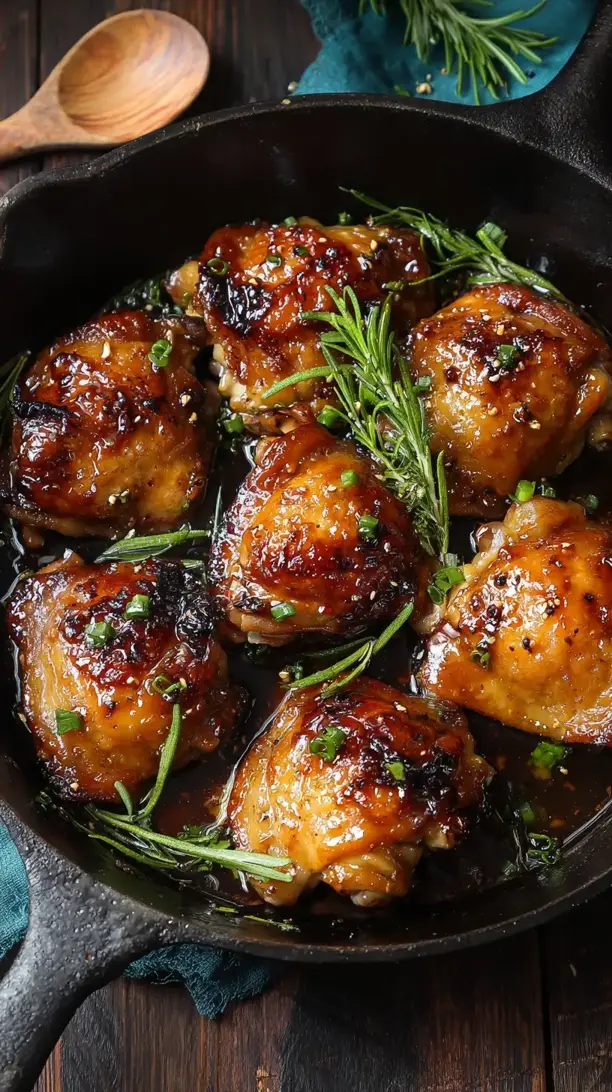
Step 3: Time to sear the chicken. Heat the olive oil in your large, oven-safe skillet over medium-high heat. Once the oil is shimmering, carefully place the chicken thighs in the skillet, skin-side down. Don’t overcrowd the pan—you might need to do this in two batches. Sear them for 5-7 minutes without moving them, until the skin is a deep golden brown and super crispy. Flip them over and cook for another 2 minutes on the other side.
Step 4: This is where the magic happens. Brush a generous amount of the maple glaze over the top and sides of each chicken thigh, making sure to get it into all the crevices. You should hear a gentle sizzle—that’s a good sign! Transfer the entire skillet to your preheated oven.
Step 5: Bake for 20-25 minutes, or until the chicken is cooked through and registers 165°F (74°C) on an instant-read thermometer inserted into the thickest part, avoiding the bone. About halfway through, pull the skillet out and brush the chicken with more of the reserved glaze. This double-glazing ensures a thick, irresistible coating.
Step 6: Once the chicken is done, carefully remove the skillet from the oven—remember, the handle will be extremely hot! Let the chicken rest in the skillet for about 5 minutes. This allows the juices to redistribute, ensuring every bite is moist. Drizzle with any remaining glaze from the pan before serving.
Storage & Freshness Guide
- Fridge: Store in an airtight container for up to 3 days.
- Freezer: Freeze in a single layer, then transfer to a bag for up to 2 months.
- Reviving: Reheat in a 350°F oven for 10–15 minutes to restore crispiness.
Serving Suggestions
Complementary Dishes
- Garlic Mashed Potatoes — The creamy, savory potatoes are the perfect canvas for that rich maple glaze and any extra pan juices.
- Simple Roasted Broccoli — The slight char and earthy flavor of the broccoli provides a wonderful contrast to the sweet and sticky chicken.
- Buttery Cornbread — A slightly sweet, crumbly piece of cornbread is fantastic for sopping up every last bit of the delicious glaze from your plate.
Drinks
- A Crisp Chardonnay — The wine’s slight oakiness and acidity cut through the richness of the chicken and balance the sweetness of the glaze beautifully.
- An Amber Ale — The malty, caramel notes in the beer mirror the flavors in the glaze, creating a really harmonious pairing.
- Sparkling Water with Lemon — For a non-alcoholic option, the bubbles and citrus cleanse the palate between each flavorful bite.
Something Sweet
- Warm Apple Crumble — It continues the cozy, comforting theme with spiced apples and a buttery oat topping that feels like a hug.
- Vanilla Bean Panna Cotta — The simplicity and cool, creamy texture of the panna cotta is a lovely, light finish after the hearty chicken.
- Dark Chocolate Truffles — Just one or two rich, intense truffles provide a sophisticated and decadent end to the meal without being too heavy.
Top Mistakes to Avoid
- Mistake: Using imitation maple syrup. This is the biggest flavor-killer. The artificial stuff is too sweet, thin, and often contains vanilla flavoring that will clash with the savory elements. It also burns much more easily in the hot oven.
- Mistake: Not patting the chicken skin dry. Any moisture on the skin will steam instead of sear, leaving you with rubbery, pale skin instead of the crackly, golden-brown crust you’re after. A little pat-down makes a world of difference.
- Mistake: Moving the chicken too soon while searing. I know it’s tempting to peek, but if you don’t let the skin render and crisp up fully before flipping, it will stick to the pan and tear. Trust the process and let it sear undisturbed.
- Mistake: Skipping the rest time. If you cut into the chicken straight from the oven, all those beautiful, painstakingly created juices will just run out onto the plate. A brief 5-minute rest ensures they stay right where they belong—in the meat.
Expert Tips
- Tip: Get your skillet properly hot before adding the chicken. To test, flick a tiny drop of water into the oil—if it sizzles and dances, you’re good to go. A properly heated pan is what gives you that initial, unstickable sear.
- Tip: Use a pastry brush for the glaze. A silicone brush gives you the most control to get an even, generous coating on all the nooks and crannies of the chicken, which leads to a more flavorful and visually appealing final dish.
- Tip: Don’t discard the pan drippings. After you remove the chicken, there will be incredible, concentrated flavor left in the skillet. You can deglaze it with a splash of chicken broth or a little more vinegar and drizzle it over the plated chicken for an extra flavor boost.
- Tip: Let the glaze reduce sufficiently. If your glaze seems a bit thin after simmering, let it go for another minute or two. A slightly thicker glaze will cling to the chicken better and won’t just run off into the bottom of the pan.
FAQs
Can I use chicken breasts instead of thighs?
You can, but the result will be quite different. Chicken breasts are much leaner and can dry out more easily, especially with the longer cooking time needed for the glaze to caramelize. If you do use them, I’d recommend boneless, skinless breasts and reduce the total oven time to 15-18 minutes, checking the temperature early and often to prevent overcooking.
How should I store and reheat leftovers?
Store any leftover chicken in an airtight container in the refrigerator for up to 3 days. To reheat, place it on a baking sheet in a 350°F (175°C) oven for about 10-15 minutes, until warmed through. The microwave will work in a pinch, but it will make the skin soft and rubbery. The oven method helps preserve the texture.
Is this recipe gluten-free?
Yes, it can be easily made gluten-free by ensuring you use tamari or a certified gluten-free soy sauce instead of regular soy sauce. All the other ingredients are naturally gluten-free, so it’s a simple swap that makes the dish accessible to everyone.
My glaze burned in the oven. What happened?
This usually happens for one of two reasons: the oven temperature was too high, or the glaze contained too much sugar relative to other liquids. Ensure you’re using pure maple syrup and that you’ve added the acidic components (vinegar, soy sauce) as directed. If your oven runs hot, you might try reducing the temperature to 375°F (190°C) and adding a few extra minutes to the cooking time.
Can I make this on the grill?
Absolutely! It’s fantastic on the grill. Sear the chicken thighs skin-side down over direct medium-high heat to get the skin crispy, then move them to indirect heat, brush with glaze, and cover the grill. Cook for about 15-20 minutes, brushing with more glaze halfway through, until the internal temperature reaches 165°F (74°C). You’ll get a wonderful smoky flavor that pairs beautifully with the maple.


Maple Glazed Chicken Thighs
Make perfect Maple Glazed Chicken Thighs with this easy recipe. Crispy skin meets a sweet-savory glaze for a foolproof weeknight dinner. Get the recipe now!
Ingredients
For the Ingredients
-
8 bone-in, skin-on chicken thighs (about 1.5 lbs / 680 g)
-
1/2 cup pure maple syrup
-
3 tbsp soy sauce (or tamari for gluten-free)
-
2 tbsp olive oil
-
2 cloves garlic (minced)
-
1 tbsp apple cider vinegar
-
1 tsp smoked paprika
-
1/2 tsp freshly ground black pepper
-
1/2 tsp salt (plus more for seasoning)
-
1 tbsp fresh thyme leaves (or 1 tsp dried)
Instructions
-
First, preheat your oven to 400°F (200°C). Take your chicken thighs and pat them completely dry with paper towels—this is the secret to getting that skin really crispy. Season both sides generously with the salt and black pepper. Let them sit at room temperature for about 10 minutes while you make the glaze; this helps them cook more evenly.01
-
Now, let’s make that magical glaze. In your small saucepan, combine the maple syrup, soy sauce, minced garlic, apple cider vinegar, smoked paprika, and fresh thyme. Whisk it all together and bring it to a gentle simmer over medium heat. Let it bubble away for 3-4 minutes, stirring occasionally, until it thickens slightly. You’ll notice it becoming more fragrant and syrupy. Remove it from the heat and set it aside.02
-
Time to sear the chicken. Heat the olive oil in your large, oven-safe skillet over medium-high heat. Once the oil is shimmering, carefully place the chicken thighs in the skillet, skin-side down. Don’t overcrowd the pan—you might need to do this in two batches. Sear them for 5-7 minutes without moving them, until the skin is a deep golden brown and super crispy. Flip them over and cook for another 2 minutes on the other side.03
-
This is where the magic happens. Brush a generous amount of the maple glaze over the top and sides of each chicken thigh, making sure to get it into all the crevices. You should hear a gentle sizzle—that’s a good sign! Transfer the entire skillet to your preheated oven.04
-
Bake for 20-25 minutes, or until the chicken is cooked through and registers 165°F (74°C) on an instant-read thermometer inserted into the thickest part, avoiding the bone. About halfway through, pull the skillet out and brush the chicken with more of the reserved glaze. This double-glazing ensures a thick, irresistible coating.05
-
Once the chicken is done, carefully remove the skillet from the oven—remember, the handle will be extremely hot! Let the chicken rest in the skillet for about 5 minutes. This allows the juices to redistribute, ensuring every bite is moist. Drizzle with any remaining glaze from the pan before serving.06
Not what you're looking for?


